
ChevyMan.ru
Mazda Mitsubishi Toyota Land Rover Honda Kia Nissan
English Русский
Български
Беларускі
Український
Српски
Hrvatski
Română
Polski
Slovenský
Magyar
|
Articles | Sitemap | Contacts |


Home   Aveo   Captiva   Cruze   Lacetti   Lanos   Niva   Tahoe   Others  
Lanos T150 (2002-2009)
  • Home
  • Lanos
  • T150 (2002-2009)
  • Body
  • Heating and air conditioning
  • Removal the heating, ventilation and air conditioning control unit

Removal the heating, ventilation and air conditioning control unit (Chevrolet Lanos T150)

            0

We remove the unit to replace the failed damper drive rods and backlight lamps, as well as to replace the unit as a whole.

The above work is carried out on a vehicle not equipped with an audio system.

If present, it is necessary to remove the head unit of the audio system.

Disconnect the wire terminal from the negative terminal of the battery.
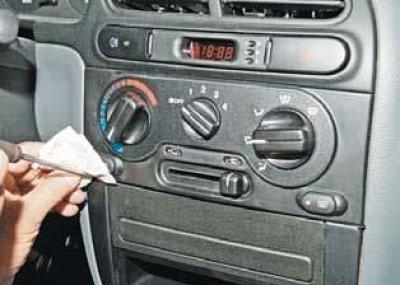
Using a slotted screwdriver, pry off both ends of the instrument panel console trim panel at the…


Using a slotted screwdriver, pry off both ends of the instrument panel console trim panel at the top and bottom.
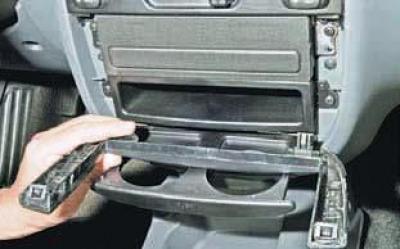
We remove the trim panel.
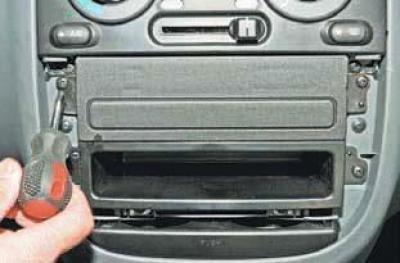

We remove the trim panel.

Using a Phillips screwdriver, unscrew the two screws securing the plug.

Using a Phillips screwdriver, unscrew the two screws securing the plug.


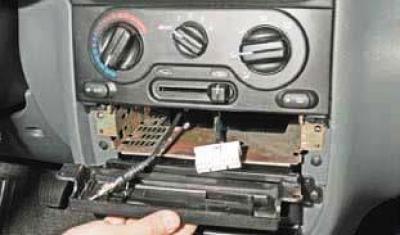
We remove the plug and disconnect the wiring harness block and the antenna cable from the holders.
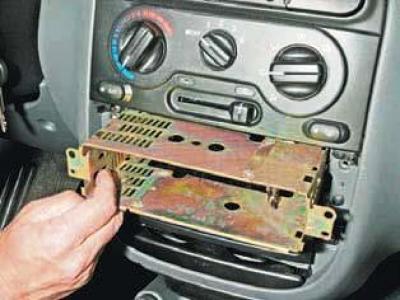

We remove the plug and disconnect the wiring harness block and the antenna cable from the holders.

We remove the basket for installing the audio system head unit from the dashboard console.


We remove the basket for installing the audio system head unit from the dashboard console.

To make it easier to continue working, we also recommend removing the small items drawer located below.
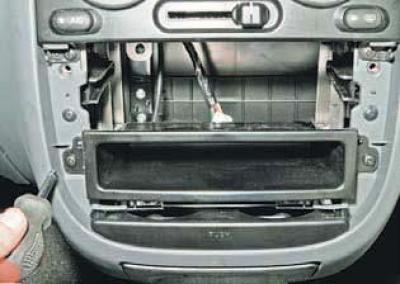
To do this, use a Phillips screwdriver to unscrew the two screws that secure the drawer…
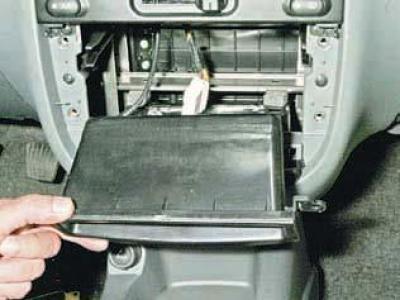

To do this, use a Phillips screwdriver to unscrew the two screws that secure the drawer…


… and we remove the box from the dashboard console.
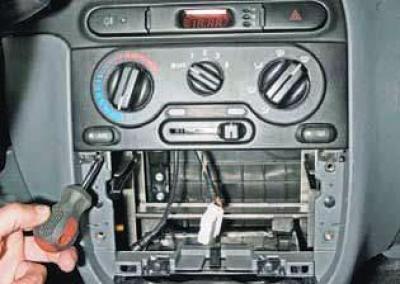

… and we remove the box from the dashboard console.

We unscrew the two screws securing the heating, ventilation and air conditioning control unit.
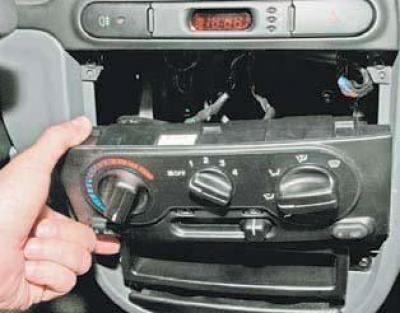

We unscrew the two screws securing the heating, ventilation and air conditioning control unit.

We release the three clamps at the top of the block from engagement with the instrument panel and…


We release the three clamps at the top of the block from engagement with the instrument panel and pull the block towards ourselves as far as the length of the wires and rods allows.
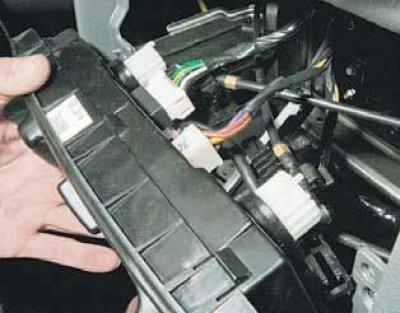


We disconnect the wiring harness connectors from the block.
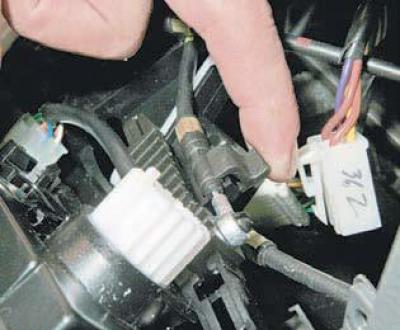

We disconnect the wiring harness connectors from the block.

We press the retainer of the air flow distribution flap drive casing with our finger…
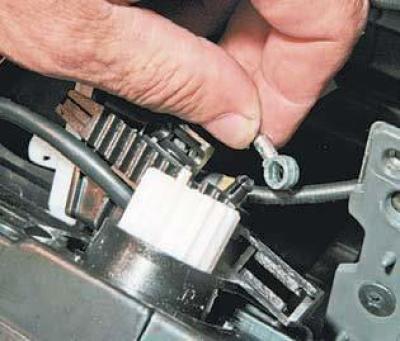

We press the retainer of the air flow distribution flap drive casing with our finger…

…we remove the casing from the holder on the block body and disconnect the rod from the block lever.
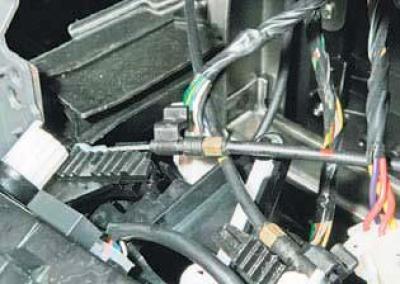

…we remove the casing from the holder on the block body and disconnect the rod from the block lever.

Similarly, we disconnect the air temperature regulator flap drive rod.
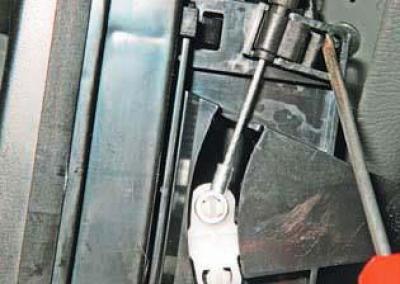

Similarly, we disconnect the air temperature regulator flap drive rod.


Using a screwdriver, press the retainer of the recirculation flap drive rod casing…
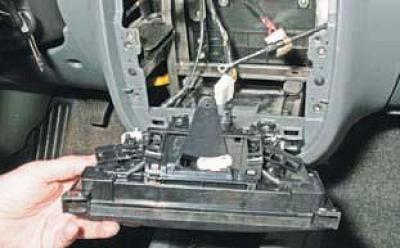

Using a screwdriver, press the retainer of the recirculation flap drive rod casing…

…we remove the rod casing from the holder and disconnect it from the block lever.
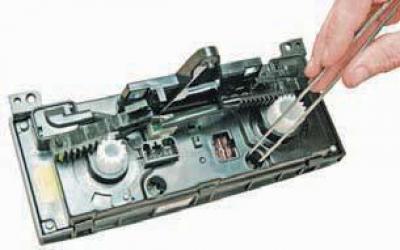

…we remove the rod casing from the holder and disconnect it from the block lever.

Using tweezers, turn the block backlight lamp socket counterclockwise..
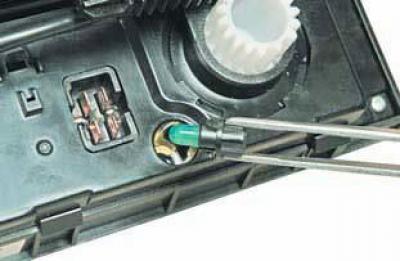

Using tweezers, turn the block backlight lamp socket counterclockwise..

… and we extract it.
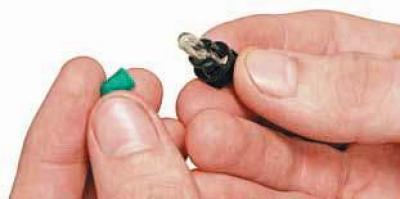

… and we extract it.


We remove the colored cap from the lamp..

We remove the colored cap from the lamp..

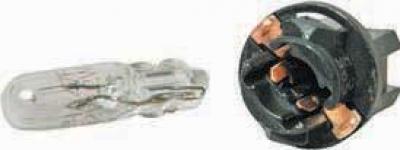
… we remove the baseless lamp from the socket and replace it with a new W1.2W.


… we remove the baseless lamp from the socket and replace it with a new W1.2W.

We install the heating, ventilation and air conditioning control unit in the reverse order.

The article was checked: Vladimir Romannikov
This article is available at russian, bulgarian, belarusian, ukrainian, serbian, croatian, romanian, polish, slovak, hungarian

Share information:

Previous articles
Lanos T150: Heating and air conditioning
Next articles

Heating, ventilation and air conditioning system
Removal the heater fan
Removal the additional heater fan resistor


See similar articles on the topic of Chevrolet cars:
Removal and installation the control unit for the heating, air conditioning and ventilation system Chevrolet Aveo T300 (2012-2018)
Remote control unit Chevrolet Captiva 1 (2006-2018)
Scheme 36. Control unit for heating, air conditioning and ventilation system Chevrolet Cruze 1 (2008-2016)
Control unit for heating, ventilation and air conditioning systems Chevrolet Lacetti 1 (2002-2009)
Air Conditioning Control Chevrolet Niva 1 (2002-2016)
Typical electrical circuit for air conditioning and heating control (models since 1995) Chevrolet Tahoe 1 (1992-2000)
Control panel for heating and air conditioning systems — removal and installation Chevrolet Trailblazer 1 (2001-2008, petrol)
Link in different formats to this page


Visitor comments

No comments yet


How much will 26 + 45 =


Lanos T150 (2002-2009) 
  • General information
  • User manual
  • Maintenance
  • Troubleshooting
  • Power unit
  • Engine repair
  • Control system
  • Supply system
  • Cooling system
  • Exhaust system
  • Transmission
  • Clutch
  • Car gearbox
  • Front wheel drives
  • Chassis
  • Front suspension
  • Rear suspension
  • Steering
  • Brake system
  • Body
  • Repair of body elements
  • Heating and air conditioning
  • Electrical equipment
  • Engine electrics
  • Lighting and lamps
  • Equipment and devices
  • Electrical circuits


ChevyMan.ru © 2017-2026 · Mobile version · Feedback · Site search · Interesting to read · Sitemap: EN BG BY UA RS HR RO PL SK HU

Aveo 2003-2008 · Aveo 2006-2011 · Aveo 2012-2018 · Captiva 2006-2018 · Cruze 2008-2016 · Lacetti 2002-2009 · Lanos 2002-2009 · Niva 2002-2016 · Tahoe 1992-2000 · Tahoe 2000-2014 · Lumina 1 1989-1994 · Trailblazer 1 2001-2008 · Orlando 1 2010-2018 ·
🛡️ For your security and to improve our service, this site uses cookies. You can disable them in your browser.