
Soundproofing panel on the driver's side
1. Unscrew the nuts of the lower soundproofing panel, the bolts connecting the panel to the lower trim panel (see illustration) and remove the ashtray (see section 24).
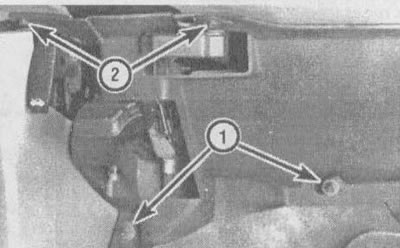
26.1. Side insulation panel near the driver's seat: 1 - lower panel mounting nuts, 2 - panel mounting bolts
2. Pull out the soundproofing panel upwards.
3. Installation is carried out in reverse order.
Soundproofing panel on the passenger side
4. Unscrew the bottom panel nut and the bottom screw (on earlier production cars) or screws (on cars of later production) (see illustration).
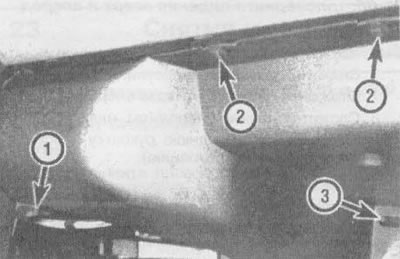
26.4. Details of the side insulation panel on the right side (the illustration shows a variant of the car from the first production runs): 1 - lower panel mounting screw, 2 - upper panel mounting bolts, 3 - lower panel mounting nut
5. On cars of earlier years of production, unscrew the two bolts at the top of the panel (see illustration 26.4). On later model vehicles, remove the bolt in the upper right corner and the nut in the upper left corner of the panel. Installation is carried out in reverse order.
(Original version of the article on the website: «CHEVYMAN»)