ChevyMan.ru
Mazda Mitsubishi Toyota Land Rover Honda Kia Nissan
English Русский
Български
Беларускі
Український
Српски
Hrvatski
Română
Polski
Slovenský
Magyar
|
Articles | Sitemap | Contacts | Search:


Home   Aveo   Captiva   Cruze   Lacetti   Lanos   Niva   Tahoe   Others  
Lacetti 1 (2002-2009)
  • Home
  • Lacetti
  • J200 (2002-2009)
  • Chassis
  • Rear suspension
  • Removal the rear wishbone

Removal the rear wishbone (Chevrolet Lacetti J200)

            0

We remove the lever for replacement if it is deformed or damaged (ruptures, rubber peeling) or severe wear of silent blocks.

We show the operations for replacing the lever on the right side of the car. On the left side of the car, we replace the lever in a similar way. We hang up and remove the wheel from the side of the lever being removed.


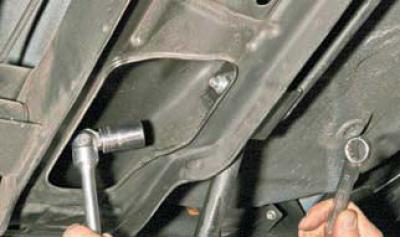
Using a 17 mm socket, unscrew the nut securing the lever to the subframe…


…holding the bolt from turning with a spanner of the same size.


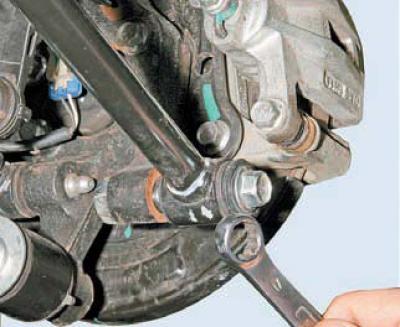
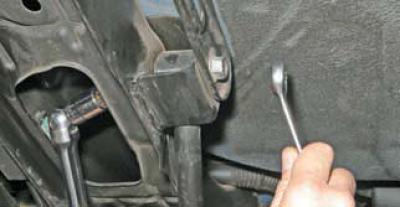
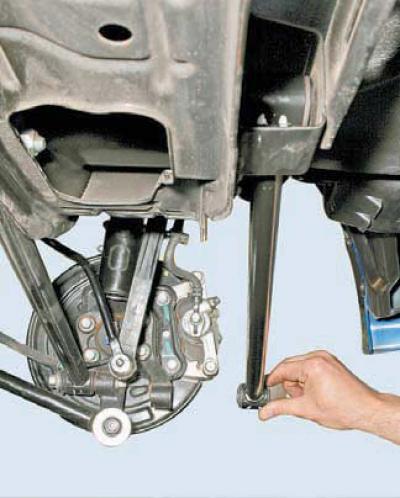
Using a 17 mm open-end wrench, unscrew the bolt securing the lever to the rear suspension knuckle.


In this case, there is no need to hold the square nut of the bolt, since its rotation is prevented by the protrusion on the knuckle.


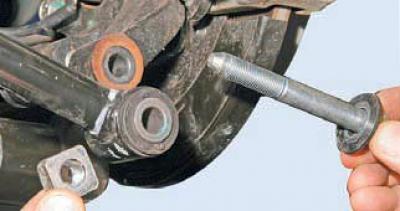
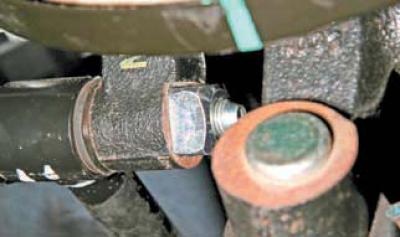
We take out the bolt.


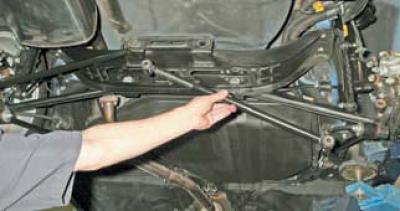
We remove the rear transverse arm.

We install the lever in the reverse order.

Since the two lugs of the lever for the silent blocks are welded to its rod at different angles, the lever is mounted in only one position.


If the lever is not installed correctly, it will be impossible to secure it.

We tighten, but do not completely tighten, the bolt that attaches the lever to the knuckle and the nut that attaches the bolt to the subframe. Finally tighten the connections to the prescribed torques (see Appendices) we perform in the "car on wheels" position.

The article was checked: Vladimir Romannikov
This article is available at russian, bulgarian, belarusian, ukrainian, serbian, croatian, romanian, polish, slovak, hungarian

Share information:

Previous articles
Lacetti 1: Rear suspension
Next articles

Removal the front wishbone
Removal the trailing arm
Removal the shock absorber strut and disassembling it
Replacing the anti-roll bar cushions, removing the bar
Removal the anti-roll bar
Removal the subframe
Removal the wheel hub


See similar articles on the topic of Chevrolet cars:
Removal and installation the left rear mudguard Chevrolet Aveo T300 (2012-2018)
Rear muffler — removal and installation Chevrolet Captiva 1 (2006-2018)
Removal and installation the rear suspension beam Chevrolet Cruze 1 (2008-2016)
Removal the rear anti-roll bar Chevrolet Lanos T150 (2002-2009)
Removal the rear bumper beam for the 55 configuration Chevrolet Niva 1 (2002-2016)
Rear Seat Removal (Suburban Third Seat) Chevrolet Tahoe 1 (1992-2000)
Removal, repair and installation of the rear wheel brake cylinder Chevrolet Lumina 1 (1989-1994)
Link in different formats to this page
TextHTMLBB Code


Visitor comments

No comments yet


How much will 15 + 11 =


Lacetti 1 (2002-2009) 
  • General information
  • User manual
  • Maintenance
  • Power unit
  • Engine repair
  • Control system
  • Supply system
  • Cooling system
  • Exhaust system
  • Transmission
  • Clutch
  • Manual gearbox
  • Front wheel drives
  • Chassis
  • Front suspension
  • Rear suspension
  • Steering
  • Brake system
  • Body
  • Repair of body elements
  • Heating and air conditioning
  • Electrical equipment
  • Engine electrics
  • Lighting and lamps
  • Equipment and devices
  • Electrical circuits


ChevyMan.ru © 2017-2025 · Mobile version · Feedback · Site search · Interesting to read · Sitemap: EN BG BY UA RS HR RO PL SK HU

Aveo 2003-2008 · Aveo 2006-2011 · Aveo 2012-2018 · Captiva 2006-2018 · Cruze 2008-2016 · Lacetti 2002-2009 · Lanos 2002-2009 · Niva 2002-2016 · Tahoe 1992-2000 · Tahoe 2000-2014 · Lumina 1 1989-1994 · Trailblazer 1 2001-2008 · Orlando 1 2010-2018 ·