
2. Remove the flywheel (see section 27).
3. Remove the old seal with a screwdriver or a special tool (see illustration). Be careful not to scratch or damage the crankshaft surface with the tool.
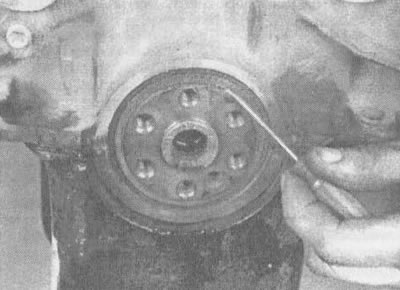
25.3. Carefully remove the old seal using a screwdriver or special tool (do not scratch the seal hole or the crankshaft surface)
4. Clean the bore in the block and the seal contact surface on the crankshaft. Check the bore or surface of the crankshaft for nicks, scratches or grooves. Even small irregularities on the crankshaft surface can damage the seal lips and cause oil leakage. If you notice any minor damage, sand it down with fine-grit sandpaper. If the damage is too extensive, the crankshaft will have to be reground or replaced.
5. It is recommended to use a special tool to install a new seal (see illustration). Lubricate the lips of the new seal with grease or clean engine oil, then slide the seal onto the tool until the bottom of the seal lips sits flush against the collar (bead) of the tool.

25.5 General Motors Special Tool J-34686 Recommended for Installing Oil Seal: 1 - adjustment hole, 2 - seal edge, 3 - seal, 4 - fastening screws, 5 - mandrel, 6 - collar, 7 - dowel pin
Note: If you do not have a special tool, carefully place the oil seal on the crankshaft and tap it with a hammer and punch until it fits evenly into place.
6. Align the dowel pin with the dowel hole in the crankshaft and attach the fixture to the crankshaft, tightening the bolts finger tight.
7. Manually rotate the tool until the bead settles onto the shell, settling the seal.
8. The remaining operations are performed in reverse order.