
If the telescopic strut or spring is faulty, then both struts or both springs should be replaced so that the characteristics of the shock absorber struts on both sides of the car are the same.
To access the upper shock absorber mount on a hatchback vehicle, simply remove the luggage compartment trim on the side of the shock absorber being removed (see Removal the trunk trim).
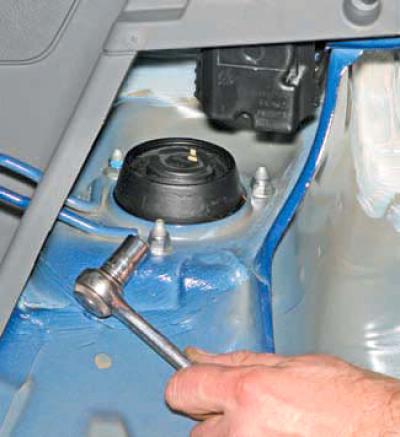
Using a 12 mm socket, loosen the tightening and unscrew the three nuts securing the upper support of the strut to the mudguard of the body by several turns of thread.
On a sedan, fold both parts of the rear seat back forward.
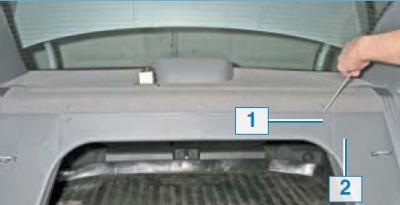
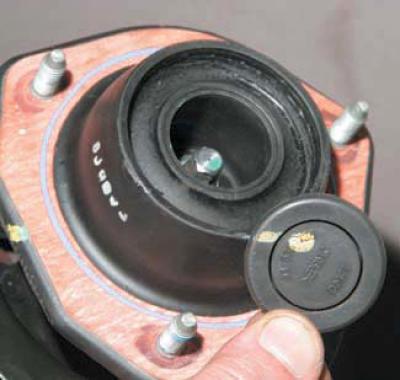
Using a slotted screwdriver, pry up the plastic cover to separate piston 1.
Having separated the piston on the other side..
…we remove the cover.
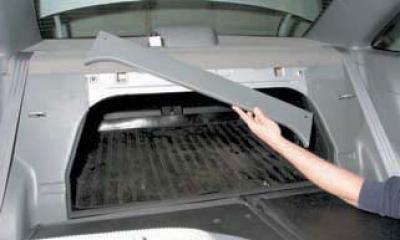
Similarly, we disconnect piston 2 and bend the cover within the elastic limits. It should be noted here that the procedure is simplified, and the probability of breakage of the plastic part is very small, if the work is carried out in a warm room or in the warm season.
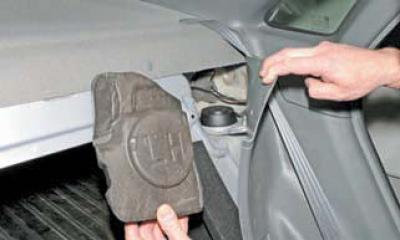
We take out the soundproofing insert.
In a confined space, it is more convenient to unscrew the nuts securing the upper support of the strut with a ratchet with a 12 mm head. The next sequence of operations is the same for cars with both types of bodies.
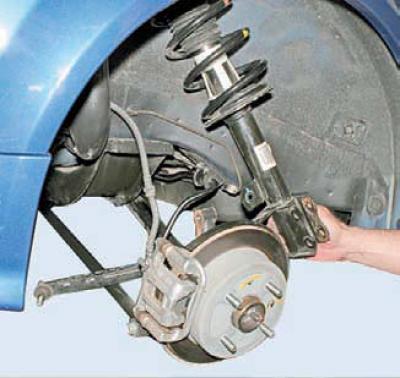
Having lifted the car with a jack, we securely fix it on a factory-made support stand and remove the wheel.
We unscrew the nut that secures the ball joint pin of the anti-roll bar to the shock absorber strut housing (see Removal the anti-roll bar).
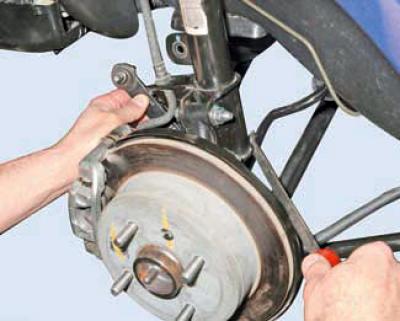
Overcoming the resistance of the stabilizer, we press down the end of its rod with a mounting blade and remove the pin of the ball joint of the stabilizer strut from the hole in the shock absorber strut housing.
Having removed the locking bracket, we extract the coupling of the brake mechanism hose from the eye of the shock absorber strut (see Replacing the rear wheel brake hose).
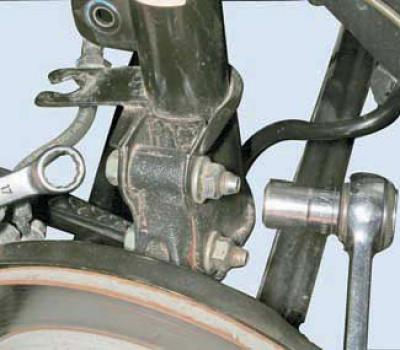
Using a 17 mm socket head, unscrew the nuts of the two bolts securing the shock absorber strut bracket to the rear suspension knuckle, holding the bolt heads from turning with a wrench of the same size.
We take out the bolts or knock them out using a soft metal punch.
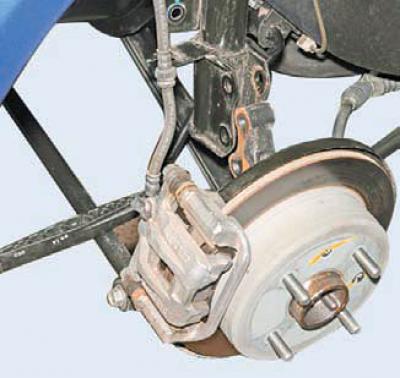
We remove the fist from the rack bracket.
While supporting the shock absorber strut, completely unscrew the three nuts securing the upper support of the strut to the mudguard of the body..
…and remove the rack.
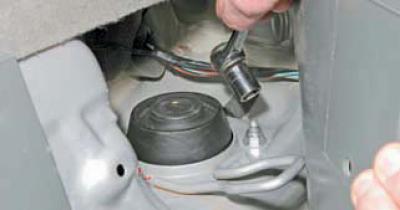
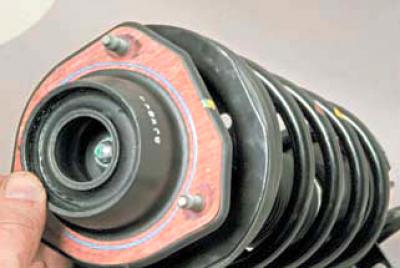
We remove the plug from the socket of the upper support of the rack.
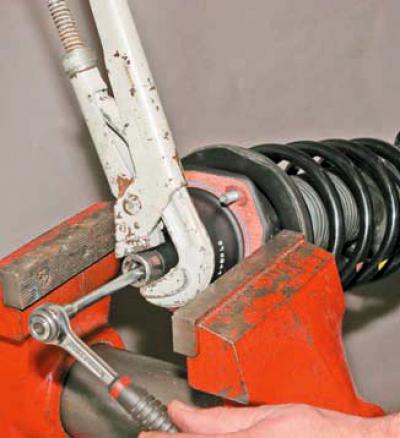
While supporting the stand, lightly clamp the edges of the upper support body in a vice.
On Lacetti, as a rule, before disassembling the strut there is no need to compress the spring with clamps, since the length of the shock absorber rod thread is sufficient so that when the rod nut is not completely unscrewed, the spring is completely released.
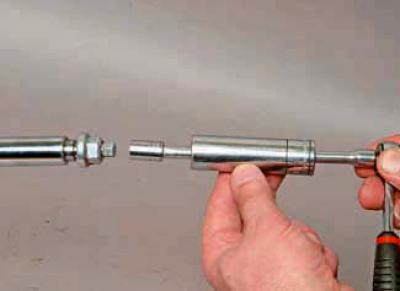
To unscrew the rod nut, we put a high head "17" on the nut, and through the hole in the head we pass an extension with a head "9" and put the head on the hexagon of the rod (shown on a disassembled stand).
Using a pipe wrench (or an open-end wrench - by the hexagon, if it is provided on the outer surface of the head), rotate the high head counterclockwise, holding the rod from turning with the other head.
As you unscrew the shock absorber rod nut, we check for the moment when the spring stops pressing on the support cups - at this point, the upper cup with the spring can be easily turned relative to the upper support of the strut.
After this, completely unscrew the nut and disassemble the rack.
If the nut is unscrewed almost to the end of the shock absorber rod thread, and the spring is not fully released, then it is necessary to compress the spring coils with clamps (see a similar operation in Chapter. Front suspension) until its pressure on the support cups is completely relieved and only then completely unscrew the nut.
We remove the upper support of the strut, the spring cup with the upper gasket, the spring, the protective cover, the compression buffer and the lower spring gasket.
Before assembling the shock absorber strut, we check the serviceability of its elements.
When recessing and extending the shock absorber rod by hand, there should be no dips, jams or jerks. There should be no nicks, signs of severe wear or corrosion on the rod mirror, hydraulic fluid should not leak through the rod seal. The strut spring should not have excessive subsidence or broken coils. The upper support of the strut should be replaced in case of significant deformation of its rubber mass or its detachment from the reinforcement. The rubber gaskets of the spring should not have tears or signs of severe wear. The compression stroke buffer should not be deformed. Replace damaged and severely worn parts with new ones. Assemble the shock absorber strut in the reverse order.
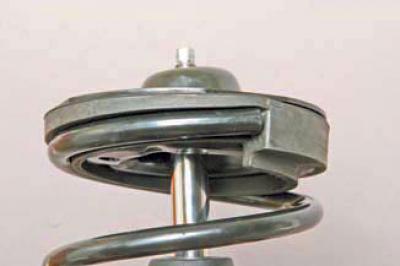
When installing the lower spring gasket, its shaped profile must match the profile of the support cup of the strut housing.
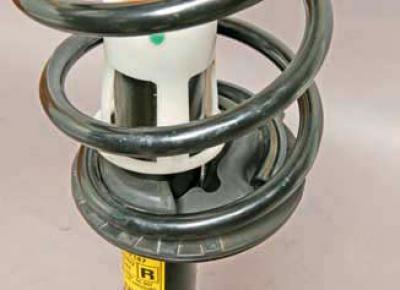
We install the spring so that its lower coil rests against the protrusion of the gasket.
We put the upper spring gasket on the upper support cup and install it on the spring…
…so that the upper turn of the spring rests against the protrusion of the gasket.
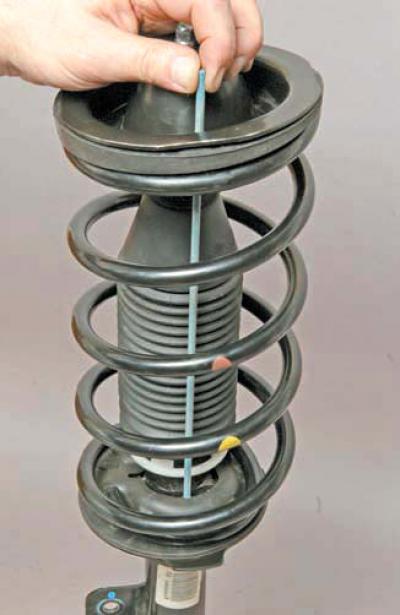
In this case, the holes in the upper and lower support cups of the spring should be located one below the other (for clarity, a rod is inserted into the holes).
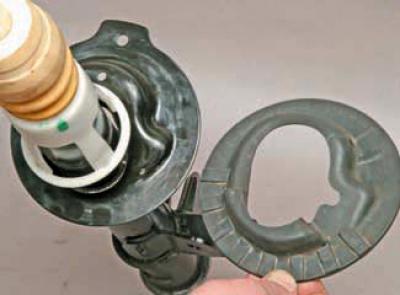
When installing the upper support, orient its edges relative to the edges of the upper spring cup, as shown in the photo.
When installing the shock absorber strut, we tighten the nuts securing its upper support to the body, but do not tighten them. Then we attach the strut to the rear suspension knuckle, and the anti-roll bar to the strut bracket. Finally, tighten it to the prescribed torque (see Appendices) nuts for fastening the upper support of the strut in the "car on wheels" position.