ChevyMan.ru
Mazda Mitsubishi Toyota Land Rover Honda Kia Nissan
English Русский
Български
Беларускі
Український
Српски
Hrvatski
Română
Polski
Slovenský
Magyar
|
Articles | Sitemap | Contacts |


Home   Aveo   Captiva   Cruze   Lacetti   Lanos   Niva   Tahoe   Others  
Lacetti 1 (2002-2009)
  • Home
  • Lacetti
  • J200 (2002-2009)
  • Chassis
  • Steering
  • Removal the steering wheel

Removal the steering wheel (Chevrolet Lacetti J200)

            0

We remove the steering wheel for replacement, as well as when dismantling the steering column, instrument panel, steering column switch connector, and drum device of the driver's airbag spiral cable.

We set the front wheels to the position of straight-line movement of the car.

Before performing any operations related to the removal of the driver's airbag module, it is necessary to disconnect the wire terminal from the negative terminal of the battery and wait at least one minute before starting the work.


This time is necessary for the capacitor of the airbag deployment system to discharge. Otherwise, an injury may occur if the airbag is deployed unintentionally.
This time is necessary for the capacitor of the airbag deployment system to discharge. Otherwise,…


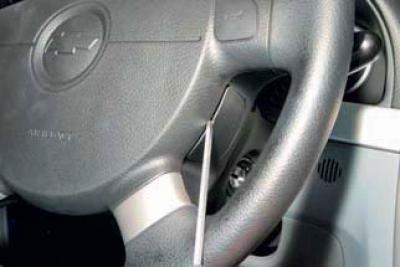
On the right side of the steering wheel, use a slotted screwdriver to pry up and remove the plug covering the screw that secures the airbag module.

Similarly, we remove the plug from the left side of the steering wheel.

If the control unit for the head unit of the audio system is located on the left side of the steering wheel…
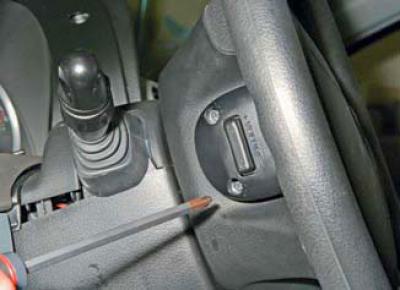
If the control unit for the head unit of the audio system is located on the left side of the…


…use a Phillips screwdriver to unscrew the two screws securing the unit.


…use a Phillips screwdriver to unscrew the two screws securing the unit.


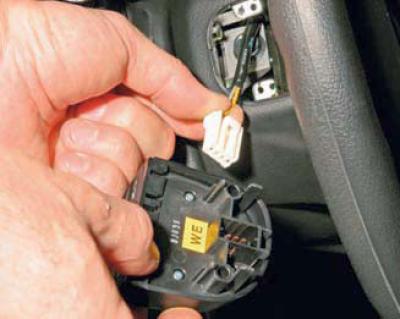
We disconnect the wiring harness connector from the control unit of the head unit of the audio reproduction system and remove the unit.
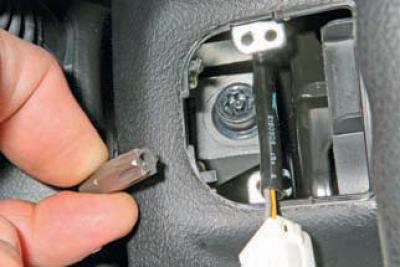
We disconnect the wiring harness connector from the control unit of the head unit of the audio…


With a Torx TR-50 key…

With a Torx TR-50 key…


…unscrew the screw securing the airbag module.

Similarly, unscrew the screw securing the airbag module on the other side of the steering wheel.
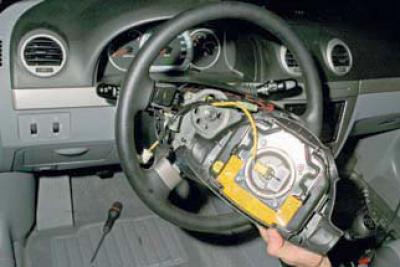
Similarly, unscrew the screw securing the airbag module on the other side of the steering wheel.


We move the airbag module away from the steering wheel…
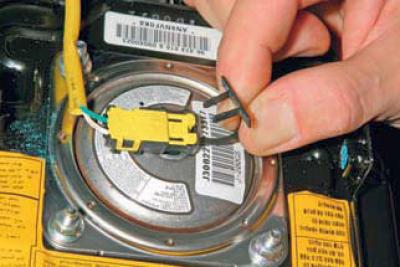


We move the airbag module away from the steering wheel…


…and remove the wiring block retainer.
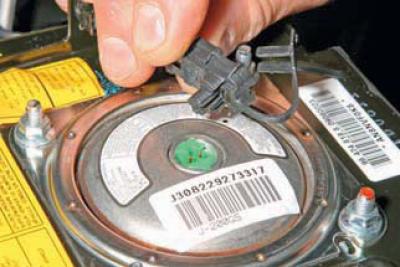
…and remove the wiring block retainer.


Disconnect the wiring harness from the airbag module.

Having removed the airbag module, we place it with the plastic cover facing up, away from the place where disassembly work is being performed.
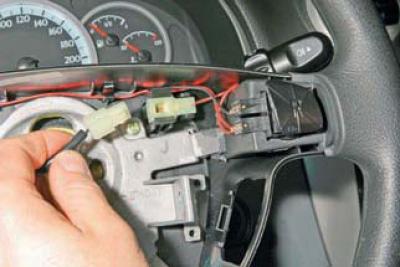
Having removed the airbag module, we place it with the plastic cover facing up, away from the place…


We disconnect the wiring blocks of the horn switches.
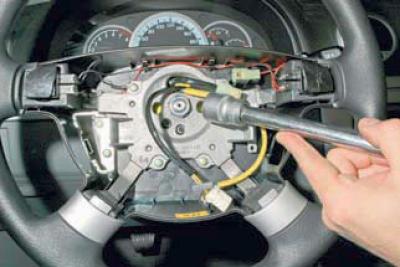
We disconnect the wiring blocks of the horn switches.


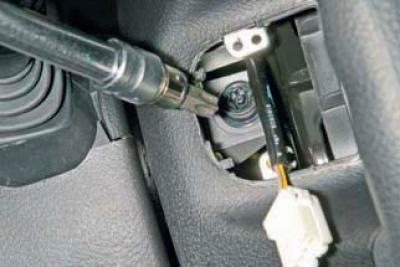
Using a 22 mm socket with an extension, loosen the steering wheel mounting nut and unscrew it a few turns.
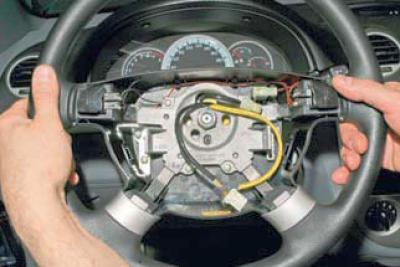


Using a 22 mm socket with an extension, loosen the steering wheel mounting nut and unscrew it a few…


While rocking, we pull the steering wheel towards ourselves and remove it from the splines of the steering shaft.

We completely unscrew the steering wheel mounting nut and remove it…
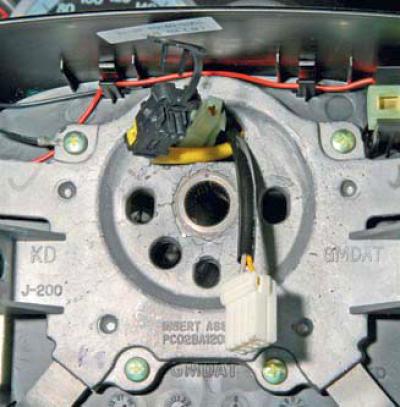
We completely unscrew the steering wheel mounting nut and remove it…


…by passing the wiring harnesses of the airbag module, horn and audio system head unit control unit through the hole in the wheel hub.

We install the steering wheel in the reverse order.

The steering wheel is mounted on the steering shaft in only one position.
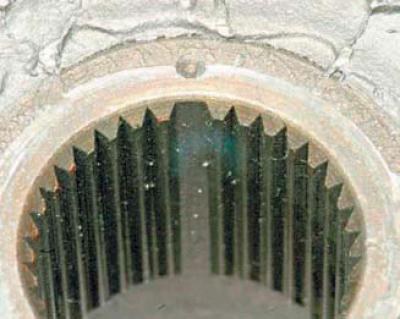
The steering wheel is mounted on the steering shaft in only one position.


The double spline in the wheel hub hole must match..
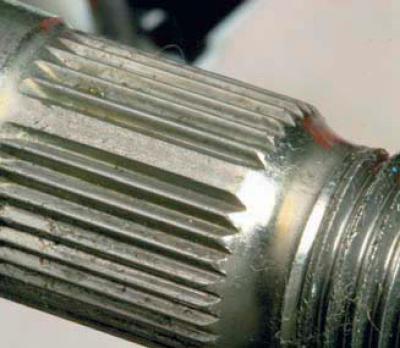


The double spline in the wheel hub hole must match..


…with a double tooth steering shaft.

Tighten the steering wheel mounting nut to the specified torque (see Appendices).

The original article is on the website: chevyman.ru

The article was checked: Vladimir Romannikov
This article is available at russian, bulgarian, belarusian, ukrainian, serbian, croatian, romanian, polish, slovak, hungarian

Share information:

Previous articles
Lacetti 1: Steering
Next articles

Steering device
Removal the steering column
Replacing the tie rod end
Replacing the steering gear cover
Removal the steering gear
Removal the steering rod


See similar articles on the topic of Chevrolet cars:
Adjusting the position of the steering wheel Chevrolet Aveo T300 (2012-2018)
Adjusting the position of the steering wheel Chevrolet Captiva 1 (2006-2018)
Steering wheel-mounted controls Chevrolet Cruze 1 (2008-2016)
Removal the steering wheel Chevrolet Lanos T150 (2002-2009)
Adjusting the position of the steering wheel Chevrolet Niva 1 (2002-2016)
Adjusting the position of the steering wheel Chevrolet Tahoe 2 and 3 (2000-2014)
Removal and installation the steering wheel Chevrolet Lumina 1 (1989-1994)
Link in different formats to this page


Visitor comments

No comments yet


How much will 17 + 20 =


Lacetti 1 (2002-2009) 
  • General information
  • User manual
  • Maintenance
  • Power unit
  • Engine repair
  • Control system
  • Supply system
  • Cooling system
  • Exhaust system
  • Transmission
  • Clutch
  • Manual gearbox
  • Front wheel drives
  • Chassis
  • Front suspension
  • Rear suspension
  • Steering
  • Brake system
  • Body
  • Repair of body elements
  • Heating and air conditioning
  • Electrical equipment
  • Engine electrics
  • Lighting and lamps
  • Equipment and devices
  • Electrical circuits


ChevyMan.ru © 2017-2026 · Mobile version · Feedback · Site search · Interesting to read · Sitemap: EN BG BY UA RS HR RO PL SK HU

Aveo 2003-2008 · Aveo 2006-2011 · Aveo 2012-2018 · Captiva 2006-2018 · Cruze 2008-2016 · Lacetti 2002-2009 · Lanos 2002-2009 · Niva 2002-2016 · Tahoe 1992-2000 · Tahoe 2000-2014 · Lumina 1 1989-1994 · Trailblazer 1 2001-2008 · Orlando 1 2010-2018 ·
🛡️ For your security and to improve our service, this site uses cookies. You can disable them in your browser.