


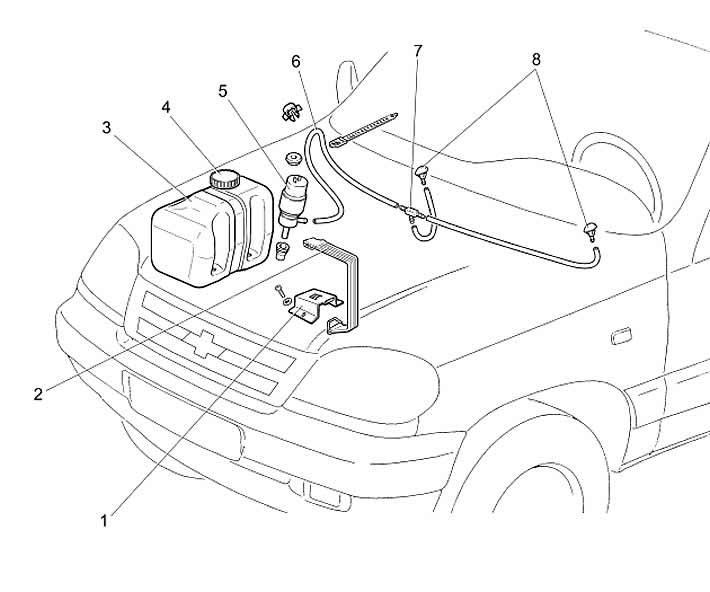
Figure 8-56. Windshield washer diagram:
1 - bracket;
2 - tank mounting belt;
3 - washer reservoir;
4 - tank lid;
5 - Windshield washer pump;
6 - tube;
7 - tee;
8 - washer nozzle.
When installing the jet, insert it sharply with its body into the hole in the hood.
Adjust the direction of the liquid stream by changing the position of the sprayer in the housing socket. To do this, insert the needle into the hole of the sprayer nozzle and carefully turn the sprayer so that the liquid stream hits the required area of the glass.
In the complete set of cars with a headlight glass washer (see figure 8-57) two pumps 9 and 10 for the windshield washer and the headlight glass washer are installed in the recesses of the tank.
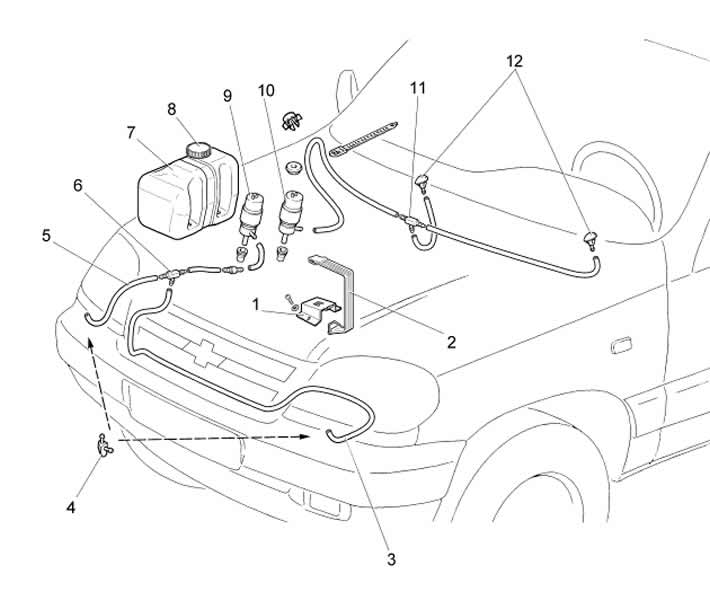
Figure 8-57. Windshield and headlight glass washers diagram:
1 - bracket;
2 - tank mounting belt;
3 - left headlight washer tube;
4 - adapter;
5 - right headlight washer tube;
6 - tee;
7 - tank;
8 - tank lid;
9 - headlight washer pump;
10 - Windshield washer pump;
11 - tee;
12 - washer nozzle.
There is a separate tank 6 for washing the rear door glass (figure 8-58), installed in the rear door niche.
To remove the tank, unscrew the cover 4, remove the trim 3 (see figure 8-20), 4, 12 and 10. Disconnect the feed tube 2 (see figure 8-58) from the electric pump 5. Unscrew the two self-tapping screws 1 and remove the tank assembly with the pump.
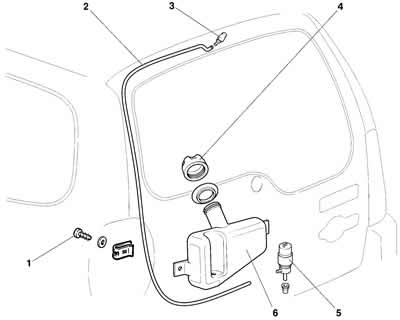
Figure 8-58. Rear door glass washer diagram:
1 - screw;
2 - hose for supplying liquid to the jets;
3 - jet;
4 - cap of the rear door glass washer reservoir;
5 - electric pump;
6 - rear door glass washer reservoir.
For details, visit the website: chevyman.ru