


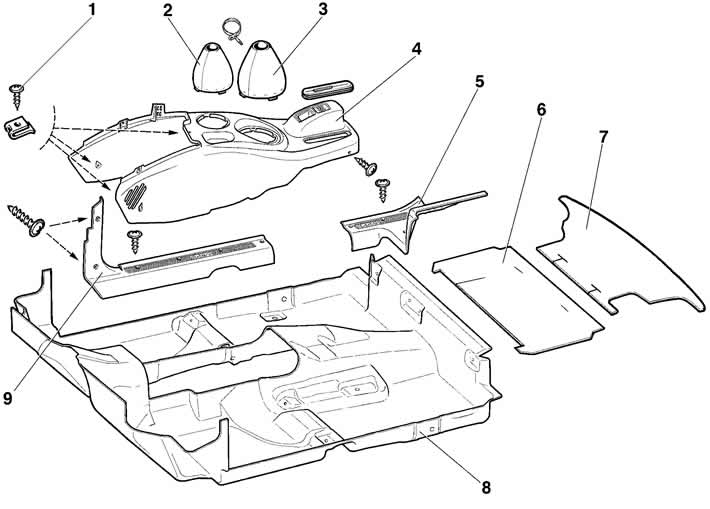
Figure 8-78. Body floor trim:
1 - screw;
2 - Transfer case lever cover;
3 - gear lever cover;
4 - floor tunnel lining;
5 - rear floor sill trim;
6 - Front trunk mat;
7 - rear trunk mat;
8 - floor mat;
9 - front floor sill trim.
Remove boots 2 and 3 from the transfer case lever and gearbox lever.
Loosen the self-tapping screws 1 and remove the floor tunnel lining 4.
Loosen the screws and remove the front 9 and rear 5 floor sill trims.
If necessary, remove the floor mat 8, front 6 and rear 7 trunk mats.
Removing the body trim is shown in Figure 8-79.
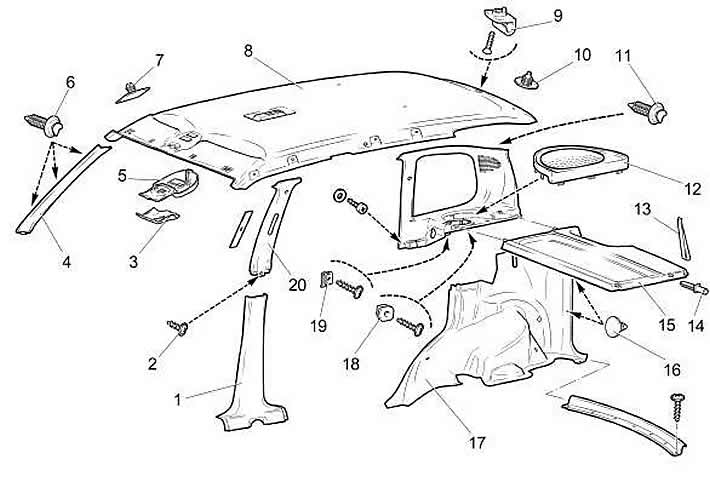
Figure 8-79. Removing the body trim:
1 - lower trim of the central pillar;
2 - self-tapping screw;
3 - front pad insert;
4 - right windshield pillar trim;
5 - Front roof trim trim;
6 - Roof trim holder;
7 - holder;
8 - roof lining;
9 - spring nut;
10 - holder;
11 - Rear roof trim holder;
12 - speaker cover;
13 - trunk shelf cord;
14 - axis;
15 - trunk shelf;
16 - button;
17 - arch and trunk trim;
18 - nut;
19 - spring nut;
20 - upper trim of the central pillar.
Loosen the self-tapping screws 2 and remove the lower 1 and upper 20 trims of the central pillar. Press the trims 4 of the windshield pillar and remove the trims.
Remove the shelf 15 of the trunk. Remove the trims 12 of the trunk.
Unscrew the self-tapping screws and remove the rear side trim. Remove the trims of the 17 arch and trunk.
Remove insert 3 of the front trim and front trim 5 of the roof trim.
Loosen the mounting screws and remove the roof trim.
The material was created based on information from the website «ChevyMan.ru»