


Removal the roof lining
Place the vehicle on a work post, lift the hood, and disconnect the ground wire terminal from the battery.
Remove two plastic plugs 1 (figure 8-94) from the handrails, unscrew two mounting bolts and remove three handrails 3.
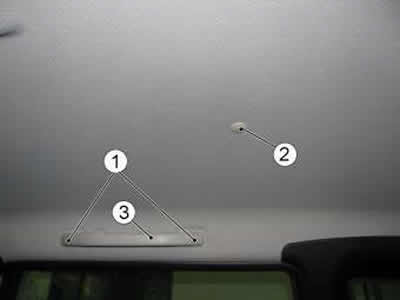
Figure 8-94. Attaching the handrail:
1 - handrail plugs;
2 - roof trim fastening clip;
3 - handrail.
Remove the two plastic clips 2 securing the roof trim.
Unscrew three screws 1 (figure 8-95) sun visor mounts and remove the two visors 2 and holders 3.
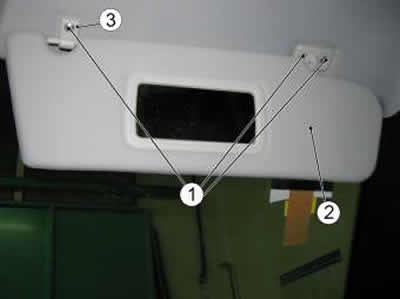
Figure 8-95. Attaching sun visors:
1 - screws;
2 - sun visors;
3 - holder.
Remove one screw 1 (figure 8-96) hook - luggage compartment shelf holder, remove hook 2.
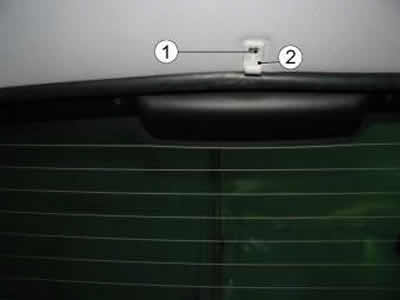
Figure 8-96. Fastening the luggage compartment shelf hook:
1 - screw;
2 - hook.
Remove two plugs 1 (figure 8-97) from the right/left rear side trims and two decorative trims 2 from the rear seat belt guides. Unscrew the rear trim mounting screws and the rear seat belt guide mounting bolts, right/left.
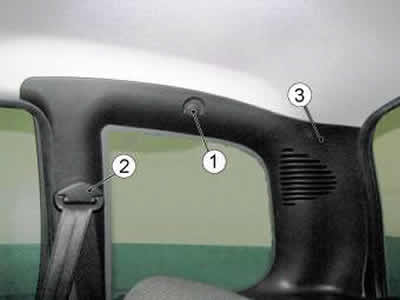
Figure 8-97. Fastening the rear trim:
1 - plug;
2 - decorative trim for rear seat belt guide;
3 - rear side trim.
Remove two plugs 1 (figure 8-98) from the trim of the central pillars, right/left and two decorative trims for 2 front seat belts.
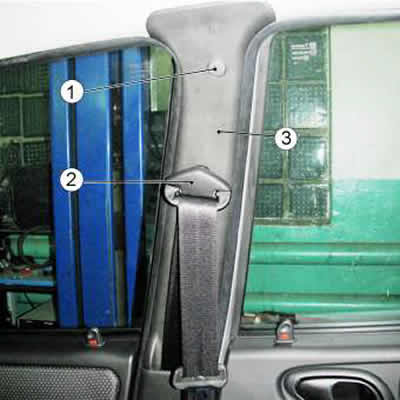
Figure 8-98. Center pillar trim:
1 - plug;
2 - decorative overlay;
3 - central pillar trim.
Unscrew one bolt at a time 1 (figure 8-99) fastenings for front seat belt guides, right/left.
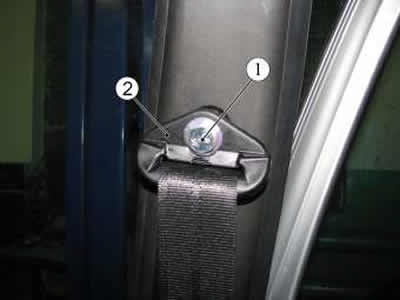
Figure 8-99. Fastening the seat belts:
1 - bolt;
2 - front seat belt guide.
Unscrew one screw at a time 1 (figure 8-100) fastenings of the central pillar trims. Disconnect the trims, right/left.
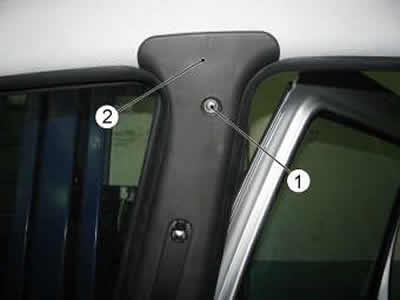
Figure 8-100. Fastening the center pillar trim:
1 - screw;
2 - central pillar trim.
Remove the trims 1 (figure 8-101) front struts, overcoming the resistance of three plastic holders.
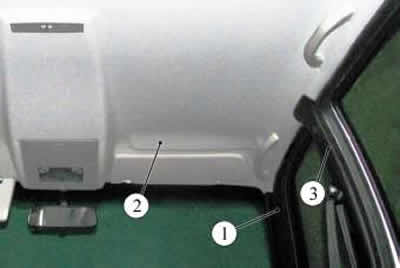
Figure 8-101. Front pillar:
1 - Front pillar trim;
2 - roof lining;
3 - central pillar trim.
Open the lid 1 (figure 8-102) box on the roof trim, unscrew the two screws 2 securing the box, remove the box assembly with the cover.
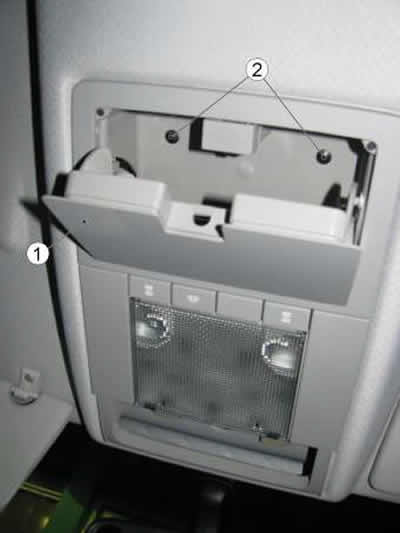
Figure 8-102. Fastening the box to the roof lining:
1 - box cover;
2 - screws.
Remove decorative trim 1 (figure 8-103) in the front part of the console, overcoming the resistance of the plastic clips. Remove the diffuser 2, the interior light, overcoming the resistance of the plastic clips.
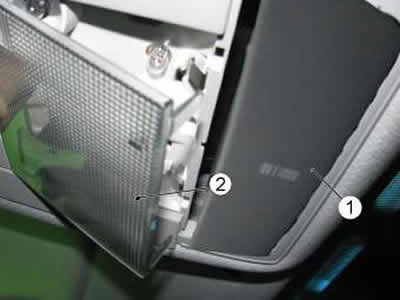
Figure 8-103. Removing the diffuser:
1 - overlay;
2 - diffuser.
Remove three screws 1 (figure 8-104) fastenings of the lamp housing and remove the housing with the lamp housing assembly.
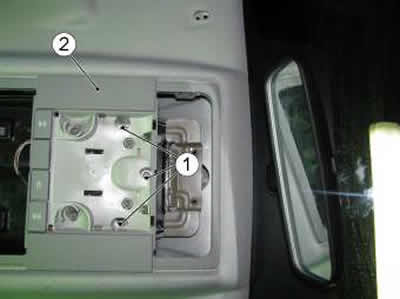
Figure 8-104. Fixing the lamp housing:
1 - screws;
2 - lamp housing.
Disconnect connector 1 (figure 8-105) wiring harness, remove lampshade 2, overcoming the resistance of the plastic holders.
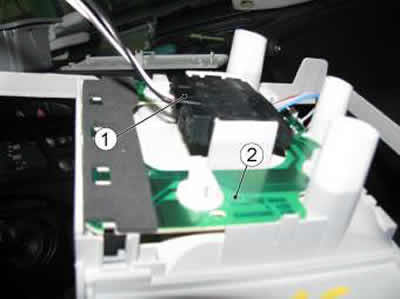
Figure 8-105. Wiring harness connection block to the ceiling light:
1 - Wiring harness connector;
2 - lampshade.
Remove the lampshade 1 (figure 8-106) rear lighting, overcoming the resistance of the plastic clamps.

Figure 8-106. Rear light:
1 - rear light.
Disconnect connector 1 (figure 8-107) rear wiring harness from the ceiling light.
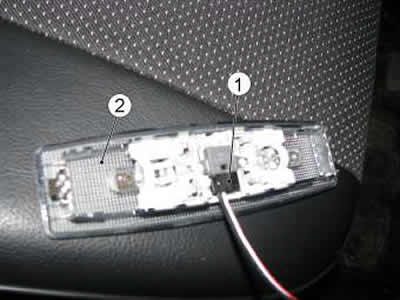
Figure 8-107. Wiring harness connection block to the rear light:
1 - harness block;
2 - rear light.
Partially detach the four seals 1 (figure 8-108) door openings in the area where they meet the roof lining.
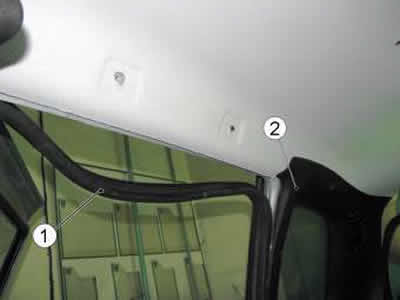
Figure 8-108. Removing seals from door openings:
1 - seal;
2 - rear trim.
Fold back the rear trim. Fold down the rear part of the trim 1 (figure 8-109) roof, cut the adhesive connection of the three buffers to the roof, remove the roof trim through the rear door opening.
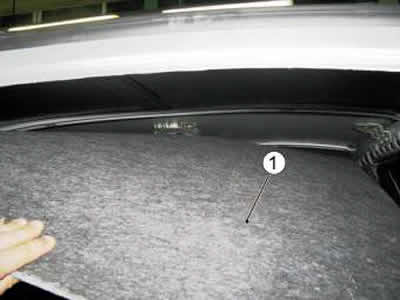
Figure 8-109. Removing the roof trim:
1 - roof lining.
Remove two screws 1 (figure 8-110) ceiling console plate fasteners and remove plate 2.
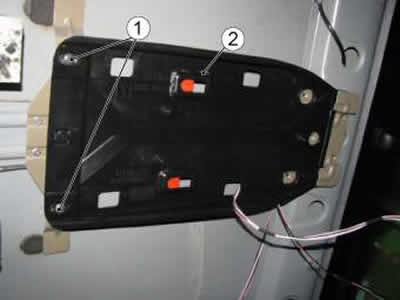
Figure 8-110. Fastening the ceiling console plate:
1 - screw;
2 - console plate.
Installing roof lining
Glue three buffers (similar to factory), on the roof panel or roof lining.
Apply glue to the ends of the buffers.
Install the roof trim in the reverse order of removal.
Ensure that all mating parts are mated symmetrically, with uniform gaps.
Fasten the seat belts, observing the tightening torques of the bolts (17,64-30,87) Nm ((1.,8...3,15)kgm), lampshades and cladding for all attachment points provided for by the design.
Check the operation of electrical devices and seat belts. The front and rear side seat belts should return from the working position to the original position freely without jamming after opening the locks.
The article is based on data from the website: «chevyman»