


Contents: Removal ↧ Installation ↧
Removal
Place the vehicle in a work area, apply the parking brake, turn off the ignition and disconnect the negative terminal from the battery.
Unscrew nut 3, Figure 7-18, on the support bracket 4 of the receiver.
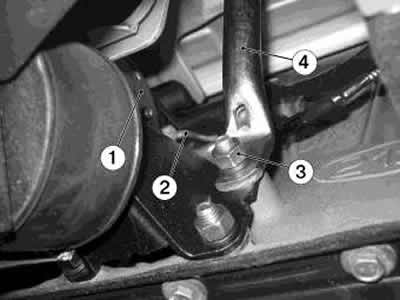
Figure 7-18. Removing the starter:
1 - starter;
2 - starter wires;
3 - nut of the support bracket mounting bolt;
4 - receiver support bracket.
Place the car on a lift and raise it to a height convenient for work. Remove the noise insulation screen.
Remove the engine protection.
Remove the engine splash shield.
Unscrew the lower nut of the receiver support bracket.
Remove the starter shield.
Disconnect the intake pipe and separate it from the additional muffler with the neutralizer assembly.
Secure the additional muffler with the neutralizer assembly using a technological hook.
Lower the car.
Disconnect the exhaust pipe from above.
Unscrew the oxygen sensor 1, Figure 7-19, from the inlet pipe 2.
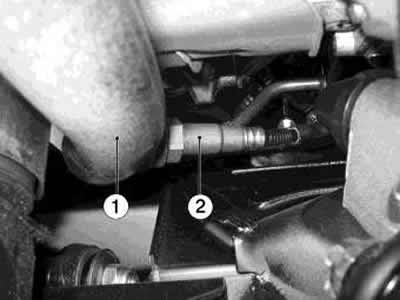
Figure 7-19. Disconnecting the oxygen sensor:
1 - oxygen sensor;
2 - intake pipe
Remove the exhaust pipe.
Place the car on a lift.
Disconnect the stabilizer cushion.
Remove the neutralizer screen.
Remove the compressor splash shield.
Unscrew the bolts (3 pcs) securing the starter to the clutch housing and remove the starter from its mounting location.
Disconnect the electrical wires from the starter and remove the starter.
Installation
To install the starter, perform the operations in the reverse order of removal.
Tighten the bolts securing the starter to the clutch housing. The tightening torque of the bolts is 16...25 Nm (1.6...2.5 kgf·m).