


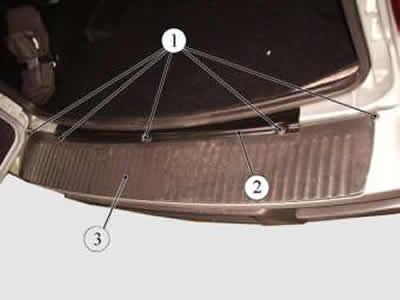
Figure 8-27. Rear bumper upper mount:
1 - bolt;
2 - Upper bumper trim;
3 - rear bumper.
Unscrew two nuts 1 (figure 8-28) central bumper mount in the license plate installation area.
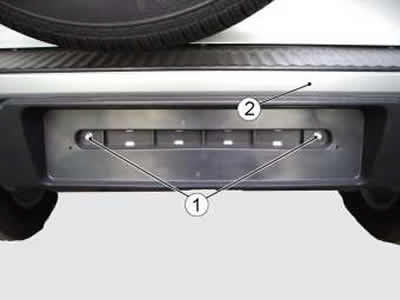
Figure 8-28. Fastening the rear bumper in the license plate area:
1 - nut;
2 - bumper.
Remove three screws 1 (figure 8-29) fastenings of the mudguard, unscrew one screw 1 (figure 8-30) and two nuts 2 from the wheel arch side, remove the pressure plate 4 and the apron 3.
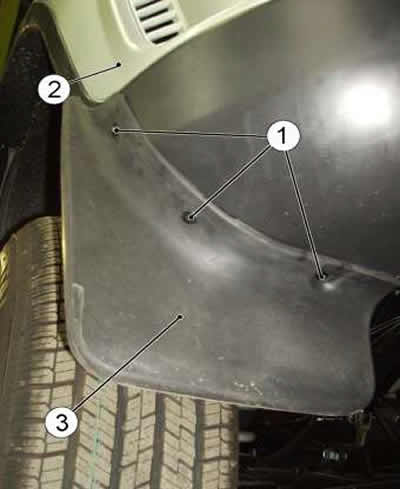
Figure 8-29. Fastening the apron:
1 - screw;
2 - rear bumper;
3 - mudguard.
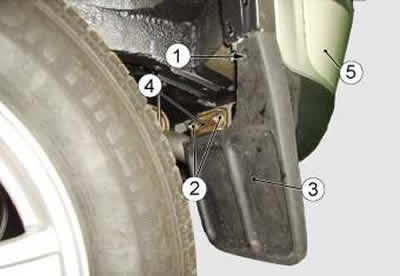
Figure 8-30. Fastening the apron:
1 - screw;
2 - nuts;
3 - mudguard;
4 - pressure plate;
5 - bumper.
Unscrew two screws 1 (figure 8-31) fastening the bumper to the rear wheel arch right/left.
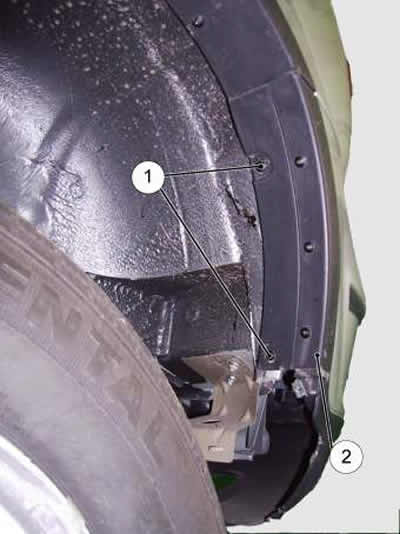
Figure 8-31. Fastening the bumper to the rear wheel arch right/left:
1 - screws;
2 - bumper assembly.
Remove two screws 1 (figure 8-32) lower bumper mount to the bumper beam.
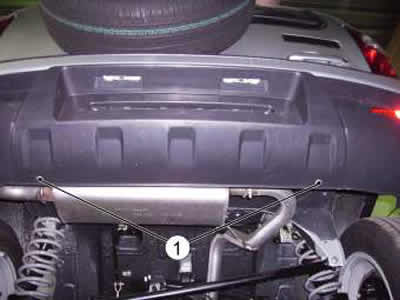
Figure 8-32. Lower bumper mount:
1 – screw.
Bend back the trunk trim on the left, disconnect terminal 1 (figure 8-33) license plate light harness from the body and connector 2 of the license plate light harness from the rear wiring harness.
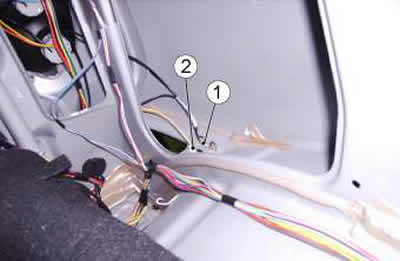
Figure 8-33. License Plate Light Harness Wires:
1 - terminal of the ground wire of the license plate light harness;
2 - connector for the license plate light wiring harness to the rear wiring harness.
Remove the reflectors, unscrew one nut 1 (figure 8-34), remove the bumper.
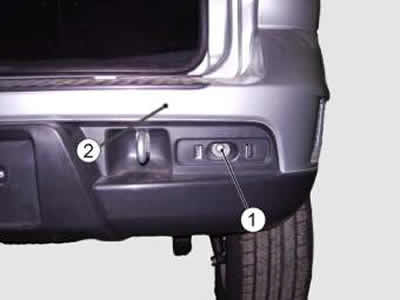
Figure 8-34. Side bumper mount:
1 – nut;
2 – rear bumper.
[The article was borrowed from the website «CHEVYMAN.RU»]