


Contents: Disassembly ↧ Assembly ↧
Disassembly
Remove five screws 1 (figure 8-21) lower bumper trim fasteners, remove trim 2.
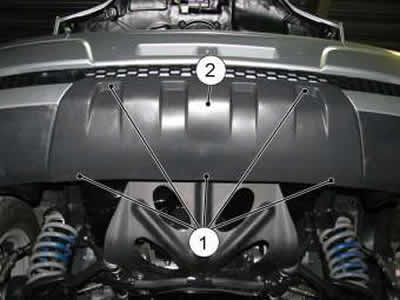
Figure 8-21. Removing the lower bumper trim:
1 - self-tapping screw;
2 - lower bumper trim.
Remove two screws 1 (figure 8-22) fastening brackets and remove brackets 2.
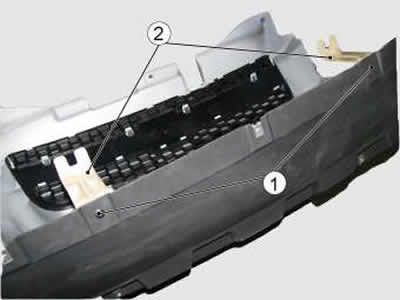
Figure 8-22. Fastening the brackets:
1 - bracket mounting screws;
2 - bumper bracket.
Disconnect twenty latches 1 (figure 8-23) upper grille fasteners and remove grille 2, disconnect six metal latches from upper grille and remove chrome trim 2 (figure 8-12).
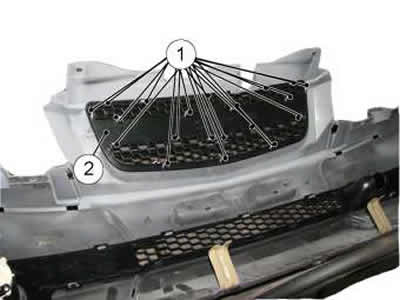
Figure 8-23. Fastening the upper bumper grille:
1 - latches;
2 - upper bumper grille.
Unscrew three screws 1 (figure 8-24) fog light mounts, remove headlights 3, right and left. Unscrew two screws 2 for fastening the lower grille.
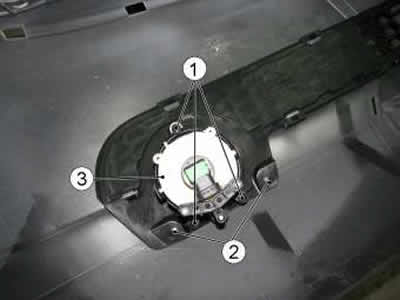
Figure 8-24. Fog light mounting:
1 - Fog light mounting screws;
2 - screws for fastening the lower grille;
3 - left fog light.
Disconnect the seventeen latches 1 (figure 8-25) fastenings of the lower, decorative bumper grille, remove grille 2.
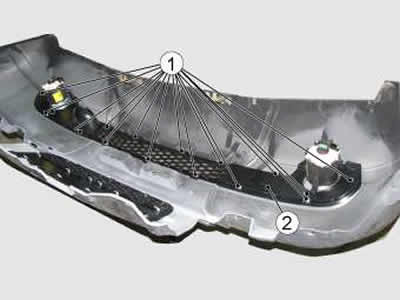
Figure 8-25. Fastening the lower bumper grille:
1 - latches;
2 - lower bumper grille.
Cut with a string (fishing line) 1 (figure 8-26) factory mark 2, overcoming the resistance of double-sided adhesive tape, (string, twisted nylon thread).
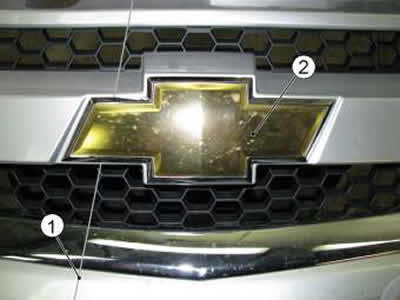
Figure 8-26. Removing the emblem:
1 - string, fishing line;
2 - factory mark.
Assembly
Assemble the front bumper in the reverse order of disassembly.