
1. We prepare the car for maintenance and repair.
2. Remove the front wheels. We hang out the front part of the car.
3. Using a TORX T20 key, unscrew the two screws that secure the upper mudguard liner to the bumper trim...
...and two lower mounting screws.

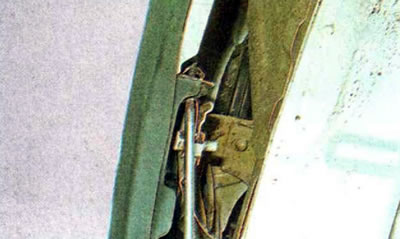
4. Pull out the retainers of the front part of the mudguard liner and remove the holders: one on top...
...and three on the side.
5. Having disconnected the holder, remove the front part of the fender liner.
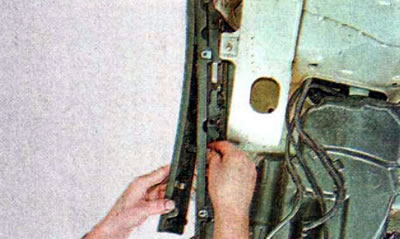
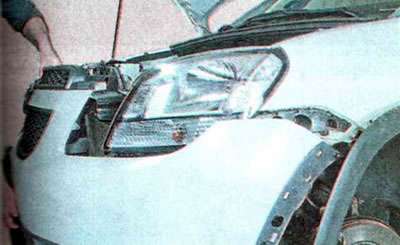
6. Using a TORX T20 key, unscrew the screw securing the bumper trim to the wing.
7. By pressing the clamps, we detach the wheel arch trim from the bumper trim.
8. Perform similar operations on the right side.
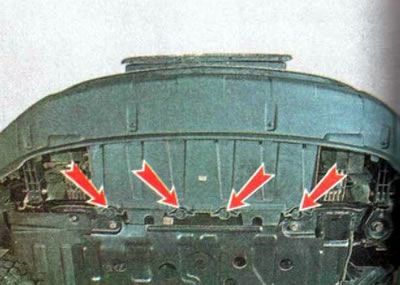
9. Pull out the clamps and remove the four holders of the bumper mudguard.
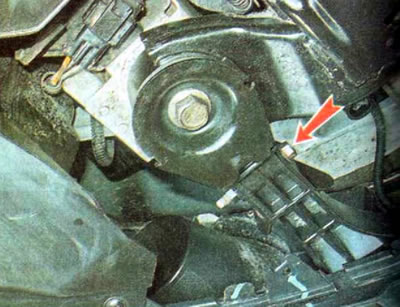
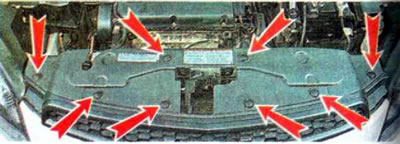
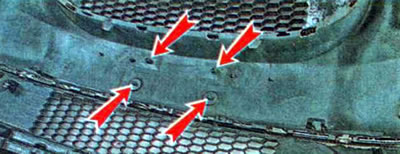
10. Using a 13 mm wrench, loosen the tightening bolts - one on the right and one on the left (the photo shows the left bolt).
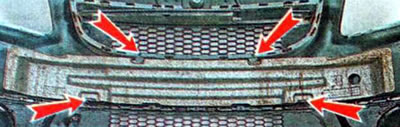
11. Having pulled out the clamps, we remove the eight holders of the radiator trim, and remove the trim
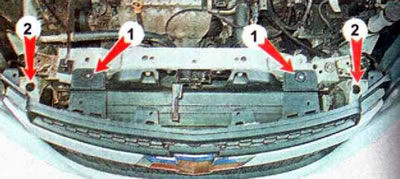
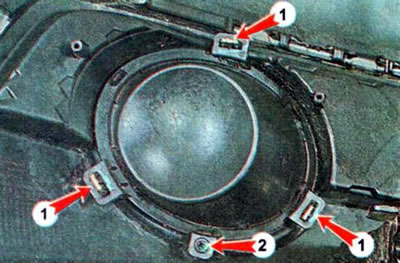
12. Having pulled out the clamps, we remove two holders 1. Using a 10 mm socket wrench, we unscrew two bolts 2.
Note: It is easier to remove the bumper cover with an assistant.
13. Alternately disconnect the left and right sides of the bumper trim from the side holders...
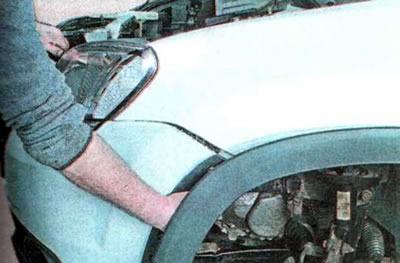
...and we take it off (if there are fog lights, disconnect the wiring harness connectors from them).
Note: In some cases, depending on the extent of damage, it is advisable to replace not the entire overlay, but only its upper or lower part, or perhaps only the upper or lower grille of the upper part of the overlay.
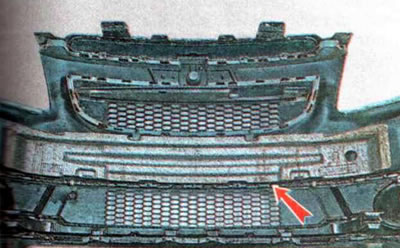
14. To separate the upper and lower parts of the bumper cover, use a Phillips screwdriver to unscrew 14 screws evenly spaced along the horizontal connector (indicated by the arrow).
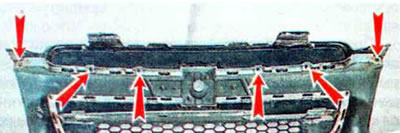
15. To remove the top grille, use a Phillips screwdriver to unscrew six screws.
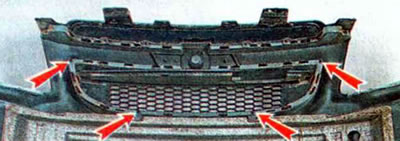
16. To remove the lower grille, use a Phillips screwdriver to unscrew the four screws.
17. When removing the energy-absorbing element of the pad, it is necessary to alternately compress it in the area of the clamps and remove it from the pad.
18. When installing the energy-absorbing element, it is necessary to align the holes in it with the protrusions on the pad.
19. To remove the plug or fog light, use a Phillips screwdriver to unscrew screw 2 and alternately squeeze the holder clamps 1.
20. Install the parts in reverse order.