


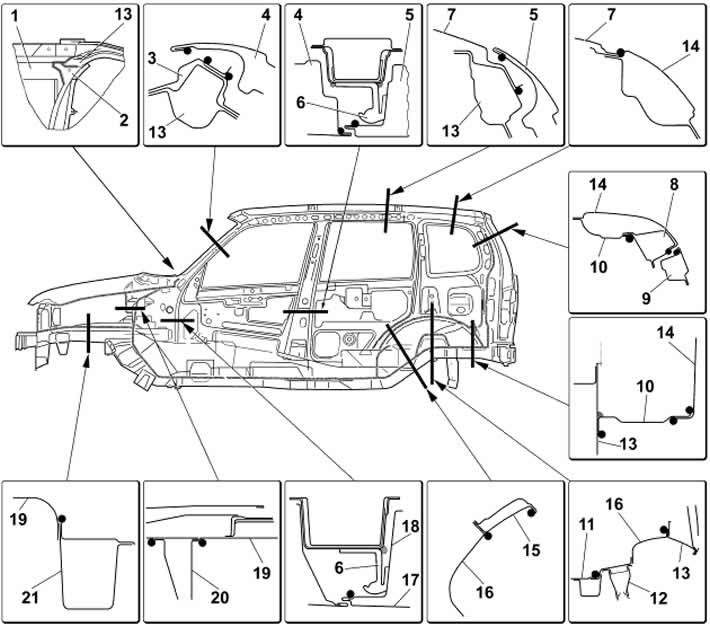
Figure 8-6. Places where sealing mastic is applied (side view):
1 - front panel reinforcement;
2 - windshield frame;
3 - groove;
4 - front door;
5 - back door;
6 - door hinge;
7 - roof panel;
8 - rear pillar;
9 - tailgate;
10 - rear wing extension;
11 - middle floor;
12 - spring support;
13 - rear pillar;
14 - rear wing;
15 - outer arch;
16 - inner arch;
17 - outer door panel;
18 - Front door inner panel;
19 - mudguard;
20 - front shield;
21 - front side member.
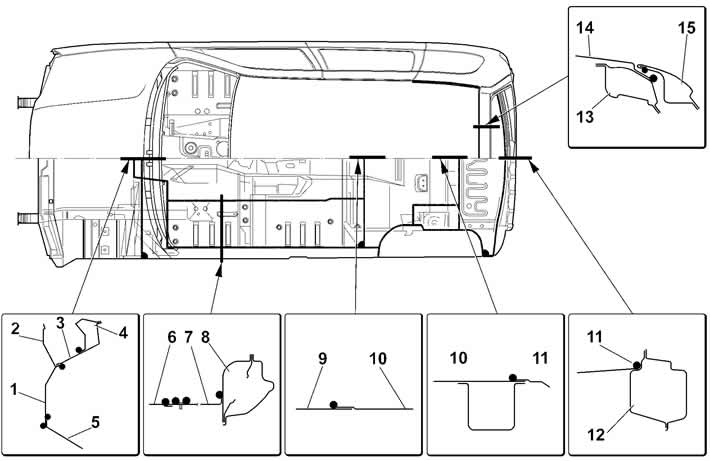
Figure 8-7. Places of application of sealing mastic (top view):
1 - front shield;
2 - front shield extension;
3 - upper front shield reinforcement;
4 - windshield frame;
5 - front floor;
6 - floor tunnel;
7 - floor panel;
8 - floor threshold;
9 - front floor;
10 - middle floor;
11 - rear floor;
12 - rear cross member;
13 - rear roof beam;
14 - roof panel;
15 - tailgate.
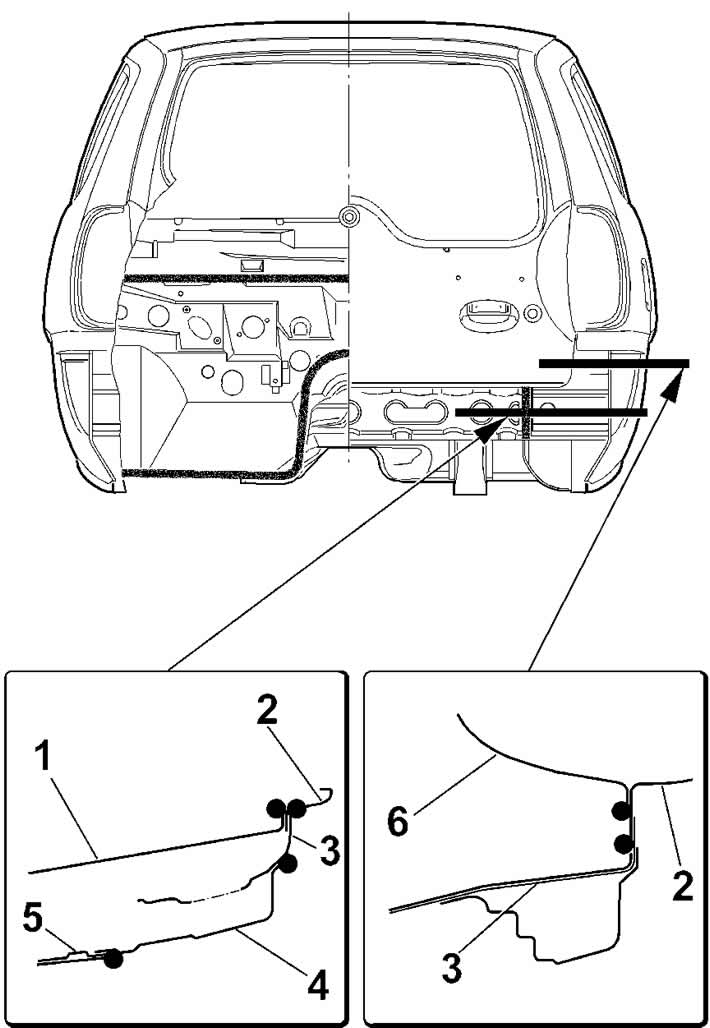
Figure 8-8. Sealing mastic application areas (rear view):
1 - floor crossbar;
2 - side joint;
3 - rear wing trim;
4 - rack;
5 - rear cross member;
6 - wheel arch.
When removing and installing seals with metal frames, do not allow the frame to become crushed or corrugations to form on the seals.
The welded seams are sealed with D-4A plastisol to prevent moisture and dirt from getting in. After replacing individual body parts, coat the welded seams on both sides with D-4A plastisol and apply non-drying mastic 51-G-7 to the corner joints:
- floor thresholds with front shield (from the salon side);
- front shield with front pillar panel;
- connections of the front side members with the radiator frame and the front shield;
- rear floor and rear floor extensions with rear wheel arches, sidewalls and rear cross member.
(The original material is located on the website: CHEVYMAN.RU)