
Warning: The vehicles described in this manual are equipped with a passive restraint system (SRS), also known as an air spring system. Before carrying out work in the area where the elements of this system are located, you should turn off its power, since accidental deployment of the airbags can result in serious injury (see chapter 12).
1. Disconnect the negative battery cable. Loosen the wheel nuts, raise the car and install vertical supports. Remove the front wheel.
2. Remove the radiator grille as described in subsection 9.
3. Unscrew the fastening nuts and remove the footrest.
4. Remove the threshold trim and box lining (see illustrations).
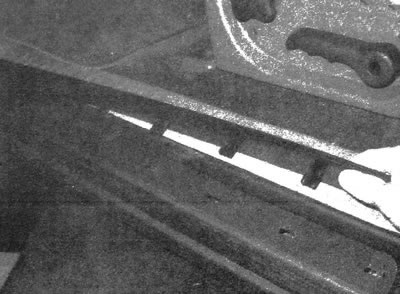
13.4a. To remove the sill trim, grab it at the rear end, lift it up and pull it forward
13.4b. Remove the rear sill trim pin, then disconnect the clips
Note: On Trailblazer EXT and Envoy XL vehicles, only the front box trim needs to be removed.
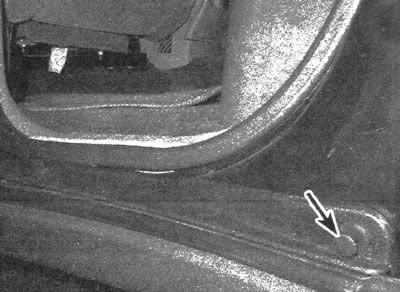
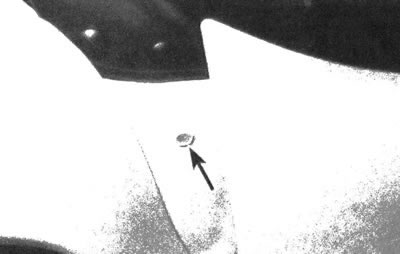
5. Pry up and remove the plastic rivets, unscrew the bolt and remove the wheel arch trim (see illustration).

13.5. Unscrew the bolt and remove the pins that secure the wheel arch trim
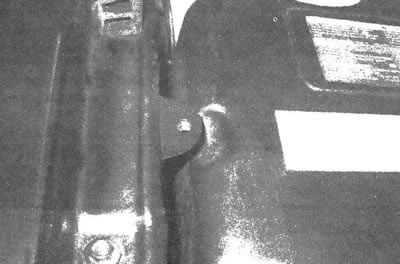
6. Carrying out the procedure from under the car, unscrew the fastening bolt located in the front wheel arch, the bolt located in the lower left corner, as well as the bolt securing the fender to the door jamb (see illustrations).
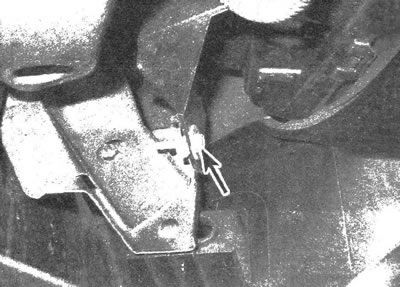
13.6a. After removing the wheel arch trim, unscrew the bolt located at the front...
13.6b.... the bolt that is located in the lower left corner...
13.6s....as well as the bolt securing the fender to the door jamb
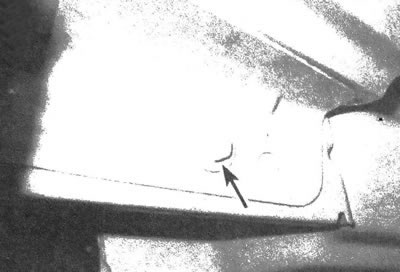
7. Unscrew the upper wing mounting bolts (see illustrations).
13.7a. Unscrew the bolts securing the fender to the front panel of the body...
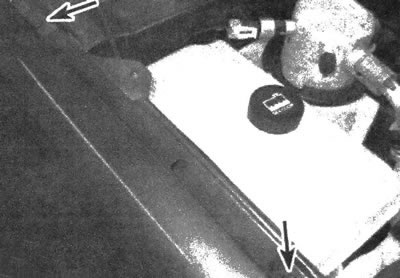
13.7b....as well as bolts located along the upper edge of the wing (marked with arrows' one of the bolts is not shown)
8. Disconnect the wing. To prevent damage to adjacent body parts during fender removal, it is recommended to involve an assistant.
9. Installation is carried out in the reverse order of removal. Tighten all nuts, bolts and screws securely.