
We release the pressure in the fuel system (see Replacing the fuel filter).
Disconnect the wire terminal from the negative terminal of the battery.
In the car interior, lift the rear seat cushion.
Using a slotted screwdriver, pry off the fuel module hatch cover…
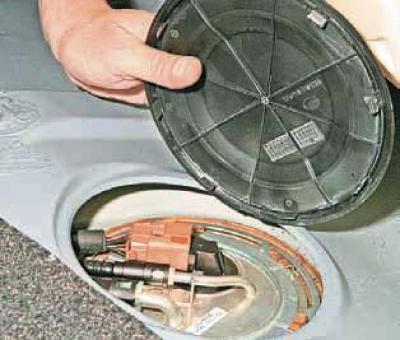
…we remove the lid.
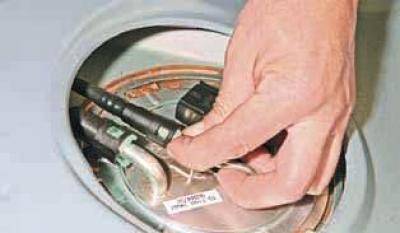
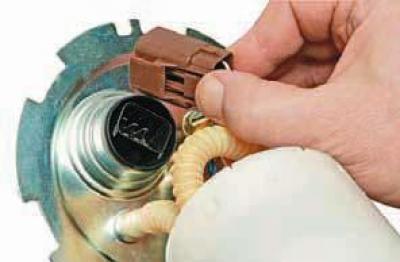
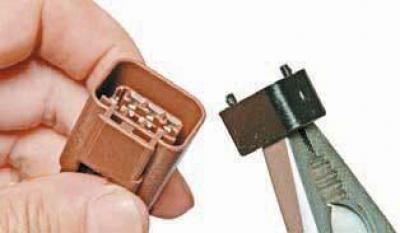
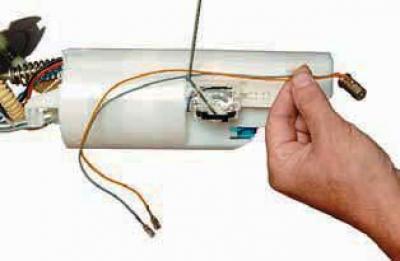
To disconnect the engine management system wiring harness connector from the fuel module cover connector…
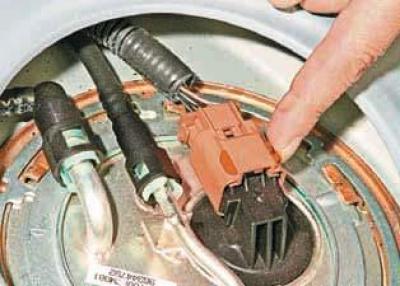
…we move the engine management system wiring harness blocker (orange color)…
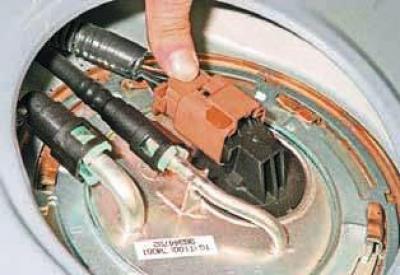
…and pressing the latch at the rear of the wiring harness connector…
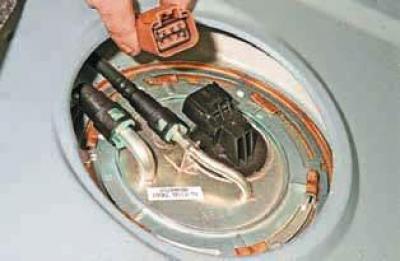
…we remove the block.
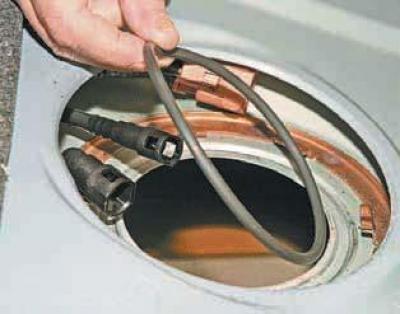
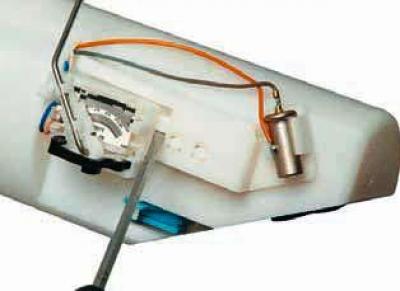
We squeeze the retainer of the drain line tube tip…
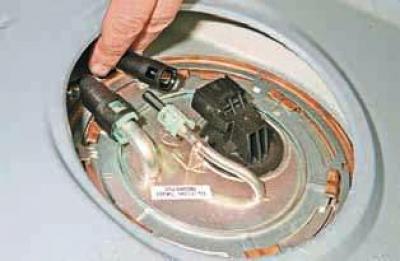
…and remove the tube tip from the fuel module cover fitting.

Similarly, we remove the tip of the discharge line tube from the other fitting on the module cover.
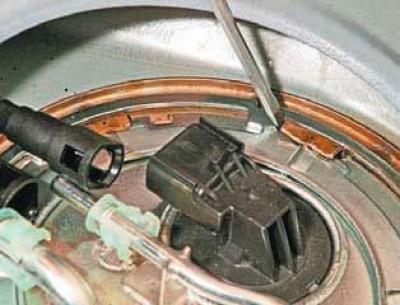
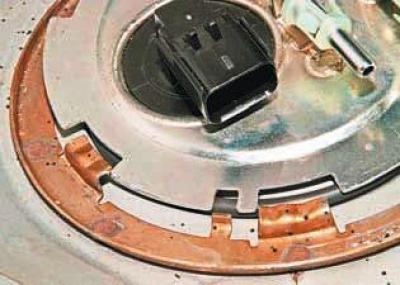
Using a slotted screwdriver, turn the locking ring of the fuel module cover counterclockwise until the grooves in the ring and the protrusions in the flange of the fuel tank align..
…and remove the ring.
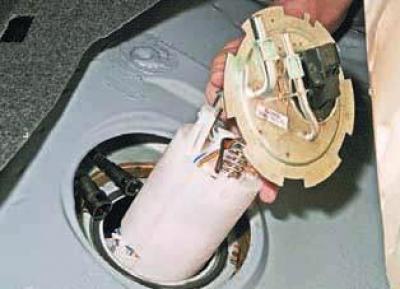
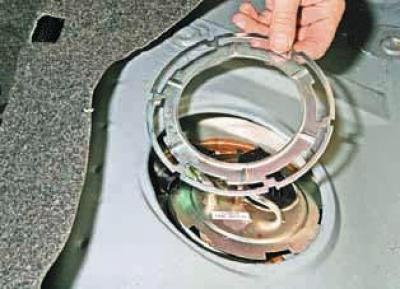
We remove the fuel module from the fuel tank opening.
The connection between the fuel module cover and the tank opening flange is sealed with a rubber ring.
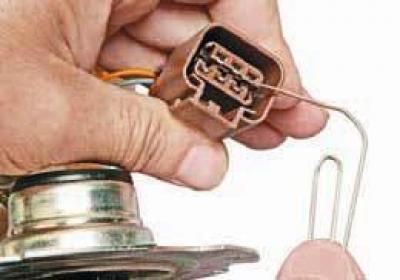
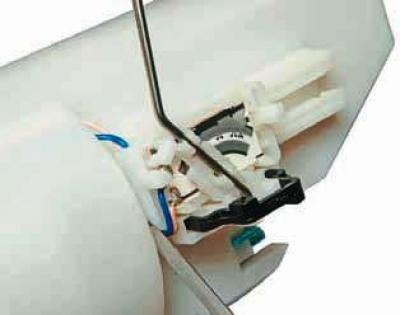
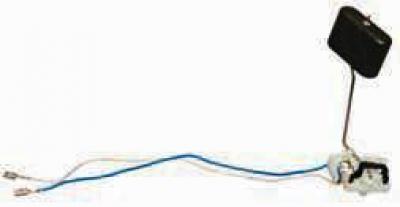
To replace the fuel gauge sensor and fuel reserve indicator lamp resistor…
...by pressing the lock of the wiring harness connector, we disconnect the connector from the fuel module cover connector.
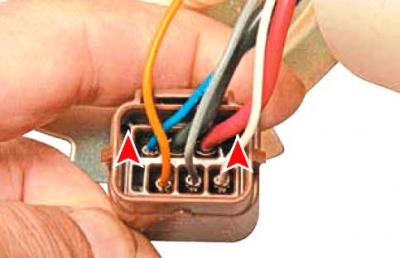
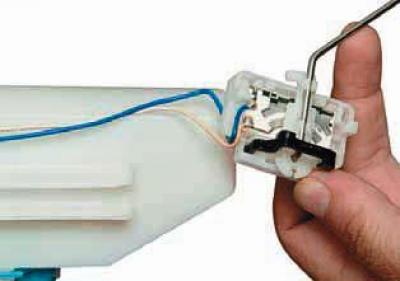
To remove the sensor and resistor, you need to remove the ends of their wires from the wiring harness block (the sensor has blue and white wires, and the resistor has yellow and gray wires).
We mark the location of the wires in the block.
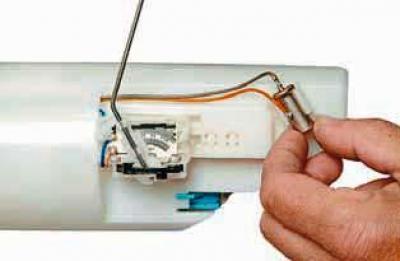
Through two holes of the shoe (shown by the arrow) we press the awl on the protrusions of the wire end retainer one by one…
…and using pliers we remove the wire end retainer from the block.
Using an awl or a paper clip wire, we press down the tongue of the block that holds the tip of the desired wire..
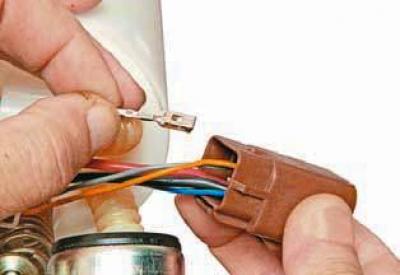
…and remove the wire tip from the block.
We remove the tips of the other wires from the block in the same way.
To replace the fuel reserve indicator lamp resistor, remove it from the retainer..
…and remove the resistor by pulling its two wires through the hole in the module body.
To remove the fuel level indicator sensor…
...using a slotted screwdriver, we remove the sensor and resistor retainer.
Using a screwdriver, pry up the sensor..
…we move it along the guides of the module body…
…and remove the fuel level indicator sensor, leading its wires through the hole in the module body.
We assemble and install the fuel module in the reverse order.
If the module cover sealing ring fails, replace it with a new one.
When installing the fuel module into the tank, align the cutout in the fuel module cover with the tongue on the flange of the tank opening.
Before closing the hatch cover in the floor of the body under the rear seat, it is necessary to check the tightness of the fuel module connections.
To do this, connect the wire terminal to the negative terminal of the battery and turn on the ignition.