ChevyMan.ru
Mazda Mitsubishi Toyota Land Rover Honda Kia Nissan
English Русский
Български
Беларускі
Український
Српски
Hrvatski
Română
Polski
Slovenský
Magyar
|
Articles | Sitemap | Contacts |


Home   Aveo   Captiva   Cruze   Lacetti   Lanos   Niva   Tahoe   Others  
Cruze 1 (2008-2016)
  • Home
  • Cruze
  • J300 (2008-2016)
  • Power unit
  • Supply system
  • Removal, repair and installation of the fuel module

Removal, repair and installation of the fuel module (Chevrolet Cruze J300)

            0

If the engine power drops, there is increased noise, or periodic whining sounds are heard when the fuel pump is running, then most likely the fuel pump has failed.

Check the fuel system pressure (see "Checking the pressure in the engine fuel system").


If the fuel pump fails, the fuel module is replaced as an assembly.

This subsection shows the process of removing the fuel module followed by removal of the fuel level sensor and fuel pressure regulator.

You will need: a flat-blade screwdriver, a container for draining fuel from the fuel pump module, a hammer, and a 14 mm wrench.

1. Reduce the pressure in the fuel system (see "Reducing pressure in the engine fuel system").

2. Disconnect the wire from the negative terminal of the battery.

3. Remove the fuel tank (see "Replacing the fuel tank").
3. Remove the fuel tank (see «Replacing the fuel tank»).


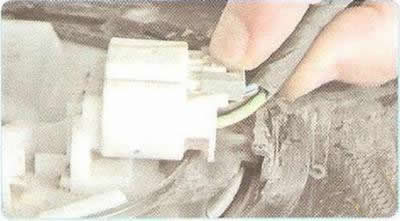
4. Slide the wiring harness connector retainer...
4. Slide the wiring harness connector retainer...


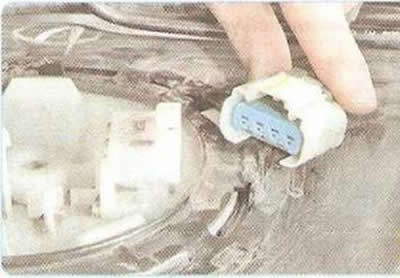
5. ...and disconnect the connector from the fuel pump module.
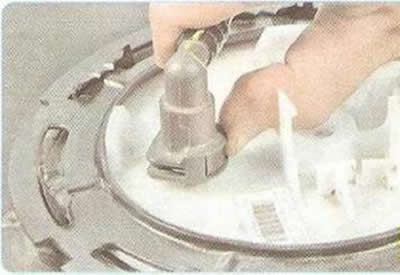


5. ...and disconnect the connector from the fuel pump module.


6. By squeezing the plastic retainer...
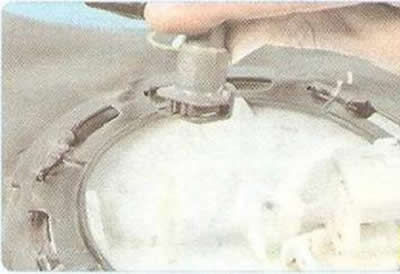
6. By squeezing the plastic retainer...


7. ...disconnect the high-pressure fuel line tip from the module fitting.
7. ...disconnect the high-pressure fuel line tip from the module fitting.


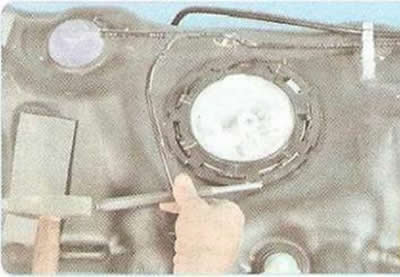
8. Turn the fuel pump module retaining ring counterclockwise until the grooves in the ring align with the protrusions on the fuel tank flange...
8. Turn the fuel pump module retaining ring counterclockwise until the grooves in the ring align…


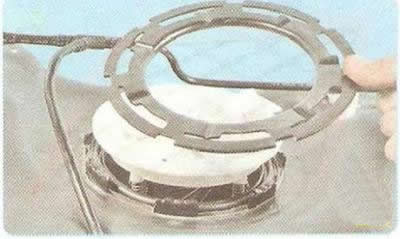
9. ...and remove the ring.


9. ...and remove the ring.


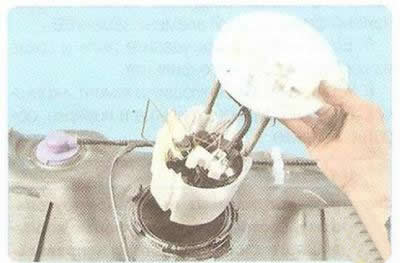
10. Carefully remove the module and drain the fuel from it into a previously prepared container.

10. Carefully remove the module and drain the fuel from it into a previously prepared container.
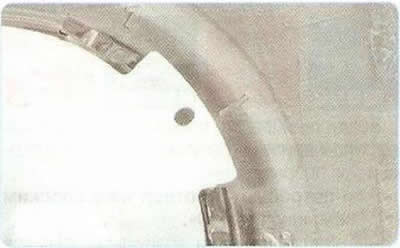

To ensure correct installation of the fuel module, a mark is applied to the fuel tank, which must align with the hole in the fuel module cover during reassembly.

To ensure correct installation of the fuel module, a mark is applied to the fuel tank, which must…


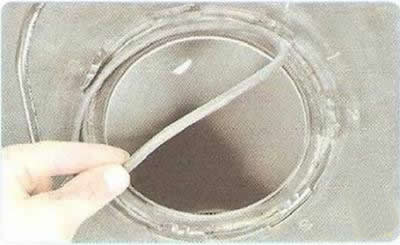
11. Remove the sealing ring and inspect it. Be sure to replace the ring if it is torn or too compressed.


11. Remove the sealing ring and inspect it. Be sure to replace the ring if it is torn or too…


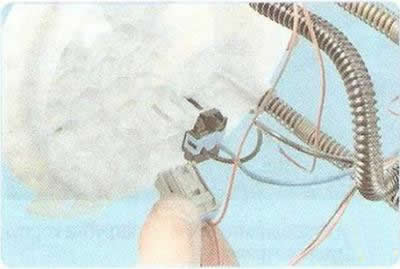
12. Press the lock and disconnect the fuel level sensor wiring connector from the fuel module connector.
12. Press the lock and disconnect the fuel level sensor wiring connector from the fuel module…


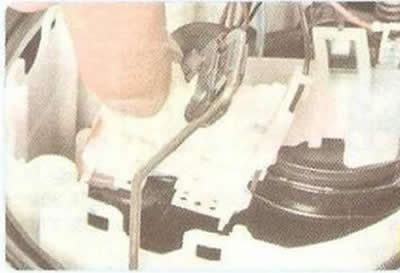
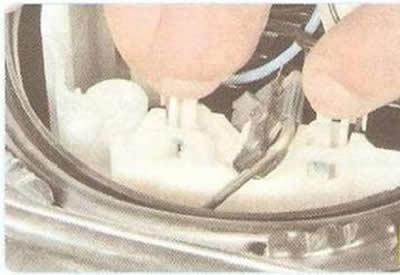
13. Having pressed the clamps...

13. Having pressed the clamps...


14. ... remove the fuel level sensor from the fuel module cup holder.
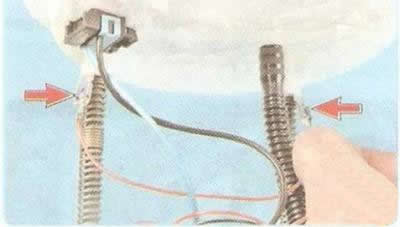
14. ... remove the fuel level sensor from the fuel module cup holder.


15, Disconnect the fuel level sensor wire ends from the connectors on the guides...
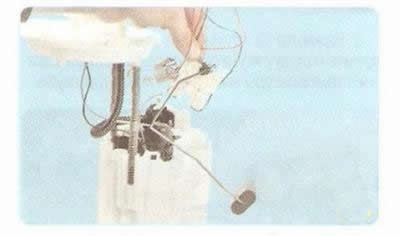


15, Disconnect the fuel level sensor wire ends from the connectors on the guides...


16. ...and remove the fuel level sensor.
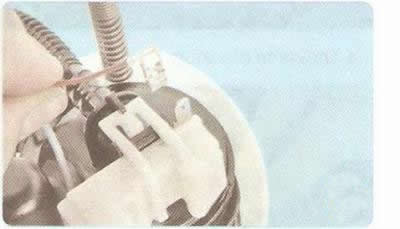
16. ...and remove the fuel level sensor.


17. Disconnect the wire tip from the fuel pressure regulator.
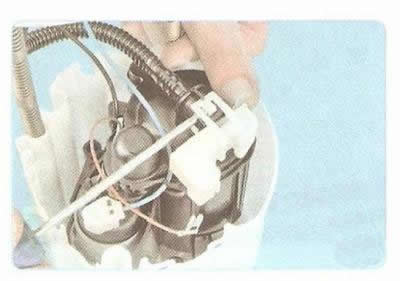
17. Disconnect the wire tip from the fuel pressure regulator.


18. Use a screwdriver to pry up the retainer...
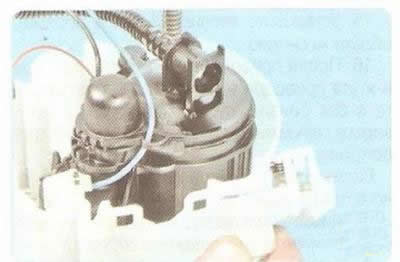
18. Use a screwdriver to pry up the retainer...


19. ...and remove the fuel pressure regulator.
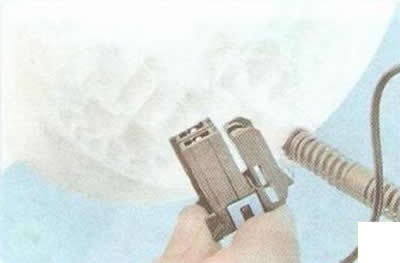


19. ...and remove the fuel pressure regulator.


20. Press the lock and disconnect the fuel pump wiring connector from the fuel module connector.

21. Assemble and install the fuel module in the reverse order of disassembly and removal.

22. After installing the fuel module, start the engine and check the tightness of the fuel line connection to the module.

The original article is on the website: ChevyMan

The article was checked: Vladimir Romannikov
This article is available at russian, bulgarian, belarusian, ukrainian, serbian, croatian, romanian, polish, slovak, hungarian

Share information:

Previous articles
Cruze 1: Supply system
Next articles

Removal and installation the air filter housing
Replacing the air filter element
Checking the tightness of fuel lines
Decreased pressure in the engine fuel system
Checking the pressure in the fuel system
Replacing the fuel tank and its filler pipe
Removal and installation the fuel rail
Removal, inspection and installation of injectors
Removal and installation the throttle assembly
Removal and installation the accelerator pedal


See similar articles on the topic of Chevrolet cars:
Removal and installation the fuel module Chevrolet Aveo T300 (2012-2018)
Fuel level indicator Chevrolet Captiva 1 (2006-2018)
Removal and disassembling the fuel module Chevrolet Lacetti 1 (2002-2009)
Removal and disassembling the fuel module Chevrolet Lanos T150 (2002-2009)
Fuel tank cap Chevrolet Niva 1 (2002-2016)
Fuel Tank Repair — General Information Chevrolet Tahoe 1 (1992-2000)
Fuel tank cleaning and repair Chevrolet Lumina 1 (1989-1994)
Link in different formats to this page


Visitor comments

No comments yet


How much will 17 + 47 =


Cruze 1 (2008-2016) 
  • General information
  • User manual
  • Troubleshooting
  • Maintenance
  • Power unit
  • Engine repair
  • Lubrication system
  • Cooling system
  • Exhaust system
  • Supply system
  • Control system
  • Transmission
  • Clutch
  • Car gearbox
  • Front wheel drives
  • Chassis
  • Front suspension
  • Rear suspension
  • Steering
  • Brake system
  • Body
  • Exterior (external elements)
  • Interior (internal elements)
  • Doors, covers and windows
  • Heating and air conditioning
  • Security systems
  • Electrical equipment
  • Equipment and devices
  • Power devices
  • Lighting and signaling
  • Electrical circuits


ChevyMan.ru © 2017-2026 · Mobile version · Feedback · Site search · Interesting to read · Sitemap: EN BG BY UA RS HR RO PL SK HU

Aveo 2003-2008 · Aveo 2006-2011 · Aveo 2012-2018 · Captiva 2006-2018 · Cruze 2008-2016 · Lacetti 2002-2009 · Lanos 2002-2009 · Niva 2002-2016 · Tahoe 1992-2000 · Tahoe 2000-2014 · Lumina 1 1989-1994 · Trailblazer 1 2001-2008 · Orlando 1 2010-2018 ·
🛡️ For your security and to improve our service, this site uses cookies. You can disable them in your browser.