
Cleaning and washing of the body
During operation, the car constantly gets dirty. Road dirt, dust and other contaminants settle on the body. The paintwork becomes dull and untidy. In addition, dirt penetrates into microcracks in the paintwork and leads to further destruction of the paint and the formation of corrosion centers. To a greater extent, this applies to the impact of "environmentally safe" anti-icing reagents, which are generously used to treat roads in the winter. Therefore, the body must be cleaned periodically.
In cities, you can usually only wash your car in places specially designated for this purpose – car washes. There are several types of car washes: manual, contactless and mechanical. All other things being equal, it is probably worth choosing a contactless car wash or, alternatively, a large mechanical car wash. However, it should be remembered that the quality of a car wash depends to a large extent on the qualifications of the staff and the quality of the detergents used.
In winter, before going to a car wash, ask if it is possible to blow out the locks and door seals with compressed air. After blowing out the locks, treat them with penetrating lubricant.
But in the summer, if possible, why not wash your car yourself? To wash your car yourself, you will need the following:
- bucket with a capacity of 8-10 l;
- a hose connected to the water supply system (if this is not possible, then another bucket with a capacity of 8-10 liters);
- big sponge (there are many different types of car sponges available on the market, choose the one that suits your taste and budget);
- special car shampoo;
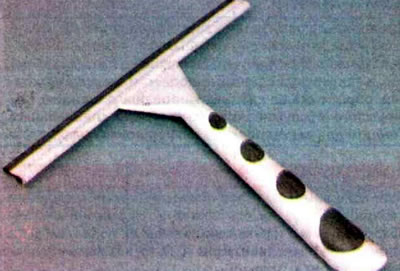
- a small towel, rag or chamois (to remove water from the surface of the car after washing). For initial water removal, you can additionally purchase a special rubber scraper.
We carry out the work in the following order:
Warning! Do not wash your car when it is very hot or in direct sunlight.
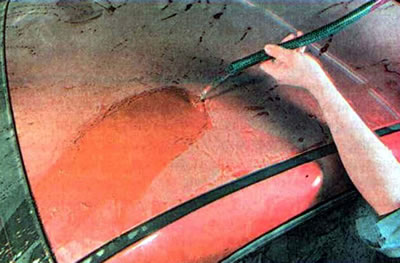
1. Rinse the car with clean water from a hose or bucket, starting from the roof.
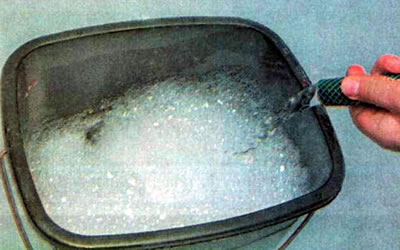
2. Pour shampoo into the bucket (in the quantity specified in the instructions attached to it).
3. Pour water into the bucket, preferably under pressure, to obtain abundant foam.
4. After dipping the sponge into the bucket, soak up as much water as possible and, starting from the roof of the car, wash off the dirt without applying much effort.

5. When the liquid absorbed by the sponge is finished, rinse the sponge in clean water.
6. Repeat operations p. 3-4, gradually descending from the roof of the car to the thresholds.
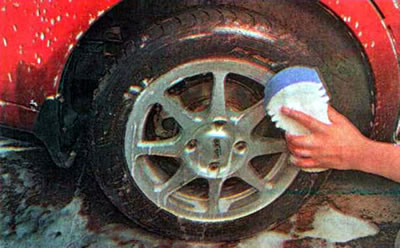
7. Lastly, we wash the car wheels. After this, it is advisable to treat the tire and disk with a special compound.
8. After the entire body has been washed, rinse the body again with clean water from a hose or bucket, starting from the roof of the car. In this case, you need to try to completely wash off the remains of the shampoo along with the soaked dirt.
9. After rinsing, use a small towel, rag or chamois to wipe away the water on the car body. In this case, it is necessary not to rub the water over the surface of the body, but to drive it off from top to bottom. This must be done quickly enough before the water dries and leaves streaks on the body.
Recommendation. To initially remove water, you can use a special rubber scraper.
That's the whole simple process. It doesn't always work out well the first time. But don't be upset: after 2-3 washes the result will be quite comparable to the results of most car washes.
Recommendation. After washing the car body, it is advisable to wash the car windows, as streaks usually remain on the windows.
Care of interior elements
The car interior also needs regular cleaning. You only see the body when you get in and out of the car, but you spend much more time in the cabin. In addition, a dirty and untidy interior may not leave the best impression of the car owner.
The dirtiest interior elements are the mats. If you have rubber mats in your car, they need to be washed periodically. It is better to combine the procedure with washing the car body, then they can be washed with shampoo. Just be sure to dry the mats before placing them on the floor of your car.
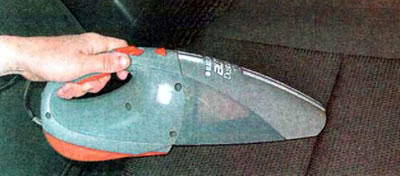
If you use pile rugs, they must be vacuumed and, in case of heavy contamination, cleaned with special upholstery cleaning products, as well as floor coverings, ceiling upholstery and seats. Before using the cleaner, it is recommended to vacuum the pile and fabric surfaces of the interior. We carry out cleaning in the following sequence.
1. Thoroughly vacuum the front seats of the car, paying special attention to the joints and seams of the upholstery.
2. Clean the back seat in the same way.
3. Remove the rubber mats and clean the floor covering in the driver's and all passenger's footwells.
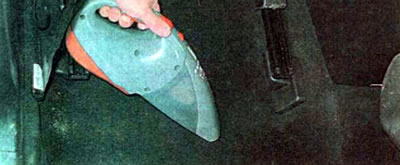
4. Vacuum the upholstery of the luggage compartment.
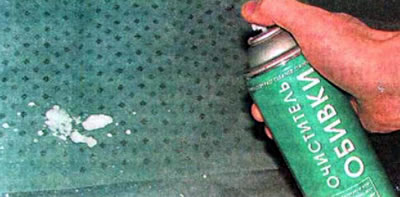
5. Upholstery, especially light-colored ones, quickly gets dirty and greasy. Moreover, various rugs, capes or even covers do not help. At the same time, you can't send a dirty chair or door to the dry cleaner. The problem can be solved with special aerosol formulations that create a rich foam on the surface being cleaned. The foam dissolves the dirt and pushes it out of the fabric to the surface. At the same time, the seat does not absorb moisture, unless, of course, you overdo it. And then you can hit the road almost immediately after putting the interior in order.
These special cleaning compounds transform the appearance of the upholstery and also have an antistatic effect, which allows the interior parts to remain clean longer. The drug can also be useful in everyday life.
Before using the cleaner, read the instructions on the label.
6. After 2-3 minutes, remove the remaining foam using a soft cloth or brush (in the presence of serious contamination).
Warning! When cleaning interior elements covered with fabric (for example, ceiling upholstery), avoid over-wetting it as this may cause the fabric to peel off from the panel. Chemical cleaning of the interior, offered by specialized workshops, can also have the same effect, so before placing an order, find out about the workshop's liability and warranty in the event of such defects.
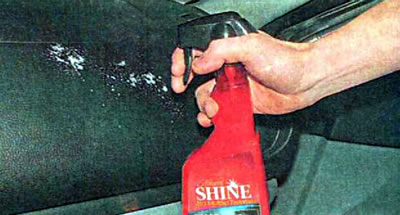
7. To care for plastic interior parts and the instrument panel, use special cleaners and polishes for plastic.
The polish shown in the photo is a cream with a light, pleasant smell. It easily removes various contaminants from plastic and also forms a thin protective film on the surface, restoring the color and texture of the panels and giving them the appearance as if the car had just rolled off the assembly line. The film also has antistatic and anti-fog properties. The product can be used to clean transparent plastic and will not leave any streaks on it.
Before using the cleaner, read the instructions on the label.
8. After waiting 2-3 minutes, polish the panels with a soft cloth.
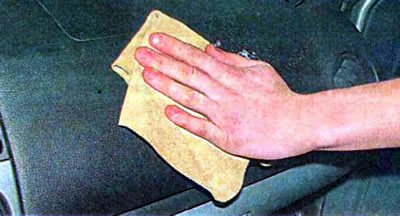
After cleaning the plastic parts, we apply a special polish to them.
Note: Usually, in addition to the antistatic effect, plastic polishes, depending on the manufacturer, provide two opposite effects: they give the surface a glossy shine or give it a noble matte finish. Therefore, before purchasing, read the description of the drug and choose the one that best suits your preferences.
[The source of the article is available on the website: «chevyman.ru»]