
Contents: Central console ↧ Upper console ↧
Warning: The vehicles described in this manual are equipped with a Supplemental Restraint System (SRS), also known as an air bag system. Before carrying out work in the area where the elements of this system are located, it is necessary to disconnect its power supply, since accidental deployment of the airbags can result in serious injury (see chapter 12).
Central console
1. Place chocks under the wheels to prevent the vehicle from rolling. It should be noted that during this procedure you will have to move the selector out of the Park position and release the parking brake.
2. Remove the screw that secures the automatic transmission selector lever handle (see illustration). Squeeze the sides of the selector lever boot at the base to release the clips, then remove the handle and boot.
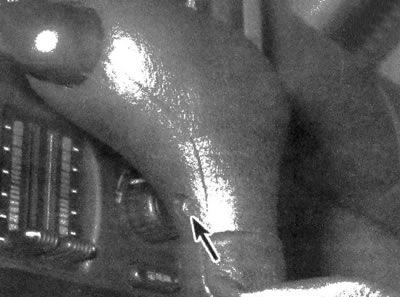
23.2. Unscrew the selector lever screw
3. When performing the procedure on an Oldsmobile, you must press the selector lever handle button, simultaneously press the lock release lug forward and move the selector lever back until it stops. Remove the screws and fasteners that secure the console trim panel, then remove the panel.
4. On other models, you will need to open the console cover and remove the six screws that secure the accessory box to the console (see illustration). Lift and remove the drawer
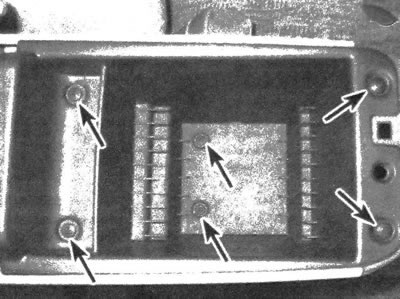
23.4. Unscrew the screws located inside and remove the accessory box
5. Remove the console mounting screws (see illustration).
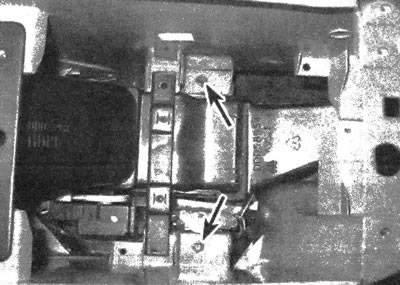
23.5. Remove the console mounting screws
6. Raise the parking brake lever all the way.
7. When performing this procedure on an Oldsmobile, you will need to remove the two console to instrument cluster mounting hardware located at the front of the console.
8. Lift and move the console back to access the electrical connectors located underneath. Disconnect the connectors, lower the parking brake lever to half its travel and remove the console from the vehicle.
9. Installation is carried out in the reverse order of removal.
Upper console
10. When performing the procedure on the front section of the upper console, it is necessary to unscrew the two screws located at the rear. Disconnect the two fasteners located at the front, lower the console, disconnect the electrical connectors and remove the console from the vehicle.
11. When performing the procedure on the rear section of the upper console, you must unscrew the four screws that secure it. Lower the console section and remove it from the vehicle.
12. Installation is carried out in the reverse order of removal.