
Warning: The vehicles described in this manual are equipped with a Supplemental Restraint System (SRS), also known as an air bag system. Before carrying out work in the area where the elements of this system are located, it is necessary to disconnect its power supply, since accidental deployment of the airbags can result in serious injury (see chapter 12).
Caution: To avoid damaging the caps, follow this procedure exactly as described.
1. Remove the steering wheel (see chapter 10). Pull the steering wheel tilt lever out of the column.
2. From the driver's seat, pull down the left edge of the front cover (if its presence is provided for by the design), to release the left retainer. Do not pull the cover more than necessary to release the retainer, and do not attempt to remove it at this stage of the procedure.
3. To detach the right latch, perform the operation on the right side of the front cover as described in item. 2.
4. While operating from the left side, carefully turn the front cover to the right to release the four remaining clips.
5. If there are two screws on the back of the lower steering column cover, remove them.
6. Carefully detach the steering column cover from the upper cover and remove the lower cover (see illustration).
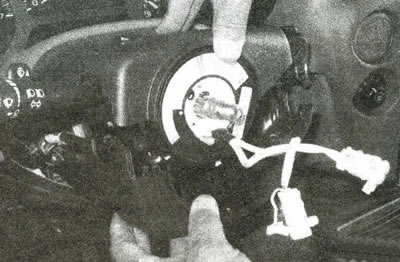
25.6. Separate the bottom cover from the top cover
7. If there is a screw on top of the top trim cover, remove it.
8. Remove the top and front covers from the speaker.
9. Installation is carried out in the reverse order of removal. If the fasteners were damaged during removal, install screws in their place.
(The article was borrowed from the website: «chevyman»)