
Warning: The vehicles described in this manual are equipped with a Supplemental Restraint System (SRS), also known as an air bag system. Before carrying out work in the area where the elements of this system are located, it is necessary to disconnect its power supply, since accidental deployment of the airbags can result in serious injury (see chapter 12).
Front anatomical seat (all models)
1. Disconnect the trim covers from the fasteners and remove the mounting bolts and nuts. Disconnect the electrical connector by disconnecting the wiring harness from its frame, remove the seat.
Second row seat
2. Fold the right middle seat forward.
Remove the cover from the Data Exchange Unit (VHIM), then disconnect the holder and remove the module from the bracket. Disconnect the electrical connectors and set the VHIM aside.
3. Raise the seat (see illustration).
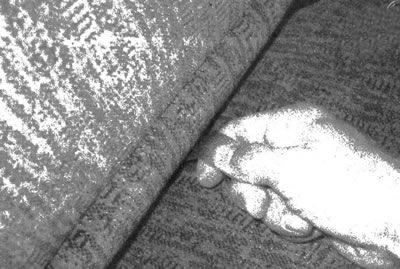
27.3. Pull the tape and lift the seat
4. Unscrew the mounting nuts (see illustration).
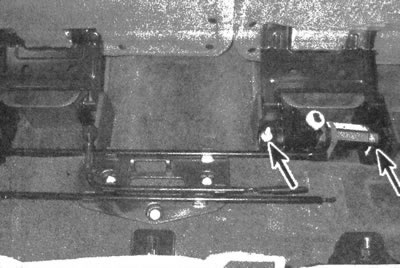
27.4. Fold the second row seat forward and unscrew the fastening nuts (marked with arrows)
5. Remove the assembled seat.
Note: This operation must be performed with the assistance of an assistant.
6. Installation is carried out in the reverse order of removal.
Third row seat
7. Unscrew the seat mounting nuts. Disconnect the seat belt anchors from the mounting studs.
8. Unscrew the mounting bolts. Remove the assembled seat.
Note: This operation must be performed with the assistance of an assistant.
9. Installation is carried out in the reverse order of removal.
(The text of the article was obtained from the website: CHEVYMAN.ru)