
Contents: Left lower soundproofing panel ↧ Right lower soundproofing panel ↧ Central soundproofing panel… ↧ A buffer located at knee level ↧ Left additional trim panel ↧ Central additional trim panel… ↧ Instrument cluster frame ↧ Glove box ↧
Warning: The vehicles described in this manual are equipped with a Supplemental Restraint System (SRS), also known as an air bag system. Before carrying out work in the area where the elements of this system are located, it is necessary to disconnect its power supply, since accidental deployment of the airbags can result in serious injury (see chapter 12).
Left lower soundproofing panel
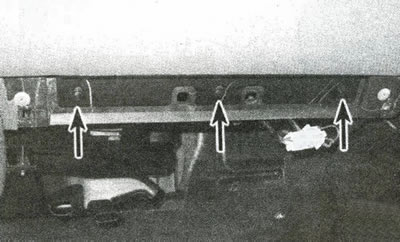
To access the components located on the left under the instrument panel, remove the two screws, release the retainer and lower the soundproofing panel (see illustration).
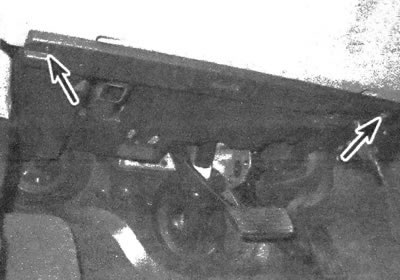
24.1. Remove the screws that secure the lower left soundproofing panel
2. Disconnect the electrical components and wiring harness located on top and remove the panel from the vehicle.
Right lower soundproofing panel
3. To access the components located on the right under the instrument panel, remove the screws, disconnect the electrical connector clamp (if its presence is provided for by the design) and remove the lower soundproofing panel from the car (see illustration).
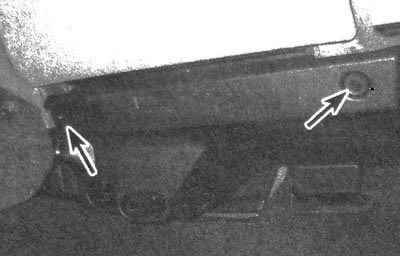
24.3. Remove the screws securing the right lower soundproofing panel
Central soundproofing panel (gMC/Chevrolet cars)
4. Remove the center console (see subsection 23).
5. Remove the soundproofing panel mounting screws (see illustration), then remove the sound insulation from the instrument panel.
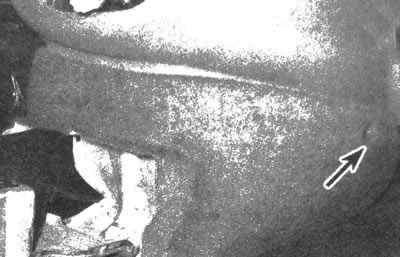
24.5. Remove the screws (shown on the right side) which secure the central lower trim of the instrument panel
6. Installation is carried out in the reverse order of removal.
A buffer located at knee level
7. Remove the left soundproofing panel (see item 1).
8. Remove the screws and detach the retainer, then remove the bumper trim from the instrument panel.
9. If it is necessary to remove the reinforcement panel, unscrew the four nuts and remove the buffer (see illustration).
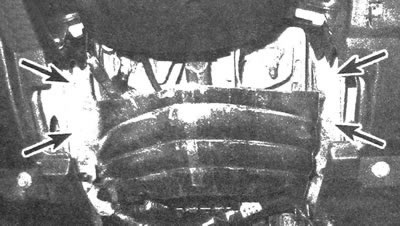
24.9. Location of the nuts for fastening the buffer located at knee level
10. Installation is carried out in the reverse order of removal.
Left additional trim panel
11. Remove the left soundproofing panel and the knee-level bumper trim.
12. Unscrew the nuts and disconnect the clips, then remove the trim panel.
Central additional trim panel (gMC/Oldsmobile car)
13. Remove the center console and (if necessary) central soundproofing panel (see above).
14. Remove the two screws located at the base, then release the clips, starting from the base of the panel and working your way up. Disconnect the electrical connectors and remove the panel from the vehicle.
15. Installation is carried out in the reverse order of removal.
Instrument cluster frame
16. When performing the procedure on a vehicle with a folding steering column, it is necessary to tilt the steering wheel down as much as possible.
17. Remove the left soundproofing panel (see above).
18. Remove the screws and the instrument panel frame (see illustration).
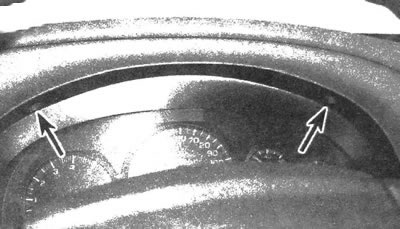
24.18. Instrument panel frame screws
19. Installation is carried out in the reverse order of removal.
Glove box
20. Remove the lower right soundproofing panel (see item 3).
21. Remove the three screws located along the base of the glove box and remove it from the dashboard (see illustration).
24.21. Glove box door mounting screws
22. Installation is carried out in the reverse order of removal.