
2. Inspect the shock absorber for fluid leaks, dents, cracks, or other visible signs of damage. Inspect the spring for chips or cracks in the coating (such defects appear when the spring is exposed to corrosion). Inspect the spring seats for hardening and deformation. Before disassembling the shock absorber to replace its parts, find out about the availability of spare parts, and also inquire about the cost of the restored unit.
Warning: Before disassembling the front suspension strut, it is necessary to install a device to lock the spring in a compressed state. Do not attempt to perform the procedure using any other method. A sudden release of the spring may cause damage to the vehicle and injury. spring compressor, following the accompanying instructions. After removing the spring with the compressor installed, place it in an isolated, safe place.
3. Remove the tie bolt that secures the earring to the shock absorber (see illustration). Drive a chisel or screwdriver into the gap to slightly spread the earring. Remove the earring from the shock absorber.
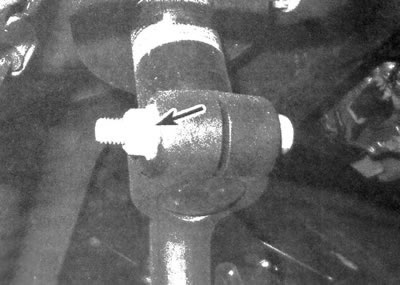
3.3. Unscrew the nut and remove the tension bolt from the shackle, then slightly wedge the shackle using a chisel or a large screwdriver, inserting the tool into the gap
4. Install the device in accordance with the accompanying instructions (which is freely available and can also be rented) and compress the spring with it so that the shock absorber is unloaded (see illustration).
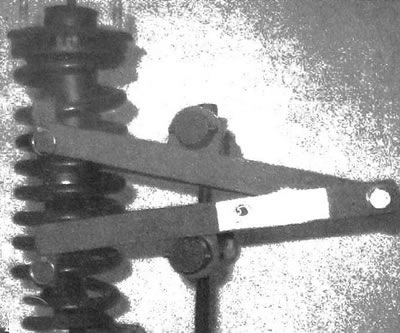
3.4. Install the spring compressor on the shock absorber strut
Caution: When tightening the compressor, be careful not to damage the anti-corrosion coating of the spring.
5. Unscrew the nut located on top of the shock absorber (see illustration).
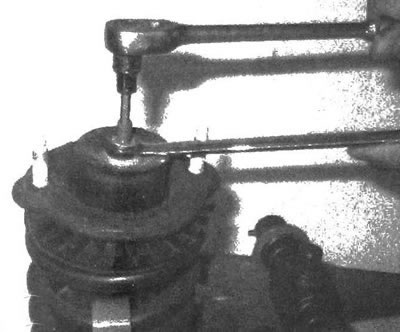
3.5. Having compressed the spring, unscrew the nut located on top of the shock absorber strut (secure the shock absorber rod by inserting a hex key into it)
6. Remove the top mounting plate. spring and bottom plate (see illustrations).

3.6a. Remove the top plate, marking its original location on the end of the spring...
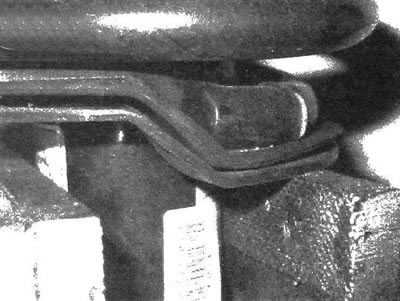
3.6b...then remove the spring from the bottom plate, also noting the original location of its end in the plate
7. Assemble the shock absorber in the reverse order of disassembly. Place the nut on the top end and tighten it to the required torque.
8. Loosen the compressor and remove it from the spring.
9. Install the earring into the base of the shock absorber strut. Install the tie bolt together with the nut and tighten the fastener to the required torque.
10. Install the rack on the car (see subsection 2).
Original version of the article on the website: ChevyMan