
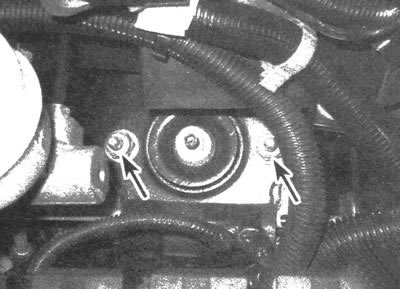
2.1. Unscrew the nuts securing the upper end of the shock absorber to the car body
2. Loosen the wheel nuts, raise the front of the vehicle and place vertical supports. Remove the wheel.
3. Support the outer end of the lower control arm with a floor jack (the shock absorber serves as the lower limiter of the front suspension). The jack must remain in this position throughout the procedure.
4. Unscrew the nut that secures the shock absorber earring to the suspension arm, then pull the earring off the arm stud. using a two-jaw puller (see illustrations)

2.4a. Unscrew the nut that secures the shock absorber earring to the suspension arm...
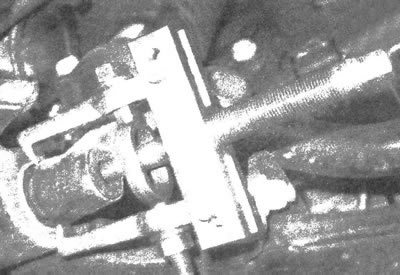
2.4b...then, using a small puller, pull the earring off the stud
5. Lower the shock absorber and remove it from under the car
6. Install the shock absorber on the car as follows. so that the upper studs enter the upper mounting holes, and also pull the shock absorber earring onto the suspension arm stud.
7. Tighten the upper and lower nuts to the required torques.
8. Install the wheels and nuts, lower the vehicle onto a supporting surface and tighten the wheel nuts to the torque specified in specifications of chapter 1.