
Contents: Removal ↧ Installation ↧
Removal
1. Loosen the wheel nuts, raise the front of the vehicle and install vertical supports. Remove the wheel. Place a floor jack under the lower control arm where the ball joint is located. Raise the jack slightly to relieve the upper control arm.
Warning: The jack must remain in this position throughout the entire procedure.
2. Disconnect the wheel speed sensor wire from the lever (see illustration).
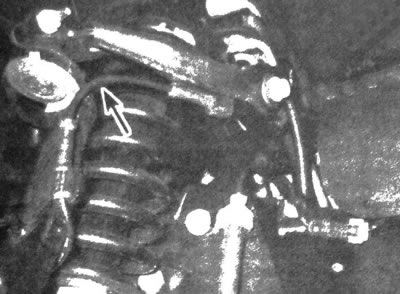
5.2. Disconnect the wheel sensor wire from the suspension arm
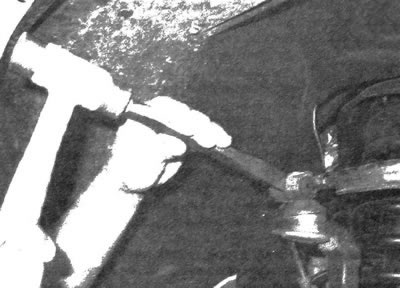
3. Loosen the nut of the ball joint clamp bolt and remove the bolt (see illustration).

5.3. Unscrew the nut and remove the ball joint clamp bolt
4. Disconnect the upper suspension arm from the steering knuckle. If this cannot be done immediately, drive a chisel into the gap in the lever to slightly wedge it (see illustration).
5.4. Drive a chisel into the gap of the suspension arm to wedge it slightly
5. Unscrew the upper control arm pivot bolts and remove it (see illustration).
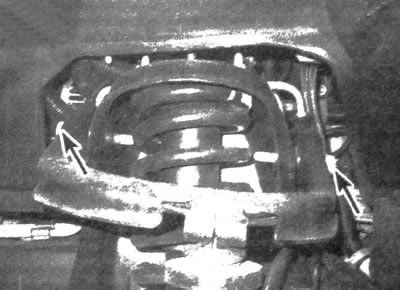
5.5. Remove the suspension arm pivot bolts
Installation
6. Installation is carried out in the reverse order of removal. Tighten the control arm pivot bolts and the ball joint pinch bolt and nut to the specified torques. Tighten the wheel nuts to the torque value given in specifications of chapter 1.
7. After completing the described procedure, check the compliance with the norm and, if necessary, adjust the front wheel alignment angles.
The text of the article was obtained from the website: «chevyman.ru»