
ChevyMan.ru
Mazda Mitsubishi Toyota Land Rover Honda Kia Nissan
English Русский
Български
Беларускі
Український
Српски
Hrvatski
Română
Polski
Slovenský
Magyar
|
Articles | Sitemap | Contacts |


Home   Aveo   Captiva   Cruze   Lacetti   Lanos   Niva   Tahoe   Others  
Orlando 1 (2010-2018) Trailblazer 1 (2001-2008, petrol) Lumina 1 (1989-1994)
  • Home
  • Chevrolet
  • Trailblazer 1
  • General information
  • User manual
  • Ceiling and roof

Ceiling and roof (Chevrolet Trailblazer 1)

            0

Contents: Ceiling console (additional… ↧ Sun visors ↧ Roof ventilation hatch (additional… ↧ Roof rack (additional equipment) ↧

Ceiling console (additional equipment)


1. The front overhead console may contain reading lamps and switches. To turn the lamp on or off, press its diffuser.

Sunroof Ventilation Switch (additional equipment)


2. If your vehicle is equipped with a sunroof, see the Sunroof subsection below.

Sun visors


Sliding sun visors


3. To protect against glare from the sun's rays, tilt the sun visor downwards or to the side.

If necessary, you can also move the visor along the guide.

Sun visors with extensions


4. To protect against glare from the sun's rays, tilt the sun visor down or to the side.

Your car's sun visors may have extenders that can be used to provide more effective protection from direct sunlight.

Toilet mirrors (additional equipment)


5. Toilet mirrors are located on the sun visors. If your vehicle is equipped with illuminated vanity mirrors, the light will come on when the mirror cover is opened and go out when it is closed.

Roof ventilation hatch (additional equipment)


6. In order to open or close the sunroof, the ignition or auxiliary power save function must be on.
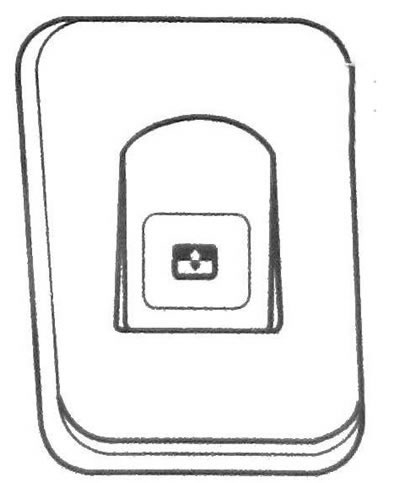
14.6 Ventilation hatch drive switch

14.6 Ventilation hatch drive switch


7. To open the sunroof, press and release the rear of the switch. To close the glass sunroof panel, press the front of the switch. If the glass panel is closed, press the front of the switch to open the rear of the sunroof to the ventilation position. To close the hatch, press the back of the switch (see illustration).

8. If the sunshade is in the closed position, when the sunroof is opened, the sunshade will also open automatically. The sunshade will remain open until you close it manually.

Roof rack (additional equipment)


9. You can use the roof rack to carry cargo. The roof rack includes fixed longitudinal rails, movable crossbars and fastening devices for securing luggage. To move the crossbars, press the levers located at each end of the crossbar. Move the crossbar to the desired position and press the levers to lock it.

Warning: Do not carry any load on the roof rack that exceeds 100 kg. Also, do not carry any load on the roof of your vehicle that is larger than the length or width of the rack, such as surfboards, plywood, etc., because a strong gust of wind may cause you to lose control of your vehicle. The cargo being transported, as well as the luggage rack itself, may be torn off by a strong gust of wind, which may cause an accident to your car or other cars, or damage your car.


Warning:
  • The maximum load weight carried on the roof rack is 100 kg.
  • When transporting large items on the roof rack, ensure that they do not protrude beyond the side and rear edges of the roof rack.
  • Place the load on the roof rack so that it rests on the roof rack and does not touch the roof of the car.
  • Place cargo on the roof rack as close to the front of the vehicle as possible.
  • When placing cargo on the roof rack, make sure that it rests on the side rails and securely fasten the cargo to the rack.
  • To prevent damage or loss of the cargo being transported, periodically check that the roof rack is securely fastened to the vehicle and that the cargo is securely fastened to the roof rack.


10. When not using the roof rack, to reduce wind noise, move one roof rack crossbar as far towards the rear of the vehicle as possible and position the other crossbar above the rear door opening. Do not exceed the maximum load capacity when loading the vehicle.

The article was checked: Vladimir Romannikov
This article is available at russian, bulgarian, belarusian, ukrainian, serbian, croatian, romanian, polish, slovak, hungarian

Share information:

Previous articles
Trailblazer 1: User manual
Next articles

Rear luggage compartment
Doors — mechanical, electrical and programmable automatic locks
Windows — electric windows
Mirrors — external, internal
Multifunctional lever
Accommodation of small luggage
Ashtray and cigarette lighter
Additional electrical equipment power supply system
Battery discharge prevention system
Power Management System


See similar articles on the topic of Chevrolet cars:
Antenna on the roof Chevrolet Aveo T300 (2012-2018)
Roof ventilation hatch Chevrolet Captiva 1 (2006-2018)
Removal and installation roof trim for trim level 55 Chevrolet Niva 1 (2002-2016)
Front of the ceiling panel Chevrolet Tahoe 2 and 3 (2000-2014)
Link in different formats to this page


Visitor comments

No comments yet


How much will 36 + 38 =


Orlando 1 (2010-2018) 
  • General information
  • Introduction to manual
  • User manual
  • Maintenance
  • Troubleshooting
  • Power unit
  • Engine repair
  • Fuel and control system
  • Cooling and lubrication system
  • Ignition system
  • Transmission
  • Clutch
  • Gearbox
  • Drive shafts
  • Chassis
  • Car suspension
  • Steering
  • Brake system
  • Body
  • Exterior (external elements)
  • Doors, locks and windows
  • Electrical equipment
  • Equipment and devices
  • Windscreen wipers
  • Power devices
  • Electrical diagrams


Trailblazer 1 (2001-2008) 
  • General information
  • User manual
  • Troubleshooting
  • Maintenance
  • Power unit
  • Engine in a car
  • Engine overhaul
  • Cooling and heating
  • Fuel and exhaust system
  • Engine electrical equipment
  • Engine control
  • Transmission
  • Automatic gearbox
  • Transfer case
  • Drive shafts and cardan
  • Chassis
  • Brake system
  • Car suspension
  • Steering
  • Body
  • Exterior (external elements)
  • Interior (internal elements)
  • Doors, locks and windows
  • Electrical equipment
  • Equipment and devices
  • Electrical circuits


Lumina 1 (1989-1994) 
  • General information
  • Maintenance
  • Power unit
  • Engine 3.1L V6
  • Engine 3.8L V6
  • Engine overhaul
  • Cooling system
  • Power and exhaust system
  • Fuel injection
  • Engine electrical equipment
  • Reduced exhaust gas toxicity
  • Transmission
  • Automatic gearbox
  • Drive shafts
  • Chassis
  • Brake system
  • Car suspension
  • Steering
  • Body
  • Heating and air conditioning
  • Repair of body elements
  • Doors, covers and windows
  • Interior (internal elements)
  • Electrical equipment
  • Equipment and devices
  • Electrical circuits


ChevyMan.ru © 2017-2026 · Mobile version · Feedback · Site search · Interesting to read · Sitemap: EN BG BY UA RS HR RO PL SK HU

Aveo 2003-2008 · Aveo 2006-2011 · Aveo 2012-2018 · Captiva 2006-2018 · Cruze 2008-2016 · Lacetti 2002-2009 · Lanos 2002-2009 · Niva 2002-2016 · Tahoe 1992-2000 · Tahoe 2000-2014 · Lumina 1 1989-1994 · Trailblazer 1 2001-2008 · Orlando 1 2010-2018 ·
🛡️ For your security and to improve our service, this site uses cookies. You can disable them in your browser.