
Contents: Manual seat adjustment (if available) ↧ Electric seat adjustment (additional… ↧ Adjusting the lumbar support ↧ Electrically heated seats… ↧ Headrests ↧ Back seat (Additional equipment) ↧
Manual seat adjustment (if available)
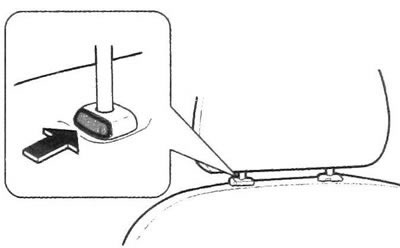
1. Pull up the lever located under the front seat and move the seat to the desired position (see illustration). Release the lever and make sure the seat is securely locked.
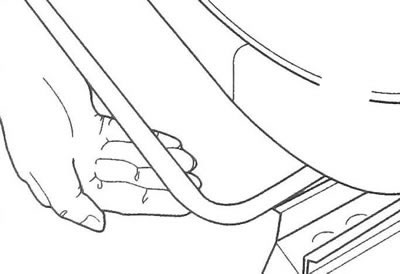
1.1 Pull up the lever located under the front seat, move the seat to the desired position
Manual adjustment of the front seat backrest angle (if available)
2. To adjust the seatback angle, lift the lever and tilt the seatback forward or backward to the desired position (see illustration). Release the lever to lock the seat back in the desired position.
2.2 To adjust the seat back angle, lift the lever and tilt the seat back forward or backward
3. To adjust the seatback to the upright position, pull the lever up and do not apply pressure to the seatback. Pull the seatback forward and back to make sure it is securely latched.
Warning:
- It is prohibited to adjust the position of the driver's seat while the vehicle is moving. The seat may move suddenly, causing you to lose control of the vehicle. If the seat back is not locked, it may tilt forward during an accident or sudden stop. This could result in injury to you or others. Be sure to press down on the seat back to ensure it is locked into place.
- If the seat back is tilted too far back while the vehicle is moving, the passenger sitting in that seat is putting themselves at risk. Even if you fasten your seat belts, they will not be able to perform their protective function if the seat back is reclined too far back.
Electric seat adjustment (additional equipment)
4. The controls for the electric seat adjustment are located on the side surface of the seat cushion (see illustration). By operating the front part of the horizontal switch, the front part of the seat cushion can be raised or lowered. By operating the rear part of the horizontal switch, the rear part of the seat cushion can be raised or lowered.
4.4 Electric seat adjustment controls
5. To raise or lower the entire seat, move the entire switch up or down.
Slide the switch forward or backward to move the seat forward or backward.
Electric front seat backrest tilt adjustment (Additional equipment)
6. Slide the switch forward or backward to adjust the seatback angle (see illustration).
1.6 Slide the switch forward or backward to adjust the seatback angle
Warning: If the seat back is reclined too far back while the vehicle is moving, the passenger in that seat is putting himself or herself at risk. Even if you fasten your seat belts, they will not be able to perform their protective function if the seat back is reclined too far back.
Function of remembering settings(additional equipment)
7. This feature allows two different drivers (driver number 1 or driver number 2) memorize and recall individual driver seat adjustments (including seat back tilt and lumbar support position, if available) and adjustable pedals (additional equipment). The controls are located on the driver's door panel (see illustration).
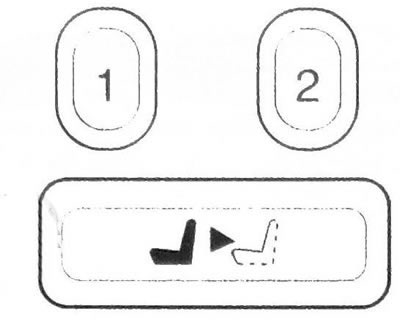
1.7 Function memory buttons
Adjusting the lumbar support
Manual lumbar support adjustment (additional equipment)
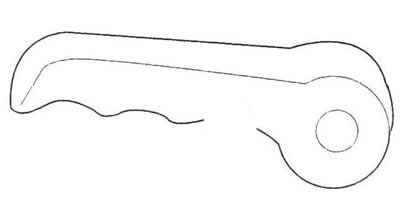
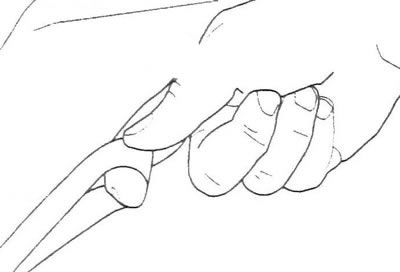
8. To increase or decrease lumbar support, turn the handle located on the outside of the seat (see illustration).
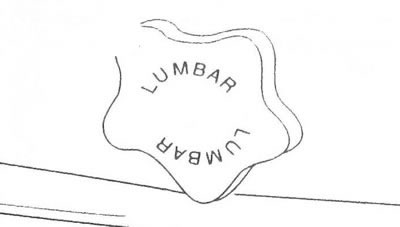
1.8 To increase or decrease lumbar support, turn the handle located on the outside of the seat
Electric lumbar support adjustment (additional equipment)
9. The regulator is located on the side of the seat. To increase lumbar support, slide the adjuster forward; to decrease lumbar support, slide the adjuster back (see illustration).
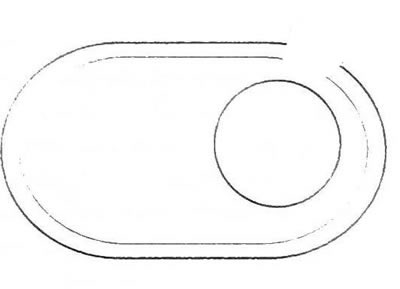
1.9 The electric regulator is located on the side of the seat
Electrically heated seats (additional equipment)
10. Your vehicle may be equipped with this feature. The electric seat heating system only functions when the engine is running.
11. The controls are located on the armrests (see illustration).
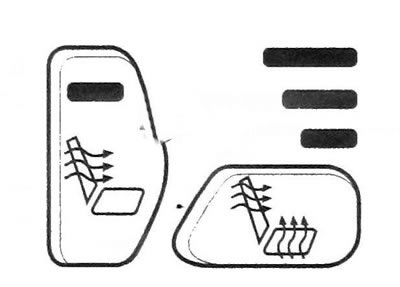
1.11 Seat heating controls
a) The vertical button allows you to turn on the heating of the seat back only.
b) Press the horizontal button if you want to turn on the seat cushion and back heating.
12. By pressing the button repeatedly, you can select high, medium or low heating intensity. The indicators located next to the seat heating symbol will show the selected heating intensity.
a) 3 indicators (high intensity heating)
b) 2 indicators (average heating intensity)
c) 1 indicator (low heating intensity)
13. To turn off the seat heating, press this button again. The seat heating automatically switches off when the ignition is switched off.
Headrests
14. The top of the headrest should be as close to your head as possible. To raise the headrest, pull it up.
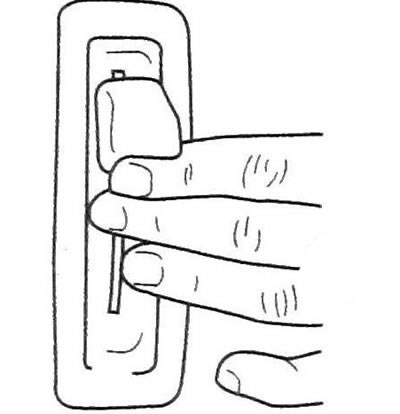
15. When the headrest is raised, it is fixed in this position. To adjust the height of the head restraint, press the release button located on the seat back and move the head restraint up or down (see illustration).
1.15 To adjust the headrest height, press the lock button
Back seat (Additional equipment)
16. Your vehicle may be equipped with a rear seat with a folding backrest, which allows you to increase the volume of the cargo compartment.
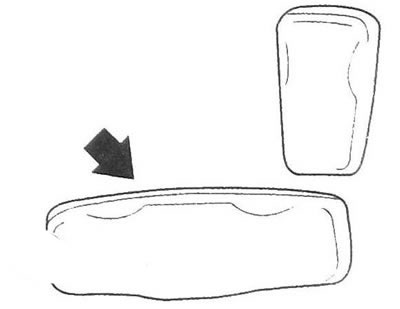
17. To fold the seat cushion, pull the loop to release the seat cushion from the retainer (see illustration), then pull it up and forward.
1.17 To fold the seat cushion, pull the loop
Warning: You may damage the rear seat or seat belts if you start folding
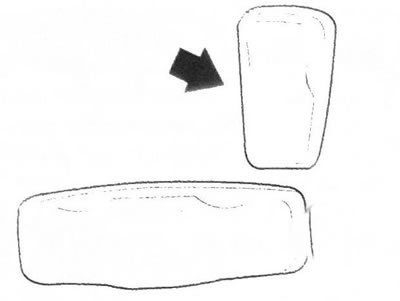
18. The seat back release levers are located on the outer surface of the seat back (see illustration).
1.18 Seat back release levers
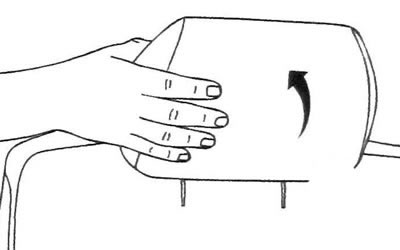
19. To fold the seatback, lift the release lever and fold the seatback forward.
20. When the rear seat back is folded, the headrest is automatically folded.
To return the seat back to its original position, simply lift the seat back and push it back until it locks into place. Move the seat back forward and back to make sure it is securely locked. Return the seat cushion to its original position.
Warning:
- If the seat back is not locked, it may tilt forward during an accident or sudden stop. This could result in injury to you or others. Be sure to press down on the seat back to ensure it is locked into place.
- A seat belt that is twisted, incorrectly fastened or poorly positioned may not provide adequate protection in a crash. After setting the seat back to the upright position, be sure to check that the seat belts are not twisted and are properly routed and secured.
21. To return the folded seat headrest to its original position, grasp it and pull it up until it locks (see illustration). Pull the headrest in different directions to make sure it is securely locked in place.
1.21 To return the folded head restraint to its original position, grasp it and pull it upwards until it locks into place
[The original article can be found on the resource «CHEVYMAN.RU»]