
ChevyMan.ru
Mazda Mitsubishi Toyota Land Rover Honda Kia Nissan
English Русский
Български
Беларускі
Український
Српски
Hrvatski
Română
Polski
Slovenský
Magyar
|
Articles | Sitemap | Contacts |


Home   Aveo   Captiva   Cruze   Lacetti   Lanos   Niva   Tahoe   Others  
Cruze 1 (2008-2016)
  • Home
  • Cruze
  • J300 (2008-2016)
  • Body
  • Security systems
  • Removal and installation of the electronic control unit of the passive safety system

Removal and installation of the electronic control unit of the passive safety system (Chevrolet Cruze J300)

            0

You will need: TORX T20, 10 and 7 keys, a Phillips-head screwdriver.

Warning: After disconnecting the wire from the negative terminal of the battery, you must wait at least 10 seconds, only then can you begin removing the passive safety system control unit.


Disassembling the passive safety system control unit is prohibited.


The control unit must not fall or be exposed to water or oil.


The unit must not be exposed to temperatures above 95°C.


1. Disconnect the wire from the negative terminal of the battery.
1. Disconnect the wire from the negative terminal of the battery.


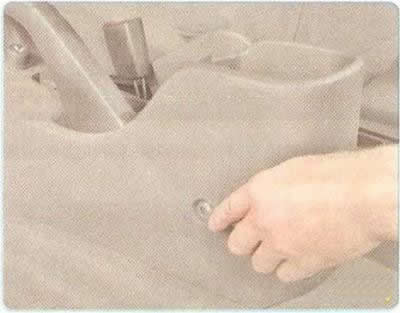
2. Unscrew the two bolts on the left and frame in the rear part of the trim.

Note: The photo shows the screw for the left fastening of the rear part of the floor tunnel trim; the screw for the right fastening is located symmetrically relative to the longitudinal axis of the car and is not visible in the photo.

Note: The photo shows the screw for the left fastening of the rear part of the floor tunnel trim;…


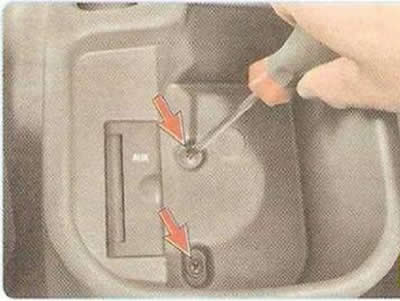
3. Remove the two screws securing the floor tunnel trim to the base of the cup holder.


3. Remove the two screws securing the floor tunnel trim to the base of the cup holder.


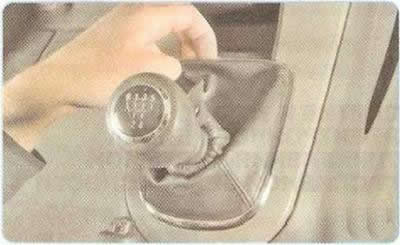
4. Overcoming the resistance of the clamps...
4. Overcoming the resistance of the clamps...


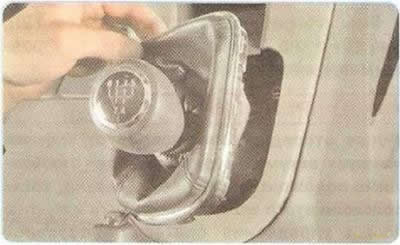
5. ... remove the gearshift lever boot frame from the decorative trim socket of the floor tunnel.
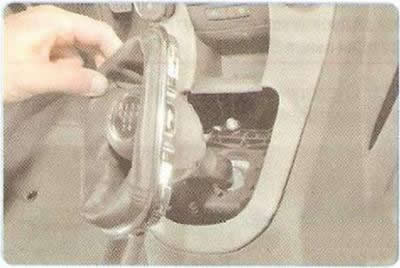
5. ... remove the gearshift lever boot frame from the decorative trim socket of the floor tunnel.


6. Turn the cover inside out and lift it up the lever.
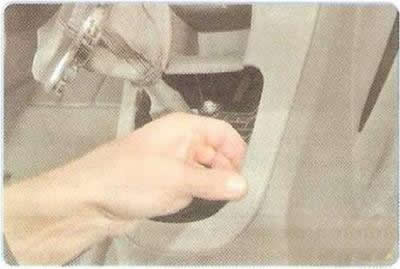
6. Turn the cover inside out and lift it up the lever.


7. Overcoming the resistance of plastic fasteners...
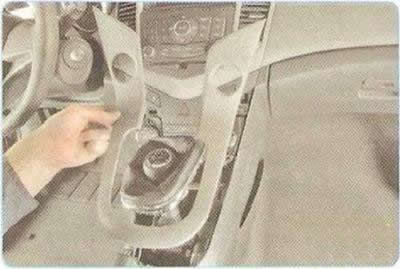


7. Overcoming the resistance of plastic fasteners...


8. ...remove the decorative floor tunnel trim.
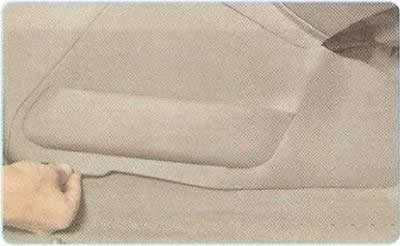
8. ...remove the decorative floor tunnel trim.


9. Overcoming the resistance of the clamps...
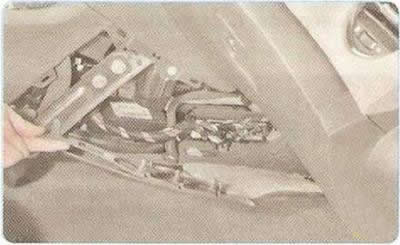
9. Overcoming the resistance of the clamps...


10. ...remove the side panel of the floor tunnel trim.
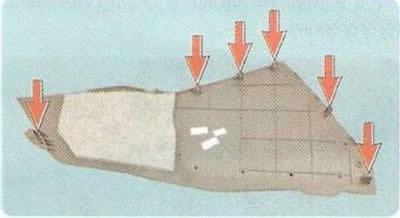
10. ...remove the side panel of the floor tunnel trim.


Note: This is how the side panel mounting clips are located.


11. Similarly, remove the left side panel of the floor tunnel trim.
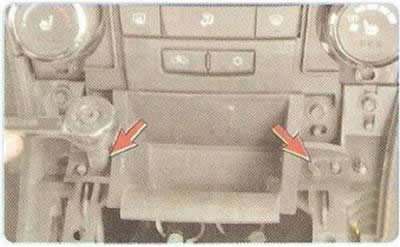
11. Similarly, remove the left side panel of the floor tunnel trim.


12. Remove the two bolts securing the ashtray to the floor tunnel trim...
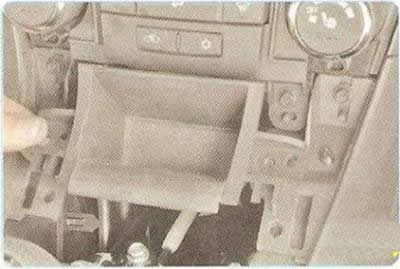
12. Remove the two bolts securing the ashtray to the floor tunnel trim...


13. ...and remove the ashtray.
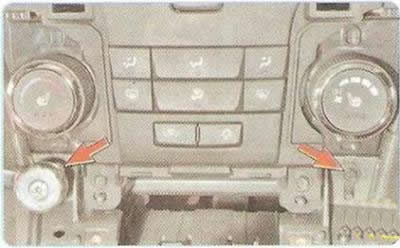
13. ...and remove the ashtray.


14. Remove the two bolts securing the upper fastening of the front part of the trim to the instrument panel...
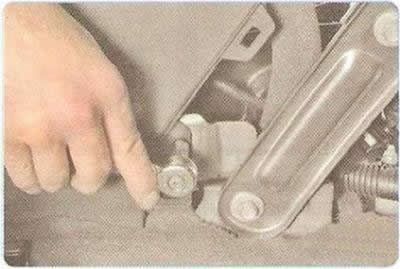
14. Remove the two bolts securing the upper fastening of the front part of the trim to the…


15. ...and two lower mounting bolts on the left and right.
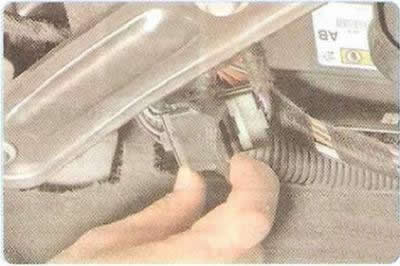


15. ...and two lower mounting bolts on the left and right.


16. Fold back the shoe retainer.
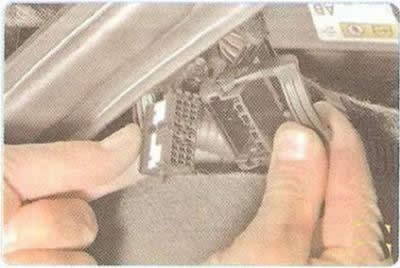
16. Fold back the shoe retainer.


17. ...and disconnect the floor tunnel wiring harness connectors.

18. Lift the parking brake lever up...
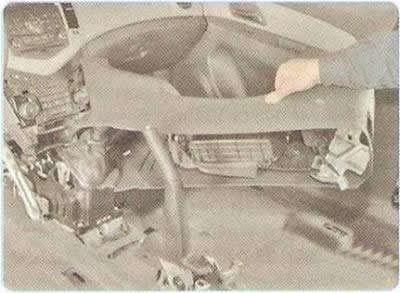
18. Lift the parking brake lever up...


19. ...and remove the trim.
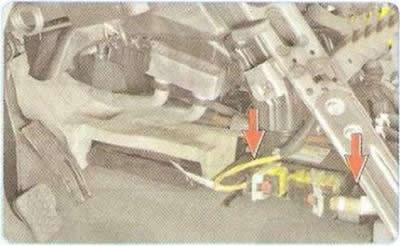
19. ...and remove the trim.


20. Unscrew the two nuts securing the electronic control unit on the driver's side.


21. Similarly, unscrew the two nuts securing the electronic control unit on the front passenger side.
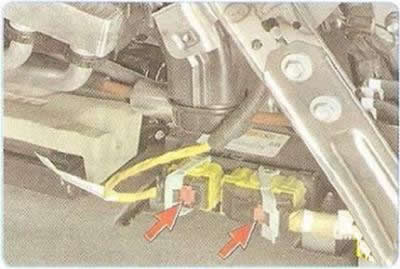
21. Similarly, unscrew the two nuts securing the electronic control unit on the front passenger…


22. Disconnect the wiring harness connectors and remove the electronic control unit.

23. Install the electronic control unit of the passive restraint system and all parts in the reverse order of removal.

The article was checked: Vladimir Romannikov
This article is available at russian, bulgarian, belarusian, ukrainian, serbian, croatian, romanian, polish, slovak, hungarian

Share information:

Previous articles
Cruze 1: Security systems
Next articles

Replacing the rear seat belt
Replacing the front seat belt
Removal and installation the front passenger airbag
Checking the electrical connector of the front passenger airbag module
Removal and installation the driver's airbag


See similar articles on the topic of Chevrolet cars:
Removal and installation of the electronic control unit of the passive safety system Chevrolet Aveo T300 (2012-2018)
Electronic climate control system Chevrolet Captiva 1 (2006-2018)
Schematic diagram of the electronic engine management system with the MR-140 control unit Chevrolet Lacetti 1 (2002-2009)
Removal the electronic control unit Chevrolet Lanos T150 (2002-2009)
Electronic anti-theft system Chevrolet Niva 1 (2002-2016)
Passive safety system control unit Chevrolet Tahoe 2 and 3 (2000-2014)
ROM of the electronic control unit ECM (3.1 l) and MEM-CAL of the PCM unit (3.8 l) Chevrolet Lumina 1 (1989-1994)
Link in different formats to this page


Visitor comments

No comments yet


How much will 42 + 46 =


Cruze 1 (2008-2016) 
  • General information
  • User manual
  • Troubleshooting
  • Maintenance
  • Power unit
  • Engine repair
  • Lubrication system
  • Cooling system
  • Exhaust system
  • Supply system
  • Control system
  • Transmission
  • Clutch
  • Car gearbox
  • Front wheel drives
  • Chassis
  • Front suspension
  • Rear suspension
  • Steering
  • Brake system
  • Body
  • Exterior (external elements)
  • Interior (internal elements)
  • Doors, covers and windows
  • Heating and air conditioning
  • Security systems
  • Electrical equipment
  • Equipment and devices
  • Power devices
  • Lighting and signaling
  • Electrical circuits


ChevyMan.ru © 2017-2026 · Mobile version · Feedback · Site search · Interesting to read · Sitemap: EN BG BY UA RS HR RO PL SK HU

Aveo 2003-2008 · Aveo 2006-2011 · Aveo 2012-2018 · Captiva 2006-2018 · Cruze 2008-2016 · Lacetti 2002-2009 · Lanos 2002-2009 · Niva 2002-2016 · Tahoe 1992-2000 · Tahoe 2000-2014 · Lumina 1 1989-1994 · Trailblazer 1 2001-2008 · Orlando 1 2010-2018 ·
🛡️ For your security and to improve our service, this site uses cookies. You can disable them in your browser.