


Contents: Removal ↧ Installation ↧
Removal
1. Disable the passive safety system (see section "Disabling and connecting the passive safety system").
2. Remove the driver's seat.
3. Remove the driver's door sill trim (see chapter "Body").
4. Fold back the edge of the floor trim to access the SRS control unit.
5. Disconnect the connector holder (1) from the control unit connector (2).
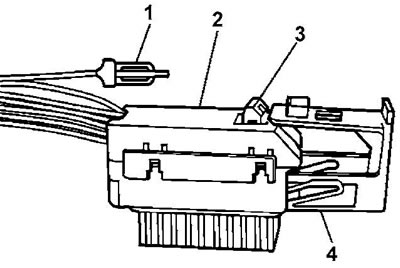
1 - holder, 2 - passive safety system control unit connector, 3 - retainer, 4 - cover.
6. Press the latch (3) and slide the connector mounting cover (4).
7. Disconnect the connector (1) from the control unit (3).
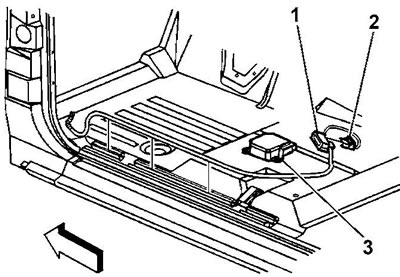
1, 2 - connector, 3 - passive safety system control unit.
8. Loosen the control unit mounting bolts. Tightening torque 10 Nm.
9. Remove the passive safety system control unit.
10. Replace damaged control unit fasteners.
- a) Unscrew and discard damaged nuts.
- b) Drill holes in the welded joint on the body floor, then remove and discard the control unit mounting studs.
- c) Treat the weld joint, clean and degrease it.
- d) Install new studs into the mounting locations.
- d) Weld new studs.
- e) Use appropriate nuts to secure the control unit.
Installation
11. Installation is carried out in the reverse order of removal.
Note: When installing a new passive safety control unit, the airbag and Belt Tensioner System (SRS) indicator may light up on the instrument cluster when the ignition is switched on. In this case, the fault code B1001 may be displayed during system diagnostics. If the indicator continues to light up after the passive safety system is turned off, perform a system diagnostic and correct the problem (see chapter "Diagnostic Trouble Codes").
12. Connect the passive safety system (see section "Disabling and connecting the passive safety system").