


Repair of a removed engine from a car Chevrolet Tahoe 1

Engine overhaul technical data
Dimensions and clearances in mm. General information Compression in cylinders (all engines) — 9.84 kgf/cm² Maximum pressure difference in cylinders is 1.3...
There is 1 comment
Dimensions and clearances in mm. General information Compression in cylinders (all engines) — 9.84 kgf/cm² Maximum pressure difference in cylinders is 1.3...
There is 1 comment

General information about engine overhaul
This Chapter describes the procedure for dismantling and overhauling 6- and 8-cylinder engines with cylinder volumes of 4.3, 5.0, 5.7 and 7.4 liters. Objective...
This Chapter describes the procedure for dismantling and overhauling 6- and 8-cylinder engines with cylinder volumes of 4.3, 5.0, 5.7 and 7.4 liters. Objective...

Measuring oil pressure
1. Oil pressure gives an idea of the wear of engine parts (connecting rod and main bearings, oil pump, etc.). The most accurate readings are provided by a...
1. Oil pressure gives an idea of the wear of engine parts (connecting rod and main bearings, oil pump, etc.). The most accurate readings are provided by a...

Engine diagnostics using a vacuum gauge
1. Measuring vacuum is a reliable and relatively inexpensive way to diagnose an engine (see photo). The vacuum gauge readings can provide an idea of the...
1. Measuring vacuum is a reliable and relatively inexpensive way to diagnose an engine (see photo). The vacuum gauge readings can provide an idea of the...

Checking the compression in the engine cylinders
1. The results of the compression test in the engine cylinders allow us to judge the condition of the engine parts (pistons, rings, valves and seats, cylinder...
1. The results of the compression test in the engine cylinders allow us to judge the condition of the engine parts (pistons, rings, valves and seats, cylinder...
Dismantling the power unit — safety measures
1. The engine is removed from the engine compartment by lifting, so the lifting equipment must be designed for the weight of the engine. Work should be carried...
1. The engine is removed from the engine compartment by lifting, so the lifting equipment must be designed for the weight of the engine. Work should be carried...
Engine Overhaul — General Notes
1. To determine the scope of the upcoming work, check the compression in the engine cylinders. Also check the tests using a vacuum gauge and determine the...
1. To determine the scope of the upcoming work, check the compression in the engine cylinders. Also check the tests using a vacuum gauge and determine the...

Engine — removal and installation
1. Remove the hood. 2. Disconnect the battery from ground. 3. Drain the fluid from the cooling system. 4. Remove the air filter. 5. Remove the drive belts. 6....
1. Remove the hood. 2. Disconnect the battery from ground. 3. Drain the fluid from the cooling system. 4. Remove the air filter. 5. Remove the drive belts. 6....
Engine Overhaul — Alternatives
When performing a major overhaul on your own, various options are possible. The determining factor is the condition of the cylinder block, which in some cases...
When performing a major overhaul on your own, various options are possible. The determining factor is the condition of the cylinder block, which in some cases...
Engine disassembly procedure
1. It is recommended to disassemble the engine on a special stand; if there is no stand, secure the engine on a level surface or on the floor. 2. If a...
1. It is recommended to disassemble the engine on a special stand; if there is no stand, secure the engine on a level surface or on the floor. 2. If a...

Cylinder head — disassembly
Attention! 1. It seems more expedient to purchase a new cylinder head than to disassemble, check and repair a previously used head. 2. Two types of cylinder...
Attention! 1. It seems more expedient to purchase a new cylinder head than to disassemble, check and repair a previously used head. 2. Two types of cylinder...

Cylinder head — cleaning and checking condition
1. Remove all gasket residue from the head split surfaces, being careful not to damage the surfaces. Remove carbon deposits from combustion chambers, valve...
1. Remove all gasket residue from the head split surfaces, being careful not to damage the surfaces. Remove carbon deposits from combustion chambers, valve...
Valve mechanism — maintenance and repair
1. If the valve mechanism parts are in an unsatisfactory condition, then the entire mechanism should be assembled, installing the parts in place on the...
1. If the valve mechanism parts are in an unsatisfactory condition, then the entire mechanism should be assembled, installing the parts in place on the...

Cylinder head — assembly
1. Before starting assembly, it is necessary to make sure that the cylinder head and its parts are clean, regardless of whether this part was repaired in a car...
1. Before starting assembly, it is necessary to make sure that the cylinder head and its parts are clean, regardless of whether this part was repaired in a car...

Connecting rod and piston group — dismantling
Caution! Before removing the pistons and connecting rods, remove the cylinder head, oil pan and oil pump, following the relevant sections in Chapter 2, Part A...
Caution! Before removing the pistons and connecting rods, remove the cylinder head, oil pan and oil pump, following the relevant sections in Chapter 2, Part A...

Crankshaft — dismantling
Note: Before removing the crankshaft, remove the flywheel (or the leading disk of the torque converter), all parts on the crankshaft nose, chain, sump, oil...
Note: Before removing the crankshaft, remove the flywheel (or the leading disk of the torque converter), all parts on the crankshaft nose, chain, sump, oil...

Cylinder Block — Cleaning
Attention! If the cooling system channel plugs fall into the cylinder block channel, it is usually impossible to remove them. 1. Using light hammer blows,...
Attention! If the cooling system channel plugs fall into the cylinder block channel, it is usually impossible to remove them. 1. Using light hammer blows,...
Cylinder Block — Check
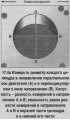
1. Before checking, thoroughly clean the cylinder block. 2. Visually check the block for cracks and corrosion. Check the condition of the threads, and restore...
1. Before checking, thoroughly clean the cylinder block. 2. Visually check the block for cracks and corrosion. Check the condition of the threads, and restore...

Cylinder honing
1. For honing it is recommended to use a "brush" with emery balls (see photo). 2. The honing procedure is as follows. 1) Clamp the fixture into the electric...
1. For honing it is recommended to use a "brush" with emery balls (see photo). 2. The honing procedure is as follows. 1) Clamp the fixture into the electric...

Connecting rods and pistons — checking condition
1. Carefully clean the pistons from carbon deposits and carefully remove the rings. Attention! When completely disassembling the engine, the piston rings must...
1. Carefully clean the pistons from carbon deposits and carefully remove the rings. Attention! When completely disassembling the engine, the piston rings must...

Crankshaft — checking condition
1. Wash the crankshaft with solvent and dry it, clean the oil passages, clean the journals and remove burrs (see photo). 2. Check the condition of the...
1. Wash the crankshaft with solvent and dry it, clean the oil passages, clean the journals and remove burrs (see photo). 2. Check the condition of the...

Main and connecting rod bearings — inspection
1. Main and connecting rod bearings must be replaced during a major engine overhaul, however, previously used bearings should be carefully checked to restore...
1. Main and connecting rod bearings must be replaced during a major engine overhaul, however, previously used bearings should be carefully checked to restore...
Engine Overhaul — Assembly Procedure
The following order of assembly of individual units and their installation on the engine is recommended: Piston rings Crankshaft and main bearings Pistons...
The following order of assembly of individual units and their installation on the engine is recommended: Piston rings Crankshaft and main bearings Pistons...

Piston rings — installation
1. Check the clearance in the piston ring joints. It is assumed that the clearance between the ring and the landing groove area has already been checked and is...
1. Check the clearance in the piston ring joints. It is assumed that the clearance between the ring and the landing groove area has already been checked and is...

Crankshaft — installation and checking of clearances in main bearings
1. Position the cylinder block so that the bottom is facing up. Remove the cap bolts, remove the caps and arrange them in the order they were installed. Remove...
1. Position the cylinder block so that the bottom is facing up. Remove the cap bolts, remove the caps and arrange them in the order they were installed. Remove...

Connecting rods and pistons — installation and checking clearances in connecting rod bearings
1. Before installing the pistons together with the connecting rods, the cylinder surface must be absolutely clean, the edges of the cylinders must be...
1. Before installing the pistons together with the connecting rods, the cylinder surface must be absolutely clean, the edges of the cylinders must be...

Pre-lubrication of the engine after major repairs
1. It is recommended that the engines in question be pre-lubricated before the first start. This procedure reduces wear on parts during running-in. For...
1. It is recommended that the engines in question be pre-lubricated before the first start. This procedure reduces wear on parts during running-in. For...
Starting the engine after repair and running-in
1. After completing assembly, double check the oil and coolant levels. 2. With the spark plugs removed and the ignition system turned off, turn the crankshaft...
1. After completing assembly, double check the oil and coolant levels. 2. With the spark plugs removed and the ignition system turned off, turn the crankshaft...
This section is available at russian, bulgarian, belarusian, ukrainian, serbian, croatian, romanian, polish, slovak, hungarian
See similar sections on Chevrolet cars:
Power unit: Engine Chevrolet Aveo T300 (2012-2018)
Engine 2.0 l (diesel): Engine device Chevrolet Captiva 1 (2006-2018)
Power unit: Engine repair Chevrolet Cruze 1 (2008-2016)
Electrical equipment: Engine electrics Chevrolet Lacetti 1 (2002-2009)
Electrical equipment: Engine electrics Chevrolet Lanos T150 (2002-2009)
Power unit: Engine repair Chevrolet Niva 1 (2002-2016)
Power unit: Engine repair Chevrolet Orlando 1 (2010-2018)
Power unit: Engine Chevrolet Aveo T300 (2012-2018)
Engine 2.0 l (diesel): Engine device Chevrolet Captiva 1 (2006-2018)
Power unit: Engine repair Chevrolet Cruze 1 (2008-2016)
Electrical equipment: Engine electrics Chevrolet Lacetti 1 (2002-2009)
Electrical equipment: Engine electrics Chevrolet Lanos T150 (2002-2009)
Power unit: Engine repair Chevrolet Niva 1 (2002-2016)
Power unit: Engine repair Chevrolet Orlando 1 (2010-2018)
Share information:
- General information
- Vehicle characteristics
- Vehicle device
- Manual
- Maintenance
- Power unit
- Engine repair
- Engine overhaul
- Cooling system
- Injection and control system
- Exhaust system
- Engine electrical equipment
- Transmission
- Automatic gearbox 4L60, 4L65, 4L70
- Automatic gearbox 6L50, 6L80, 6L90
- Transfer case
- Drive shafts and cardan
- Front drive axle
- Rear drive axle
- Chassis
- Car suspension
- Steering
- Brake system
- Body (until 2007)
- Exterior (external elements)
- Interior (internal elements)
- Doors, locks and windows
- Heating and air conditioning
- Security System (SRS)
- Body (since 2007)
- Exterior (external elements)
- Doors, locks and windows
- Interior (internal elements)
- Electrical equipment
- Electrical appliances (until 2007)
- Lighting and lamps (until 2007)
- Audio system (until 2007)
- Electrical appliances (since 2007)
- Lighting and lamps (since 2007)
- Audio system (since 2007)
- Wiring diagrams (2000-2005)
- Wiring diagrams (2005-2007)
- Wiring diagrams (since 2007)
- General information
- User manual
- Maintenance
- Power unit
- Engine in a car
- Engine removed
- Cooling system
- Heating and air conditioning
- Fuel and exhaust systems
- Decreased toxicity
- Transmission
- Manual gearbox
- Automatic gearbox
- Transfer case
- Clutch and drive shafts
- Chassis
- Brake system
- Car suspension
- Steering
- Body
- Repair of body elements
- Electrical equipment
- Engine electrics
- Equipment and devices
- Electrical circuits