


2. Wash all valve mechanism parts with solvent, being careful not to damage them.
Checking the head
3. Carefully inspect the head, check for cracks and signs of coolant penetration. If cracks are found, replace the head.
4. Check the deformation of the split surface of the head using a gauge and feeler gauge (see photo). If the deviation from the plane exceeds the norm, the head should be re-ground.
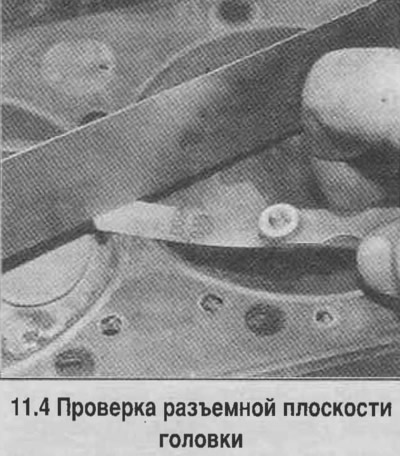
Caution! If the head has been reground, the intake manifold flanges should also be reground.
5. Check the condition of the valve seats. In the presence of pitting (pits), cracks, traces of burnout, you will need to repair the head in a car service station.
6. Determine the clearance between the sleeve and the valve. To do this, check the valve play in the transverse direction by rocking the valve in the sleeve and measuring the play (see photo). The valve head should be approximately 1.5 mm from the seat. If half of the total clearance on the indicator exceeds the norm, then the bushing should be replaced (performed in a car service).

Valves
7. Carefully inspect the valves, check for cracks on the valve faces, traces of uneven wear, metal erosion and burnout. Check for cracks on the necks and rods, as well as bending of the rods by turning the valve in the guide bushing (see photo). Check the rod ends for wear. The presence of any of the above defects indicates the need for valve repair.

8. Measure the width of the edge band of each valve (from the edge of the valve head to the sealing belt) and compare with the standard value (see photo). If this distance is less than the norm, replace the valve.

Valve Mechanism Parts
9. Measure the length of the spring in a free state (see photo). Replace shrinkage springs. Before installing springs on a repaired engine, they must be tested under load on a special stand at a car service center.

10. Check the verticality of the springs (see photo). If a deviation of the spring from the vertical is detected, the spring should be replaced.

11. Check the condition of the valve rotating devices (see photo). If jamming is detected, replace the valve rotator.

Rocker arms and rocker arm drive parts
12. Check the condition of the rocker arm rubbing surfaces, the presence of cracks and wear on them.
13. Inspect the ends of the tappets. Check for tappet deformation by rolling them across the mirror.
14. Check the condition of the rocker arm ball joints. Pressed-in axle studs are replaced at a car service center; on some engines, the axle studs are threaded and easy to replace.
15. If the valve mechanism parts are in an unsatisfactory condition, the cylinder head should be repaired at a car service center. If the parts are worn within the normal range, install them in the cylinder head, having previously cleaned it.
(The text of the article was obtained from the website ChevyMan)