


Removal procedure
1. Disconnect the negative battery cable.
2. Remove the decorative cover. See "Decorative cover" in this section.
3. Remove the air intake hoses and ducts. See "Air injection system" in this section.
4. Remove the positive crankcase ventilation (PCV) valve and adapter. See "Positive Crankcase Ventilation (PCV) Valve and Adapter" in this section.
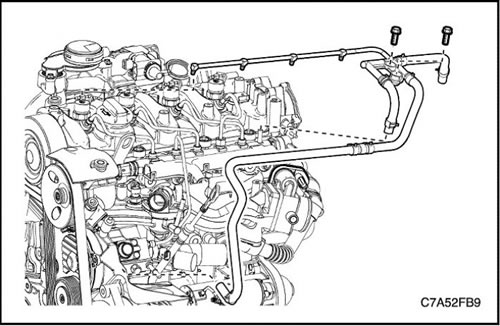
5. Remove the fuel line to the injector, located between the common fuel rail and the injector. See Section 1F1, Engine Controls - 2.0 Diesel.
6. Remove the fuel return line assembly. See Section 1F1, Engine Controls - 2.0 Diesel.
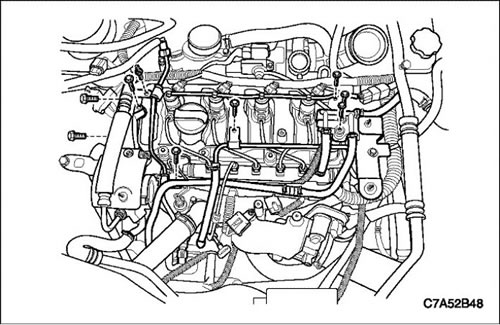
7. Remove the decorative cover bracket together with the coolant return line from the expansion tank.
8. Remove the upper timing belt cover.
9. Disconnect the camshaft position sensor connector
10. Remove the injectors. See Section 1F1, Engine Controls - 2.0 Diesel.
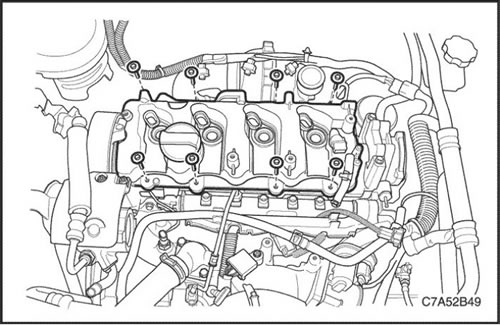
11. Remove the cylinder head cover with gasket.
Cleaning procedure
1. Clean the sealing surface of the cylinder head cover.
2. Clean the sealing surface of the cylinder head.
3. Clean the cylinder head cover bolts.
4. Clean the cylinder head cover bolt holes.
Installation procedure
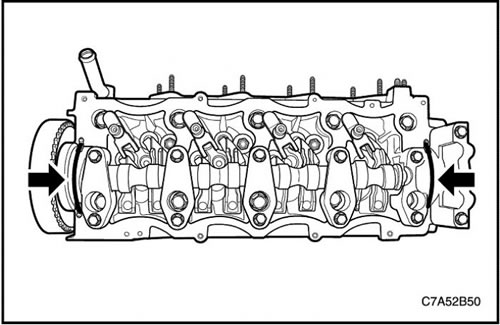
1. Apply sealant (LOCTITE 5900) on the surface of the front/rear camshaft cover.
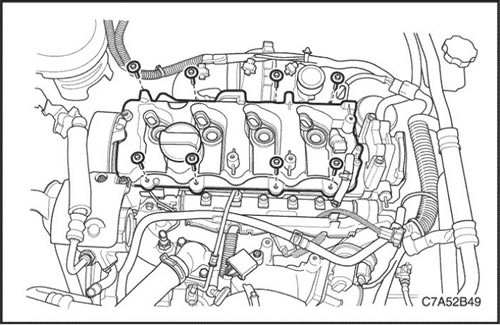
2. Install the cylinder head cover with a new gasket onto the cylinder head.
Tighten
Tighten the cylinder head cover bolts to 12 Nm (8.9 ft·lbs).
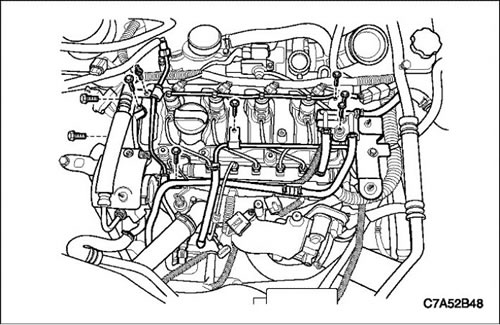
3. Install the upper timing belt cover.
4. Install the decorative cover bracket together with the coolant return line onto the expansion tank.
5. Install the fuel return line assembly.
6. Install the fuel line to the injector, located between the common rail and the injector. See Section 1F1, Engine Controls - 2.0 Diesel.
Tighten
Tighten the upper timing belt cover bolts to 11 N·m (97.4 lbs.in).
Tighten the coolant return line mounting bolt to 9 Nm (79.7 lbs.in).
Tighten the junction block bolts to 11 Nm (97.4 lbs.in).
Tighten the decorative cover bracket bolt to 11 N·m (97.4 lbs.in).
(The original article can be found on the resource: «ChevyMan.ru»)