


Brake system of the car Chevrolet Tahoe 2 and 3

Controllability improvement systems
Depending on the configuration and year of manufacture, different models may include different systems in the controllability improvement system: ABS / EBD...
Depending on the configuration and year of manufacture, different models may include different systems in the controllability improvement system: ABS / EBD...
Automated bleeding of the brake system
Note: When adding brake fluid to the master cylinder reservoir, use only Delco Supreme 11 or equivalent (DOT-3) fluid from a clean, sealed container. Warning:...
Note: When adding brake fluid to the master cylinder reservoir, use only Delco Supreme 11 or equivalent (DOT-3) fluid from a clean, sealed container. Warning:...
Manual bleeding of the brake system
Note: When adding brake fluid to the master cylinder reservoir, use only Delco Supreme 11 or equivalent (DOT-3) fluid from a clean, sealed container. 1. Place...
Note: When adding brake fluid to the master cylinder reservoir, use only Delco Supreme 11 or equivalent (DOT-3) fluid from a clean, sealed container. 1. Place...

System pressure modulator valve
Removal Caution: To prevent loss of brake fluid and dirt from entering the system, plug any open holes. 1. Raise the vehicle and place safety posts under the...
Removal Caution: To prevent loss of brake fluid and dirt from entering the system, plug any open holes. 1. Raise the vehicle and place safety posts under the...

Electronic brake control unit
Removal 1. Raise the vehicle and place safety posts under the frame. 2. Remove dirt from the surfaces of the electronic brake control unit and the brake...
Removal 1. Raise the vehicle and place safety posts under the frame. 2. Remove dirt from the surfaces of the electronic brake control unit and the brake...

Front wheel speed sensor
Removal 1. Raise the vehicle and place safety posts under the frame. 2. Remove the front wheel. 3. Remove the brake disc. 4. Remove the wheel speed sensor wire...
Removal 1. Raise the vehicle and place safety posts under the frame. 2. Remove the front wheel. 3. Remove the brake disc. 4. Remove the wheel speed sensor wire...

Rear wheel speed sensor
Removal 1. Raise the vehicle and place safety posts under the frame. 2. Disconnect the sensor wiring connector. 3. Loosen the speed sensor mounting bolt....
Removal 1. Raise the vehicle and place safety posts under the frame. 2. Disconnect the sensor wiring connector. 3. Loosen the speed sensor mounting bolt....

Rear wheel speed sensor synchronizing ring
Removal 1. Raise the vehicle and place safety posts under the frame. 2. Remove the rear wheel. 3. Remove the rear wheel speed sensor. 4. Remove the rear axle...
Removal 1. Raise the vehicle and place safety posts under the frame. 2. Remove the rear wheel. 3. Remove the rear wheel speed sensor. 4. Remove the rear axle...

Traction control switch
Removal 1. Replace the front panel access panel. 2. Disconnect the switch wiring connector. 3. Using a small screwdriver, unfasten the switch clips and remove...
Removal 1. Replace the front panel access panel. 2. Disconnect the switch wiring connector. 3. Using a small screwdriver, unfasten the switch clips and remove...

Vehicle course deviation sensor
Removal 1. Remove the passenger seat. 2. Unscrew the two nuts (1) securing the sensor. Tightening torque 7 Nm. 3. If you need to access the sensor, pull back...
Removal 1. Remove the passenger seat. 2. Unscrew the two nuts (1) securing the sensor. Tightening torque 7 Nm. 3. If you need to access the sensor, pull back...

Location of units and parts of the brake system
GMT900. Front part of the chassis. 1 - right wheel speed sensor, 2 - right shock absorber electromagnetic valve, 3 - right body height sensor, 4 - left body...
GMT900. Front part of the chassis. 1 - right wheel speed sensor, 2 - right shock absorber electromagnetic valve, 3 - right body height sensor, 4 - left body...
Disc brakes — specification
Note: The maximum thickness of the brake disc is indicated on the disc casting. The permissible scratch depth is 1.5 mm. Brake disc thickness Front brake...
Note: The maximum thickness of the brake disc is indicated on the disc casting. The permissible scratch depth is 1.5 mm. Brake disc thickness Front brake...

Measuring the thickness of the brake disc
1. If the friction surface of the brake disc is not accessible, remove the caliper together with the brake pads. 2. Clean the friction surfaces of the brake...
1. If the friction surface of the brake disc is not accessible, remove the caliper together with the brake pads. 2. Clean the friction surfaces of the brake...
Brake disc surface
1. If the friction surface of the brake disc is not accessible, remove the caliper together with the brake pads 2. Clean the friction surfaces of the brake...
1. If the friction surface of the brake disc is not accessible, remove the caliper together with the brake pads 2. Clean the friction surfaces of the brake...

Measuring Brake Disc Runout
Attention: Increased axial runout of the brake disc can lead to the development of uneven wear of the disc over 5,000-10,000 km of mileage. Checking for brake...
Attention: Increased axial runout of the brake disc can lead to the development of uneven wear of the disc over 5,000-10,000 km of mileage. Checking for brake...
Correction of brake disc runout
There are two methods to correct brake disc runout. Determine the appropriate correction method. The disk re-arrangement method is effective if the disk runout...
There are two methods to correct brake disc runout. Determine the appropriate correction method. The disk re-arrangement method is effective if the disk runout...

Checking the brake pad
Check the brake pads regularly and every time you remove a wheel. If a brake pad replacement is necessary, replace the pads of all wheels on one axle. Check...
Check the brake pads regularly and every time you remove a wheel. If a brake pad replacement is necessary, replace the pads of all wheels on one axle. Check...

Checking the brake caliper
1. Inspect the brake caliper body. Look for cracks, signs of excessive wear and/or damage. If any of these conditions are present, replace the caliper. 2....
1. Inspect the brake caliper body. Look for cracks, signs of excessive wear and/or damage. If any of these conditions are present, replace the caliper. 2....

Checking the brake caliper support
1. Check the fluid level in the master cylinder reservoir. 2. If the brake fluid level is in the middle between the maximum and minimum level marks, there is...
1. Check the fluid level in the master cylinder reservoir. 2. If the brake fluid level is in the middle between the maximum and minimum level marks, there is...

Brake pads — replacement
Attention: Do not leave the caliper hanging on the brake hose, this will cause the hose to deform and brake fluid to leak. Tie the caliper with wire. If...
Attention: Do not leave the caliper hanging on the brake hose, this will cause the hose to deform and brake fluid to leak. Tie the caliper with wire. If...
Lapping in the brake pad and disc
Bedding in brake pads and brake discs is necessary to ensure maximum efficiency of the disc brake. This procedure should be performed after replacing or...
Bedding in brake pads and brake discs is necessary to ensure maximum efficiency of the disc brake. This procedure should be performed after replacing or...

Brake caliper — removal and installation
All brakes 1. Check the fluid level in the master cylinder reservoir. 2. If the brake fluid level is in the middle between the maximum and minimum level marks,...
All brakes 1. Check the fluid level in the master cylinder reservoir. 2. If the brake fluid level is in the middle between the maximum and minimum level marks,...

Brake caliper repair
Disassembly Note: Brake caliper repair shown using a 2500 series front caliper as an example. 1. Remove the brake caliper. 2. Drain the brake fluid from the...
Disassembly Note: Brake caliper repair shown using a 2500 series front caliper as an example. 1. Remove the brake caliper. 2. Drain the brake fluid from the...

Replacing the disc brake mounting hardware
Note: The replacement of the disc brake mounting hardware is shown using the 1500 series front brake as an example. 1. Remove the brake caliper (without...
Note: The replacement of the disc brake mounting hardware is shown using the 1500 series front brake as an example. 1. Remove the brake caliper (without...

Brake disc — removal and installation
Caution: Do not leave the caliper hanging on the brake hose, this will cause the hose to deform and brake fluid to leak. Tie the caliper with wire. Note:...
Caution: Do not leave the caliper hanging on the brake hose, this will cause the hose to deform and brake fluid to leak. Tie the caliper with wire. Note:...

Front brake screen
Removal 1. Remove the wheel hub. Note: Please note the screen orientation to ensure proper installation. 2. Remove the brake shield from the steering knuckle....
Removal 1. Remove the wheel hub. Note: Please note the screen orientation to ensure proper installation. 2. Remove the brake shield from the steering knuckle....

Rear brake screen
Removal 1. Remove the parking brake support plate. 2. Remove the brake screen from the axle beam pipe flange. Installation 3. Installation is carried out in...
Removal 1. Remove the parking brake support plate. 2. Remove the brake screen from the axle beam pipe flange. Installation 3. Installation is carried out in...

Hydraulic part of the brake system — location of components
GMT900. Left side of the engine compartment. 1 - windshield wiper motor, 2 - brake booster, 3 - windshield washer fluid heater, 4 - fuse box under the hood, 5...
GMT900. Left side of the engine compartment. 1 - windshield wiper motor, 2 - brake booster, 3 - windshield washer fluid heater, 4 - fuse box under the hood, 5...
Checking the brake system on the road
Preliminary operations 1. Inspect easily accessible components for obvious damage and/or leaks that may indicate that the vehicle should not be driven until...
Preliminary operations 1. Inspect easily accessible components for obvious damage and/or leaks that may indicate that the vehicle should not be driven until...

Measuring brake pedal travel
1. With the ignition off and the brakes cold, apply the brakes five or more times to relieve the vacuum in the brake booster. 2. Install a pedal force gauge on...
1. With the ignition off and the brakes cold, apply the brakes five or more times to relieve the vacuum in the brake booster. 2. Install a pedal force gauge on...
Evaluation of the operation of the hydraulic brake booster
1. Install a pedal force gauge on the brake pedal. 2. Start the engine at idle speed. Set the front wheels in the straight-ahead position. 3. Apply a force of...
1. Install a pedal force gauge on the brake pedal. 2. Start the engine at idle speed. Set the front wheels in the straight-ahead position. 3. Apply a force of...
Checking the vacuum source
Attention: The vacuum created is affected by engine temperature, operation of attachments and altitude; The vacuum created decreases by approximately 3 kPa for...
Attention: The vacuum created is affected by engine temperature, operation of attachments and altitude; The vacuum created decreases by approximately 3 kPa for...

Search for leaks in the brake hydraulic drive
Search for external leaks 1. Check the fluid level in the master cylinder reservoir. A slight decrease in the fluid level can be considered normal, which is...
Search for external leaks 1. Check the fluid level in the master cylinder reservoir. A slight decrease in the fluid level can be considered normal, which is...
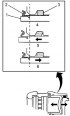
Visual inspection of hydraulic system components
1. Remove the wheel, secure the brake disc with wheel nuts and inspect the area around the caliper piston dust boots (2). 2. If there are obvious signs of...
1. Remove the wheel, secure the brake disc with wheel nuts and inspect the area around the caliper piston dust boots (2). 2. If there are obvious signs of...
Checking brake pipes and hoses
1. Inspect all brake lines and hoses, looking for: loops, incorrect tube/hose routing, missing or damaged tube or hose support clips; traces of corrosion or...
1. Inspect all brake lines and hoses, looking for: loops, incorrect tube/hose routing, missing or damaged tube or hose support clips; traces of corrosion or...

Checking the brake pedal pusher
1. Disconnect the brake pedal pusher (1) from the pedal. 2. Inspect the pushrod earring bushing (2), look for cracks and signs of wear. 3. Move the tappet boot...
1. Disconnect the brake pedal pusher (1) from the pedal. 2. Inspect the pushrod earring bushing (2), look for cracks and signs of wear. 3. Move the tappet boot...
Filling the master brake cylinder reservoir
Note: When adding brake fluid to the master cylinder reservoir, use only Delco Supreme 11 or equivalent (DOT-3) fluid from a clean, sealed container. 1. Check...
Note: When adding brake fluid to the master cylinder reservoir, use only Delco Supreme 11 or equivalent (DOT-3) fluid from a clean, sealed container. 1. Check...

Brake master cylinder reservoir
Removal 1. Apply the parking brake and block the vehicle wheels. 2. Remove the brake master cylinder. 3. Drain the master cylinder reservoir. 4. Secure the...
Removal 1. Apply the parking brake and block the vehicle wheels. 2. Remove the brake master cylinder. 3. Drain the master cylinder reservoir. 4. Secure the...

Master brake cylinder
Removal Models with vacuum brake booster Models with hydraulic brake booster 1. Using a siphon, pump out the brake fluid from the master cylinder reservoir. 2....
Removal Models with vacuum brake booster Models with hydraulic brake booster 1. Using a siphon, pump out the brake fluid from the master cylinder reservoir. 2....

Brake fluid level sensor
Removal 1. Disconnect the brake fluid level sensor wiring connector. 2. Using pliers, squeeze the sensor fixing keys (on the opposite side of the master...
Removal 1. Disconnect the brake fluid level sensor wiring connector. 2. Using pliers, squeeze the sensor fixing keys (on the opposite side of the master...

Brake pedal — removal and installation
1. Remove the clip (4) securing the brake pedal pusher. 2. Remove the brake light switch (2) and pusher (3) from the brake pedal stud (1). 3. Loosen the brake...
1. Remove the clip (4) securing the brake pedal pusher. 2. Remove the brake light switch (2) and pusher (3) from the brake pedal stud (1). 3. Loosen the brake...

Vacuum brake booster
Removal 1. Apply the parking brake. 2. Release the vacuum in the vacuum booster. To do this, press the brake pedal 3-5 times. 3. (GMT900) Disconnect the vacuum...
Removal 1. Apply the parking brake. 2. Release the vacuum in the vacuum booster. To do this, press the brake pedal 3-5 times. 3. (GMT900) Disconnect the vacuum...

Brake booster check valve and hose
Removal 1. Remove the check valve from the brake booster. 2. Remove the clamp securing the vacuum hose to the valve. 3. Remove the valve from the hose. 4....
Removal 1. Remove the check valve from the brake booster. 2. Remove the clamp securing the vacuum hose to the valve. 3. Remove the valve from the hose. 4....

Hydraulic brake booster
Examination Caution: The hydraulic booster may appear wet due to excess fluid when installed at the factory or due to brake fluid spillage when filling the...
Examination Caution: The hydraulic booster may appear wet due to excess fluid when installed at the factory or due to brake fluid spillage when filling the...

Hydraulic brake booster accumulator
Removal Warning: The battery contains compressed gas. Always use special tools and follow the instructions given here, otherwise there is a risk of injury. Do...
Removal Warning: The battery contains compressed gas. Always use special tools and follow the instructions given here, otherwise there is a risk of injury. Do...

Brake pipes — replacement
Removal Caution: When replacing brake lines, always install double-wall steel line. Using any other design of line is not recommended as it may cause brake...
Removal Caution: When replacing brake lines, always install double-wall steel line. Using any other design of line is not recommended as it may cause brake...

Front Brake Brake Hose
Front brake hose removal and installation Removal Note: Removal and installation procedures are shown using GMT900 models as an example. 1. Raise the vehicle...
Front brake hose removal and installation Removal Note: Removal and installation procedures are shown using GMT900 models as an example. 1. Raise the vehicle...

Frame and rear axle brake hose
Frame and rear axle brake hose removal and installation Removal Note: Removal and installation procedures are shown using GMT900 models as an example. Series...
Frame and rear axle brake hose removal and installation Removal Note: Removal and installation procedures are shown using GMT900 models as an example. Series...

Rear Brake Brake Hose
Rear Brake Hose - Removal and Installation, 1500 Series (Top and 2500 Series (Bottom) Removal Series 1500 1. Raise the vehicle and place safety stands under...
Rear Brake Hose - Removal and Installation, 1500 Series (Top and 2500 Series (Bottom) Removal Series 1500 1. Raise the vehicle and place safety stands under...
Checking the parking brake shoe
1. Raise the vehicle and place safety stands under the frame. 2. Remove the rear wheel. 3. Remove the brake caliper together with the bracket. Caution: Do not...
1. Raise the vehicle and place safety stands under the frame. 2. Remove the rear wheel. 3. Remove the brake caliper together with the bracket. Caution: Do not...

Replacing the parking brake shoe
Series 1500 1. Raise the vehicle and place safety posts under the frame. 2. Remove the brake disc. 3. Disconnect the parking brake cable from the brake...
Series 1500 1. Raise the vehicle and place safety posts under the frame. 2. Remove the brake disc. 3. Disconnect the parking brake cable from the brake...

Parking brake release handle
1. Loosen the bolt (1) securing the parking brake release handle. Tightening torque 9 Nm. 2. Move the parking brake cable (2) forward, disconnect the cable...
1. Loosen the bolt (1) securing the parking brake release handle. Tightening torque 9 Nm. 2. Move the parking brake cable (2) forward, disconnect the cable...

Parking brake pedal
Removal Caution: The service procedure involves removing the front parking brake cable. The front parking brake cable cannot be replaced separately, only...
Removal Caution: The service procedure involves removing the front parking brake cable. The front parking brake cable cannot be replaced separately, only...

Parking brake indicator switch
Removal 1. Disconnect the negative battery cable. 2. Without disconnecting the wiring connectors, remove the electrical distribution block from the left side...
Removal 1. Disconnect the negative battery cable. 2. Without disconnecting the wiring connectors, remove the electrical distribution block from the left side...

Rear parking brake cable
Removal 1. Release the parking brake. 2. Lock the automatic parking brake cable adjuster. 3. Raise the vehicle and place safety stands under the frame. 4....
Removal 1. Release the parking brake. 2. Lock the automatic parking brake cable adjuster. 3. Raise the vehicle and place safety stands under the frame. 4....

Parking brake cable guide
Removal 1. Release the parking brake. 2. Raise the vehicle and place safety stands under the frame. 3. Loosen the parking brake cable guide bolt to the frame....
Removal 1. Release the parking brake. 2. Raise the vehicle and place safety stands under the frame. 3. Loosen the parking brake cable guide bolt to the frame....

Parking brake cable adjuster
Before starting work on servicing the parking brake system, it is necessary to perform a locking operation (upon completion of the unlock) parking brake cable...
Before starting work on servicing the parking brake system, it is necessary to perform a locking operation (upon completion of the unlock) parking brake cable...

Parking brake drive
Removal 1. Release the parking brake. 2. Lock the automatic parking brake cable adjuster. 3. Disconnect the parking brake cable from the brake actuator lever....
Removal 1. Release the parking brake. 2. Lock the automatic parking brake cable adjuster. 3. Disconnect the parking brake cable from the brake actuator lever....

Parking brake support plate
Removal and installation 1. Lock the parking brake cable tension adjuster. 2. Disconnect the parking brake cable from the brake actuator lever. 3. Remove the...
Removal and installation 1. Lock the parking brake cable tension adjuster. 2. Disconnect the parking brake cable from the brake actuator lever. 3. Remove the...

Adjusting the parking brake
1. Install a special caliper on the inner diameter of the rear brake disc. 2. Install the caliper on the brake pads. 3. Turn the adjuster nut until the brake...
1. Install a special caliper on the inner diameter of the rear brake disc. 2. Install the caliper on the brake pads. 3. Turn the adjuster nut until the brake...
Adjusting the parking brake cable tension
Caution: Before adjusting the cable tension, adjust the clearance between the brake pads and the disc. 1. Remove the cable tension adjuster retainer. 2. Apply...
Caution: Before adjusting the cable tension, adjust the clearance between the brake pads and the disc. 1. Remove the cable tension adjuster retainer. 2. Apply...
This section is available at russian, bulgarian, belarusian, ukrainian, serbian, croatian, romanian, polish, slovak, hungarian
See similar sections on Chevrolet cars:
Chassis: Brake system Chevrolet Aveo T300 (2012-2018)
Chassis: Brake system Chevrolet Captiva 1 (2006-2018)
Chassis: Brake system Chevrolet Cruze 1 (2008-2016)
Chassis: Brake system Chevrolet Lacetti 1 (2002-2009)
Chassis: Brake system Chevrolet Lanos T150 (2002-2009)
Chassis: Brake system Chevrolet Niva 1 (2002-2016)
Chassis: Brake system Chevrolet Lumina 1 (1989-1994)
Chassis: Brake system Chevrolet Aveo T300 (2012-2018)
Chassis: Brake system Chevrolet Captiva 1 (2006-2018)
Chassis: Brake system Chevrolet Cruze 1 (2008-2016)
Chassis: Brake system Chevrolet Lacetti 1 (2002-2009)
Chassis: Brake system Chevrolet Lanos T150 (2002-2009)
Chassis: Brake system Chevrolet Niva 1 (2002-2016)
Chassis: Brake system Chevrolet Lumina 1 (1989-1994)
Share information:
- General information
- Vehicle characteristics
- Vehicle device
- Manual
- Maintenance
- Power unit
- Engine repair
- Engine overhaul
- Cooling system
- Injection and control system
- Exhaust system
- Engine electrical equipment
- Transmission
- Automatic gearbox 4L60, 4L65, 4L70
- Automatic gearbox 6L50, 6L80, 6L90
- Transfer case
- Drive shafts and cardan
- Front drive axle
- Rear drive axle
- Chassis
- Car suspension
- Steering
- Brake system
- Body (until 2007)
- Exterior (external elements)
- Interior (internal elements)
- Doors, locks and windows
- Heating and air conditioning
- Security System (SRS)
- Body (since 2007)
- Exterior (external elements)
- Doors, locks and windows
- Interior (internal elements)
- Electrical equipment
- Electrical appliances (until 2007)
- Lighting and lamps (until 2007)
- Audio system (until 2007)
- Electrical appliances (since 2007)
- Lighting and lamps (since 2007)
- Audio system (since 2007)
- Wiring diagrams (2000-2005)
- Wiring diagrams (2005-2007)
- Wiring diagrams (since 2007)
- General information
- User manual
- Maintenance
- Power unit
- Engine in a car
- Engine removed
- Cooling system
- Heating and air conditioning
- Fuel and exhaust systems
- Decreased toxicity
- Transmission
- Manual gearbox
- Automatic gearbox
- Transfer case
- Clutch and drive shafts
- Chassis
- Brake system
- Car suspension
- Steering
- Body
- Repair of body elements
- Electrical equipment
- Engine electrics
- Equipment and devices
- Electrical circuits