
Attention:
- Increased axial runout of the brake disc can lead to the development of uneven wear of the disc over 5,000-10,000 km of mileage.
- Checking for brake disc thickness variation should be done BEFORE checking for disc axial runout. Different brake disc thickness will cause increased pulsation on the brake pedal.
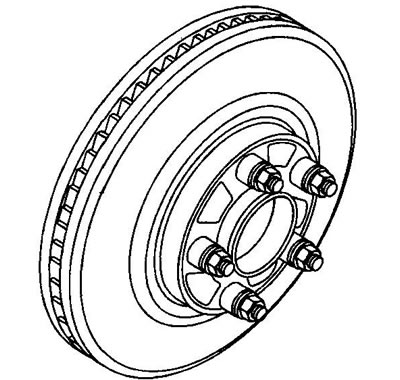
1. Mark the relative positions of the brake disc and wheel studs if this has not been done previously.
Caution: Always clean the disc seat thoroughly after removing the brake disc. Dirt in the seat may cause increased axial runout of the disc.
2. Check the condition of the hub and brake disc seating surfaces. Make sure there is no dirt or products. If the condition of the surfaces is unsatisfactory, perform the following operations:
- a) Remove the brake disc.
- b) Using special tools (or their substitutes) clean the brake disc and hub seats.
- c) Clean the hub and brake disc with denatured alcohol or an approved brake cleaner.
3. Install the brake disc on the hub using the relative position marks made before removal.
4. While holding the brake disc firmly on the hub seat, install the conical washer (1) and conical nut (2) onto the upper stud.
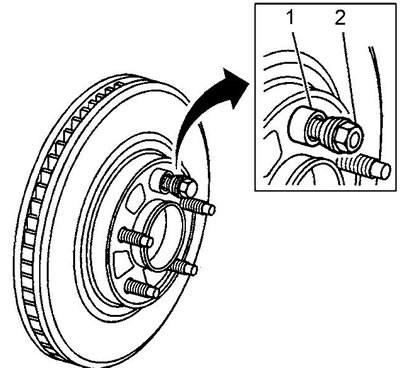
5. Tighten the cone nut by hand.
6. Install conical washers and nuts on the remaining studs according to step 4. Tighten the nuts by hand.
7. Using a torque wrench, tighten the nuts to the specified tightening torque using the star pattern (see section "Removal and installation a wheel").
8. If the dimensions of the brake disc are within the specification limits, or the brake disc has been repaired or replaced with a new one.
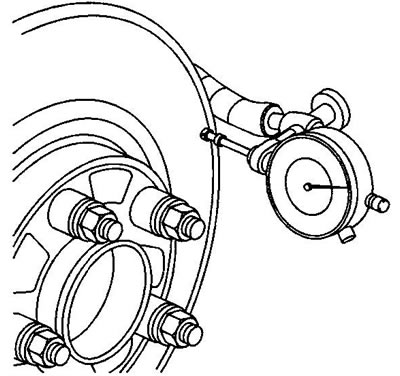
- a) Fix the dial indicator stand to the steering knuckle. Place the indicator leg on the friction surface of the brake disc perpendicular to the disc and at a distance of approximately 13 mm from the outer edge of the disc.
- b) Rotate the disk until the minimum reading is obtained on the indicator. Set the indicator to zero.
- c) Rotate the disk until the indicator shows the maximum reading.
- d) Mark the nearest wheel mounting stud at the point of maximum runout. If the distance to the studs is equal, mark both studs.
- d) Record the value of the runout.
9. If the runout value is within the permissible limits, proceed to step 11. If the runout is greater than the norm, restore the brake disc surface on a lathe and repeat the operations in step 8.
10. If the runout of a new or repaired disc is higher than normal, perform runout correction operations, see below "Correction of brake disc runout".
11. If the runout is normal, install the brake caliper and press the brake pedal several times to fully seat the disc.
Original version of the article on the website ChevyMan