
ChevyMan.ru
Mazda Mitsubishi Toyota Land Rover Honda Kia Nissan
English Русский
Български
Беларускі
Український
Српски
Hrvatski
Română
Polski
Slovenský
Magyar
|
Articles | Sitemap | Contacts |


Home   Aveo   Captiva   Cruze   Lacetti   Lanos   Niva   Tahoe   Others  
Tahoe 2 and 3 (2000-2014) Tahoe 1 (1992-2000)
  • Home
  • Tahoe
  • 1 (1992-2000)
  • Power unit
  • Engine removed
  • Cylinder Block — Cleaning

Cylinder Block — Cleaning (Chevrolet Tahoe 1)

            0

Attention! If the cooling system channel plugs fall into the cylinder block channel, it is usually impossible to remove them.


1. Using light hammer blows, knock the ends of the plugs out of the cylinder block so that the plugs rotate in the holes. Then remove the plugs from the holes with pliers (see photo).
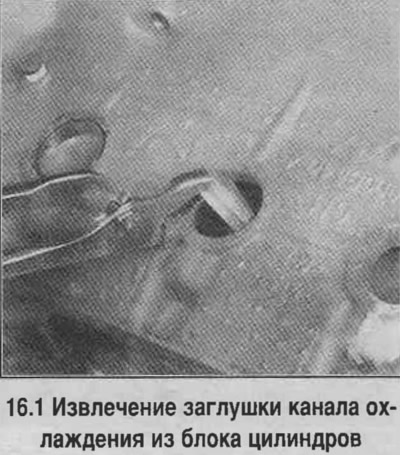
1. Using light hammer blows, knock the ends of the plugs out of the cylinder block so that the…


2. Use a spatula to remove all remaining gasket material from the cylinder block, being careful not to damage the separating surfaces.

3. Remove the main bearing caps and take the bearings out of the cylinder block and caps. Write down the cylinder number to which the removed main bearing corresponds, as well as the part from which it was extracted (from the bearing cap or from the cylinder block bed).

4. Unscrew and remove all threaded plugs of the cylinder block channels. It is almost impossible to remove the plugs, so drill them out and re-cut the threads with a tap. When assembling the engine, replace all plugs.

5. If the engine is very dirty, it should be cleaned at a car service center with a jet of steam or in a hot chamber.

6. Additionally, clean all oil passages and holes. Blow out the internal passages of the block with compressed air.


7. If the block is only slightly dirty, you can limit yourself to washing it with warm water, detergent and a hard brush.

8. Use a tap to restore the threaded holes in the cylinder block (see photo).
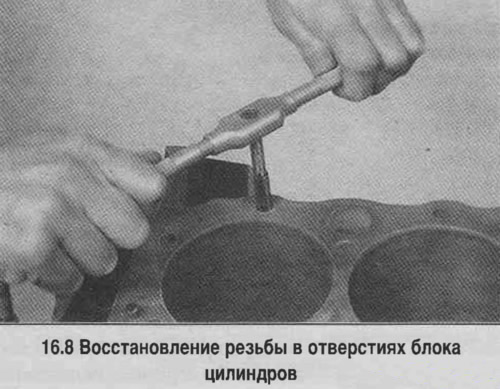
8. Use a tap to restore the threaded holes in the cylinder block (see photo).


9. Install the main bearing caps in place, tighten the bolts by hand.

10. Using a mandrel, press new cooling channel plugs into the block, after having lubricated the plugs with Permatex N1 sealant (see photo).
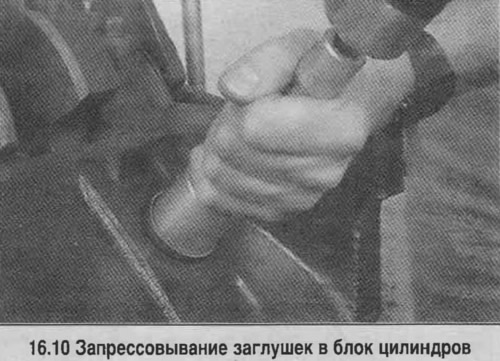
10. Using a mandrel, press new cooling channel plugs into the block, after having lubricated the…


11. Lubricate the oil passage plugs with Permatex N₂ sealant and screw them into the cylinder block holes.

12. If the engine will not be assembled at this time, cover the cylinder block with a polyethylene cover.

The source of the article is available on the website ChevyMan.ru

The article was checked: Vladimir Romannikov
This article is available at russian, bulgarian, belarusian, ukrainian, serbian, croatian, romanian, polish, slovak, hungarian

Share information:

Previous articles
Tahoe 1: Engine removed
Next articles

Crankshaft — dismantling
Connecting rod and piston group — dismantling
Cylinder head — assembly
Valve mechanism — maintenance and repair
Cylinder head — cleaning and checking condition
Cylinder Block — Check
Cylinder honing
Connecting rods and pistons — checking condition
Crankshaft — checking condition
Main and connecting rod bearings — inspection


See similar articles on the topic of Chevrolet cars:
Cleaning the cylinder head Chevrolet Aveo T250 (2006-2011)
Cylinder block repair Chevrolet Captiva 1 (2006-2018)
Checking the level and adding fluid to the brake master cylinder reservoir Chevrolet Cruze 1 (2008-2016)
Replacing the cylinder head cover gasket Chevrolet Lacetti 1 (2002-2009)
Replacing the cylinder head cover gasket Chevrolet Lanos T150 (2002-2009)
Cylinder block Chevrolet Niva 1 (2002-2016)
Cleaning the cylinder block Chevrolet Lumina 1 (1989-1994)
Link in different formats to this page


Visitor comments

No comments yet


How much will 30 + 37 =


Tahoe 2 and 3 (2000-2014) 
  • General information
  • Vehicle characteristics
  • Vehicle device
  • Manual
  • Maintenance
  • Power unit
  • Engine repair
  • Engine overhaul
  • Cooling system
  • Injection and control system
  • Exhaust system
  • Engine electrical equipment
  • Transmission
  • Automatic gearbox 4L60, 4L65, 4L70
  • Automatic gearbox 6L50, 6L80, 6L90
  • Transfer case
  • Drive shafts and cardan
  • Front drive axle
  • Rear drive axle
  • Chassis
  • Car suspension
  • Steering
  • Brake system
  • Body (until 2007)
  • Exterior (external elements)
  • Interior (internal elements)
  • Doors, locks and windows
  • Heating and air conditioning
  • Security System (SRS)
  • Body (since 2007)
  • Exterior (external elements)
  • Doors, locks and windows
  • Interior (internal elements)
  • Electrical equipment
  • Electrical appliances (until 2007)
  • Lighting and lamps (until 2007)
  • Audio system (until 2007)
  • Electrical appliances (since 2007)
  • Lighting and lamps (since 2007)
  • Audio system (since 2007)
  • Wiring diagrams (2000-2005)
  • Wiring diagrams (2005-2007)
  • Wiring diagrams (since 2007)


Tahoe 1 (1992-2000) 
  • General information
  • User manual
  • Maintenance
  • Power unit
  • Engine in a car
  • Engine removed
  • Cooling system
  • Heating and air conditioning
  • Fuel and exhaust systems
  • Decreased toxicity
  • Transmission
  • Manual gearbox
  • Automatic gearbox
  • Transfer case
  • Clutch and drive shafts
  • Chassis
  • Brake system
  • Car suspension
  • Steering
  • Body
  • Repair of body elements
  • Electrical equipment
  • Engine electrics
  • Equipment and devices
  • Electrical circuits


ChevyMan.ru © 2017-2026 · Mobile version · Feedback · Site search · Interesting to read · Sitemap: EN BG BY UA RS HR RO PL SK HU

Aveo 2003-2008 · Aveo 2006-2011 · Aveo 2012-2018 · Captiva 2006-2018 · Cruze 2008-2016 · Lacetti 2002-2009 · Lanos 2002-2009 · Niva 2002-2016 · Tahoe 1992-2000 · Tahoe 2000-2014 · Lumina 1 1989-1994 · Trailblazer 1 2001-2008 · Orlando 1 2010-2018 ·
🛡️ For your security and to improve our service, this site uses cookies. You can disable them in your browser.