ChevyMan.ru
Mazda Mitsubishi Toyota Land Rover Honda Kia Nissan
English Русский
Български
Беларускі
Український
Српски
Hrvatski
Română
Polski
Slovenský
Magyar
|
Articles | Sitemap | Contacts |


Home   Aveo   Captiva   Cruze   Lacetti   Lanos   Niva   Tahoe   Others  
Orlando 1 (2010-2018) Trailblazer 1 (2001-2008, petrol) Lumina 1 (1989-1994)
  • Home
  • Chevrolet
  • Lumina 1
  • Power unit
  • Engine overhaul
  • Cleaning the cylinder block

Cleaning the cylinder block (Chevrolet Lumina 1)

            0

1. Remove the main bearing caps and remove the bearing shells from the caps and cylinder block. Label the bearings, indicating which cylinder they came from and whether they were in the cap or block, then set them aside.

2. Using a special scraper, remove all traces of gasket material from the cylinder block. Do not damage or scratch the gasket mating surfaces.

3. Remove all covers and threaded plugs of oil lines from the block. Usually the plugs are very tight - they may need to be drilled out and re-threaded. Use new plugs when reassembling the engine.

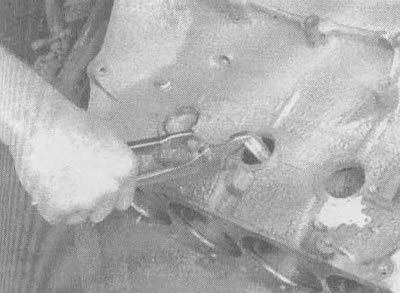
4. Remove the plugs from the cylinder block. To do this, use a hammer and punch to drive one side of the plug into the block, then grab it with large pliers and pull it out (see illustrations).
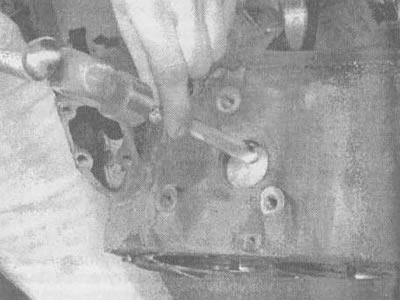
15.4a. A hammer and a large punch can be used to remove plugs from their holes

15.4a. A hammer and a large punch can be used to remove plugs from their holes
15.4b. Remove the plug from the block using pliers

15.4b. Remove the plug from the block using pliers


5. If the engine is too dirty, it should be taken to an auto repair shop for cleaning.

6. After returning the unit from cleaning, clean all oil holes and lines again. Special brushes for these purposes can be purchased. Rinse the channels with warm water until the water runs clear; dry the block thoroughly and wipe all treated surfaces with light anti-corrosion oil. If you have a source of compressed air, use it to speed up the drying process and blow out all oil holes and lines.

Caution: Wear safety glasses when using compressed air.


7. If the block is not too dirty or covered with deposits, you can clean it yourself with soapy water and a stiff brush. Take your time and do this job thoroughly. Regardless of the cleaning method used, be sure to thoroughly clean all oil holes and lines, dry the block thoroughly, and coat all treated surfaces with a coat of oil.

8. All threaded holes in the block must be clean to ensure that the required tightening torques are met during assembly. Tap each hole with the appropriate size tap to remove rust, sealant residue or deposits and repair damaged threads (see illustration). If possible, use compressed air to clear the holes of any debris that may have formed. The threads on the head bolts and main bearing cap bolts also need to be cleaned.
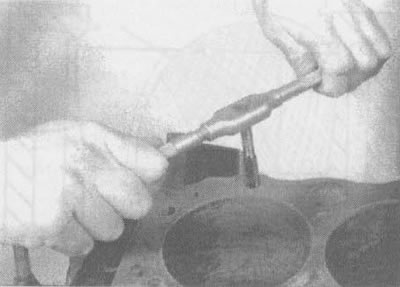
15.8. All bolt holes in the block (especially the holes for the main bearing cap bolts and head)…

15.8. All bolt holes in the block (especially the holes for the main bearing cap bolts and head) must be cleaned and the threads in them must be restored using a tap (after finishing the work, be sure to clean the holes from dirt)


9. Install the main bearing caps in their original place and tighten the bolts by hand.

10. After coating the sealing surfaces of the new plugs with Permatex N₂ sealant, install the plugs into the cylinder block (see illustration). Make sure they are directed correctly and planted correctly; otherwise leaks may occur. There are special tools for this purpose, but a large socket with an outside diameter just large enough to fit into the plug, a 1/2-inch pilot extension, and a hammer will work.
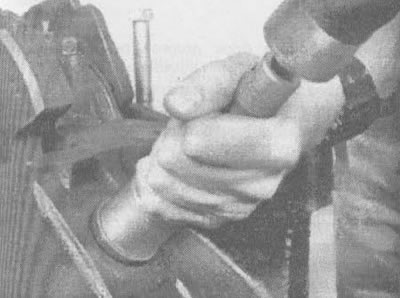
15.10. A large socket head with an extension can be used to guide new plugs into the holes

15.10. A large socket head with an extension can be used to guide new plugs into the holes


11. Apply non-hardening sealant (type Permatex N₂ or sealant for teflon pipes) onto new threaded plugs of oil lines and screw the plugs into the holes in the block. Make sure they are tightened securely.

12. If you are not going to assemble the engine immediately, cover the engine with plastic film to keep it clean.

The article was checked: Vladimir Romannikov
This article is available at russian, bulgarian, belarusian, ukrainian, serbian, croatian, romanian, polish, slovak, hungarian

Share information:

Previous articles
Lumina 1: Engine overhaul
Next articles

Removal the crankshaft
Removal pistons and connecting rods
Removal and checking the camshaft, balance shaft and bearings
Cylinder head assembly
Valve Maintenance
Checking the cylinder block
Cylinder honing
Checking pistons and connecting rods
Checking the crankshaft
Checking main bearings and upper connecting rod bearings


See similar articles on the topic of Chevrolet cars:
Cleaning the cylinder head Chevrolet Aveo T250 (2006-2011)
Cylinder block repair Chevrolet Captiva 1 (2006-2018)
Checking the level and adding fluid to the brake master cylinder reservoir Chevrolet Cruze 1 (2008-2016)
Replacing the cylinder head cover gasket Chevrolet Lacetti 1 (2002-2009)
Replacing the cylinder head cover gasket Chevrolet Lanos T150 (2002-2009)
Cylinder block Chevrolet Niva 1 (2002-2016)
Cylinder Block — Cleaning Chevrolet Tahoe 1 (1992-2000)
Link in different formats to this page


Visitor comments

No comments yet


How much will 21 + 10 =


Orlando 1 (2010-2018) 
  • General information
  • Introduction to manual
  • User manual
  • Maintenance
  • Troubleshooting
  • Power unit
  • Engine repair
  • Fuel and control system
  • Cooling and lubrication system
  • Ignition system
  • Transmission
  • Clutch
  • Gearbox
  • Drive shafts
  • Chassis
  • Car suspension
  • Steering
  • Brake system
  • Body
  • Exterior (external elements)
  • Doors, locks and windows
  • Electrical equipment
  • Equipment and devices
  • Windscreen wipers
  • Power devices
  • Electrical diagrams


Trailblazer 1 (2001-2008) 
  • General information
  • User manual
  • Troubleshooting
  • Maintenance
  • Power unit
  • Engine in a car
  • Engine overhaul
  • Cooling and heating
  • Fuel and exhaust system
  • Engine electrical equipment
  • Engine control
  • Transmission
  • Automatic gearbox
  • Transfer case
  • Drive shafts and cardan
  • Chassis
  • Brake system
  • Car suspension
  • Steering
  • Body
  • Exterior (external elements)
  • Interior (internal elements)
  • Doors, locks and windows
  • Electrical equipment
  • Equipment and devices
  • Electrical circuits


Lumina 1 (1989-1994) 
  • General information
  • Maintenance
  • Power unit
  • Engine 3.1L V6
  • Engine 3.8L V6
  • Engine overhaul
  • Cooling system
  • Power and exhaust system
  • Fuel injection
  • Engine electrical equipment
  • Reduced exhaust gas toxicity
  • Transmission
  • Automatic gearbox
  • Drive shafts
  • Chassis
  • Brake system
  • Car suspension
  • Steering
  • Body
  • Heating and air conditioning
  • Repair of body elements
  • Doors, covers and windows
  • Interior (internal elements)
  • Electrical equipment
  • Equipment and devices
  • Electrical circuits


ChevyMan.ru © 2017-2026 · Mobile version · Feedback · Site search · Interesting to read · Sitemap: EN BG BY UA RS HR RO PL SK HU

Aveo 2003-2008 · Aveo 2006-2011 · Aveo 2012-2018 · Captiva 2006-2018 · Cruze 2008-2016 · Lacetti 2002-2009 · Lanos 2002-2009 · Niva 2002-2016 · Tahoe 1992-2000 · Tahoe 2000-2014 · Lumina 1 1989-1994 · Trailblazer 1 2001-2008 · Orlando 1 2010-2018 ·
🛡️ For your security and to improve our service, this site uses cookies. You can disable them in your browser.