
If the car has light alloy wheels, then we use a jack to lift and remove the wheel from the side of the drive being removed.
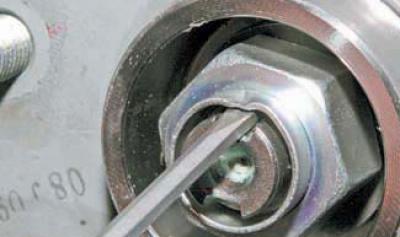
Using a flat-head screwdriver blade, straighten the jammed belt of the hub bearing nut.
We install the wheel and secure it with nuts.
Before installing alloy wheels…
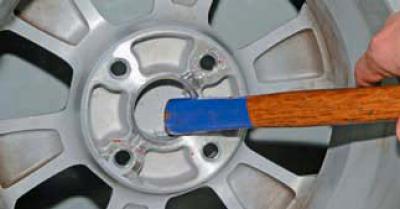
…we use the hammer handle to push it out of the central hole of the disk…
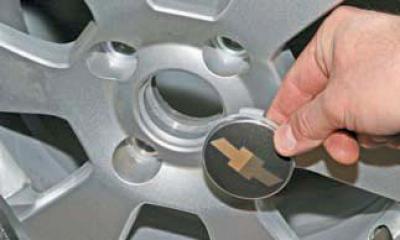
…a plastic plug.
We lower the car, secure it with the parking brake and place chocks under the rear wheels.
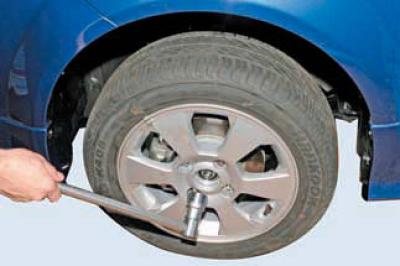
Using a 32 mm socket with a powerful ratchet, loosen the hub bearing nut.
If the disk is steel, remove the cap covering the hub bearing nut and, having straightened the dented belt, unscrew the nut. Having loosened the tightening of the wheel mounting nuts, hang it up and remove it. Securely fix the car on the factory-made support. Disconnect the ball joint of the front suspension arm from the steering knuckle (see Removal the lever). Remove the front wheel brake hose coupling bracket to the bracket on the shock absorber strut housing and remove the hose coupling from the bracket hole (see Replacing the front brake hose). We unscrew the hub bearing nut..

…and we take out the thrust washer.
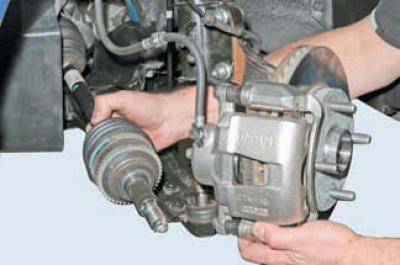
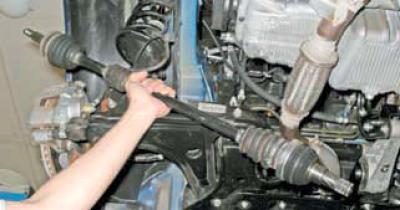
We move the steering knuckle with the shock absorber strut outward and remove the splined tailpiece of the outer joint housing of the left wheel drive from the hub hole. We place the drive on the suspension arm.
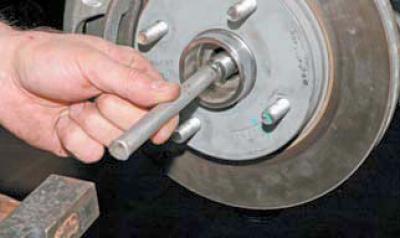
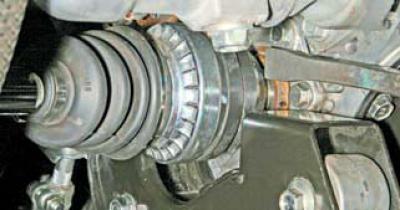
When the outer hinge housing tailpiece fits tightly in the hub hole, knock it out with a hammer using a soft metal punch.
If you decide not to drain the oil from the gearbox, then place a container under the hole in the gearbox housing, into which the tailpiece of the inner drive joint enters.

When dismantling the left drive, we use the end of the mounting blade to pry up the flange of the inner hinge housing..
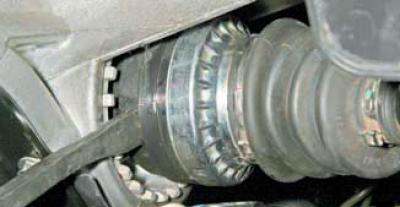
...and, leaning the spatula on the gearbox housing, overcoming the resistance of the retaining ring, we push the tail of the hinge housing out of the splined hole of the differential axle gear.
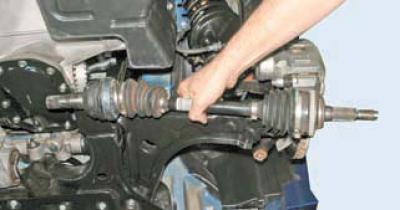
Supporting the inner joint housing so as not to damage the drive seal with its splined shank, remove the left wheel drive.
We dismantle the right drive in the same way.
When removing the inner joint tailstock of the right drive..
…we use the end of the mounting blade to pry up the end of the hinge housing and rest the blade on the head of the differential bearing cover mounting bolt.
We remove the right wheel drive.
before installing the drive, replace the retaining ring of the inner joint tail with a new one.
Reuse of retaining rings is not permitted.
Carefully insert the shank of the inner joint housing through the hole in the drive seal and, turning the shaft, align the splines of the shank with the splines of the axle gear.
With a sharp movement of the drive towards the gearbox, we send the drive to the place. By pulling the inner hinge housing or prying it with a mounting blade, we make sure that the housing tail is fixed in the axle gear. We carry out further assembly in the reverse order.
If the transmission oil was drained from the gearbox before dismantling the drive, then pour new oil into the gearbox; otherwise, check the oil level in the gearbox and bring it up to the norm by adding exactly the same oil.