
We clean the hinge housing and cover from dirt and clamp the drive shaft in a vice with soft metal jaw pads.
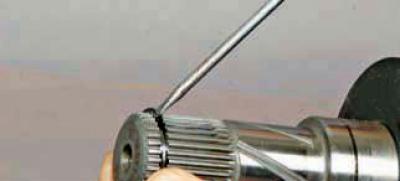
We use a screwdriver to pry up the retaining ring located in the groove of the inner hinge housing tailstock…
…and we take it off.
We cut the large clamp that secures the cover with side cutters..
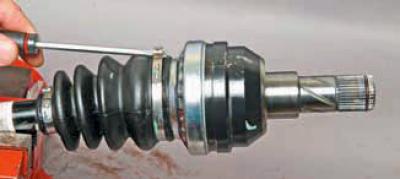
…or, by inserting a screwdriver blade into the clamp lock, we loosen it.
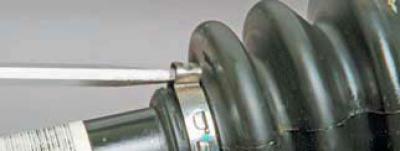
We open the small clamp lock in the same way.
We move the hinge cover along the shaft. We remove the grease from the end of the hinge cage with a rag. We clamp the tail of the inner hinge housing in a vice with soft metal jaw pads.
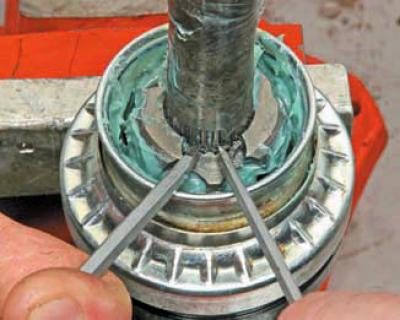
Using two screwdrivers or special pliers with flat jaws, we loosen the "antennae" of the retaining ring that secures the hinge sleeve to the drive shaft.
When performing this operation, it is necessary to use the tool to center the retaining ring as accurately as possible relative to the opening of the hinge sleeve, so that when the ring is released, it completely enters the groove of the sleeve along its entire circumference (except for the "antennae").
An uncentered ring, when the antennae are released, will not fully enter the groove of the hinge sleeve and will not release the drive shaft (for clarity, the drive shaft is removed from the housing).
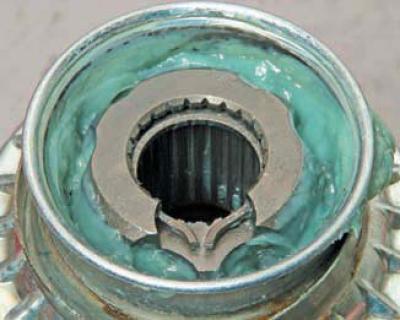
As soon as the retaining ring enters the groove of the joint cage and at the same time exits the groove on the drive shaft, pull the shaft along its axis and remove it from the cage of the inner joint.
We remove the mudguard from the shaft.
If the joint is removed only to replace the cover, when it is known that it was damaged recently and the CV joint has retained its functionality, then, without disassembling the joint, we remove the maximum possible amount of grease from it and wash it in kerosene. Wipe the joint with a rag and blow it with compressed air. Inspect the balls, separator, cage and internal cavity of the housing. Scores, dents, cracks, traces of corrosion are not allowed - such a joint is replaced.
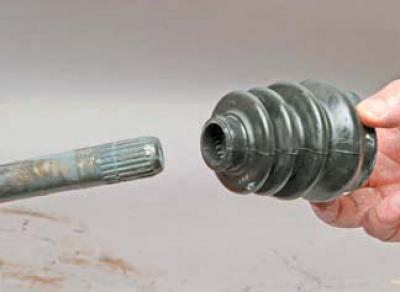
We clean the shaft from old grease and apply a thin layer of new grease to it. We put the hinge cover on the shaft.
We install a new retaining ring into the hinge housing and put new grease into the cavities of the hinge housing and the boot, a total of 120–140 g.
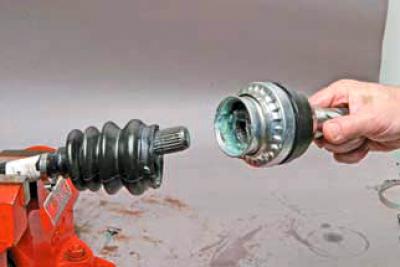
We put the hinge on the shaft, ensuring that the retaining ring is fixed in the groove of the shaft.
We check the mobility of the hinge - it should move without jamming. We pull the cover onto the hinge body so that the cover belts under the clamps are located in the corresponding seats of the shaft and the hinge body. We fix the hinge cover with new clamps.
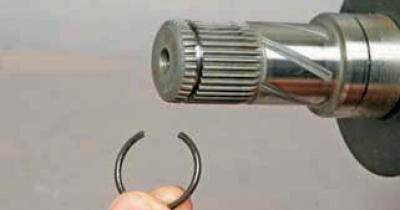
We install a new retaining ring into the groove of the inner joint housing tailstock.
(The text of the article was obtained from the website «CHEVYMAN.ru»)