
ChevyMan.ru
Mazda Mitsubishi Toyota Land Rover Honda Kia Nissan
English Русский
Български
Беларускі
Український
Српски
Hrvatski
Română
Polski
Slovenský
Magyar
|
Articles | Sitemap | Contacts |


Home   Aveo   Captiva   Cruze   Lacetti   Lanos   Niva   Tahoe   Others  
Cruze 1 (2008-2016)
  • Home
  • Cruze
  • J300 (2008-2016)
  • Transmission
  • Car gearbox
  • Removal and installation the gearbox control lever joint

Removal and installation the gearbox control lever joint (Chevrolet Cruze J300)

            0

You will need: 10 and 12 mm wrenches, a flat-blade screwdriver.

You will need: 10 and 12 mm wrenches, a flat-blade screwdriver.


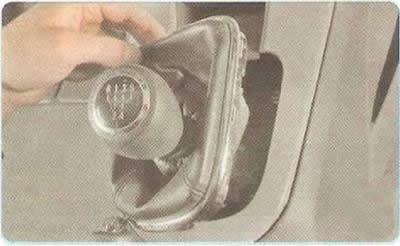
1. Overcoming the force of the clamps, remove the lever cover together with the frame.
1. Overcoming the force of the clamps, remove the lever cover together with the frame.


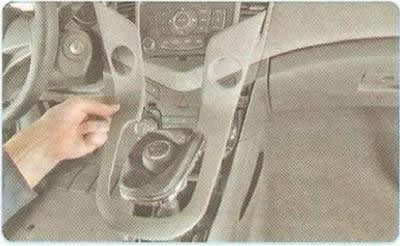
2. Remove the decorative floor tunnel trim (see "Removal and installation the floor tunnel lining").
2. Remove the decorative floor tunnel trim (see «Removal and installation the floor tunnel lining»).


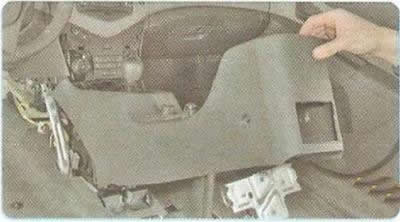
3. Remove the floor tunnel lining (see "Removal and installation the floor tunnel lining").


3. Remove the floor tunnel lining (see «Removal and installation the floor tunnel lining»).


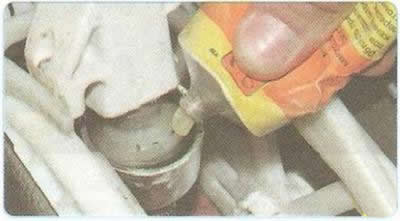
Helpful Hint: If you have observed creaking and sticking of the lever hinge, but not increased play, try lubricating the hinge with consistent grease. It is possible that after lubricating the hinge, further disassembly of the mechanism will not be required.


Note: Disassembling the lever mechanism in case of damage does not make sense, since the mechanism parts are not sold separately.
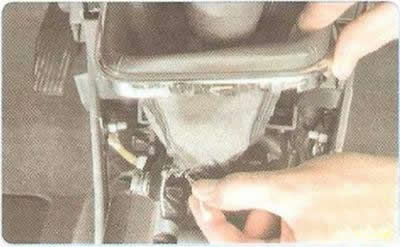

Note: Disassembling the lever mechanism in case of damage does not make sense, since the mechanism…


4. Loosen the gearshift lever boot clamp.
4. Loosen the gearshift lever boot clamp.


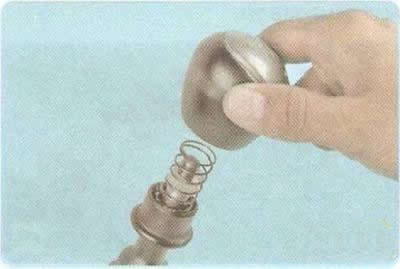
5. Unscrew the gearbox control lever handle from it.


5. Unscrew the gearbox control lever handle from it.


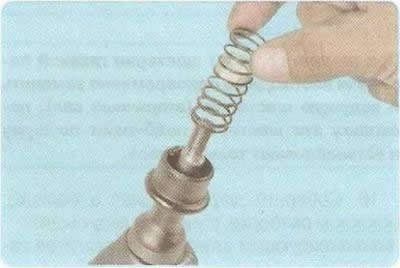
6. Remove the spring...
6. Remove the spring...


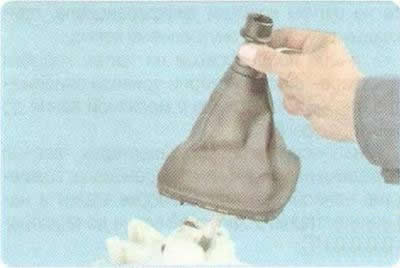
7. ...and remove the decorative cover of the gearbox control lever together with the reverse gear locking mechanism.
7. ...and remove the decorative cover of the gearbox control lever together with the reverse gear…


8. Remove the cotter pin from the hole in the gear selector lever pin on the left side...
8. Remove the cotter pin from the hole in the gear selector lever pin on the left side...


9. ...and remove the gear selector cable tip from the lever pin.


9. ...and remove the gear selector cable tip from the lever pin.


10. Remove the gear selector cable housing end from the groove in the control lever bracket housing.
10. Remove the gear selector cable housing end from the groove in the control lever bracket housing.


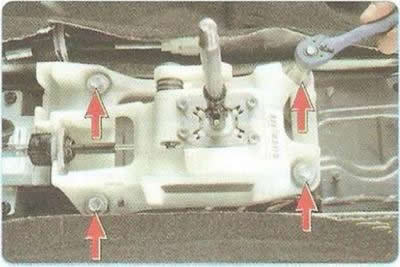
11. Remove the four bolts securing the bracket to the body base.
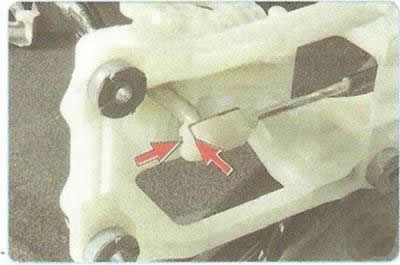
11. Remove the four bolts securing the bracket to the body base.


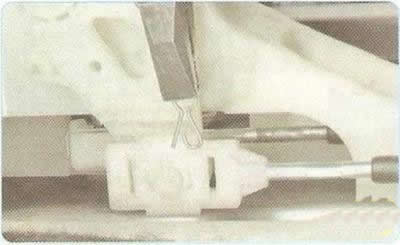
12. Tilt the bracket body and use a screwdriver to press the ends of the spring clip.
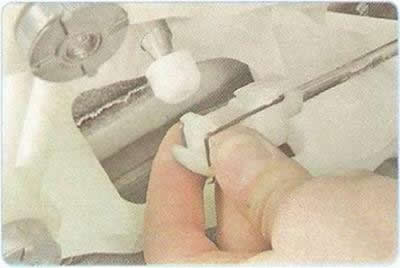
12. Tilt the bracket body and use a screwdriver to press the ends of the spring clip.


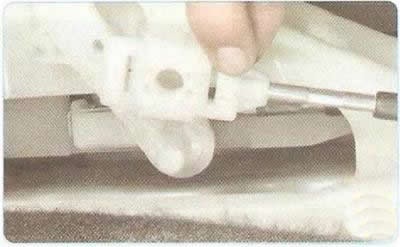
13. Disconnect the cable end from the gear shift lever joint.
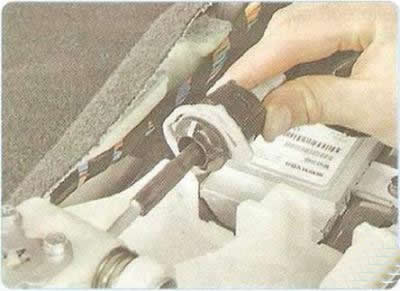


13. Disconnect the cable end from the gear shift lever joint.


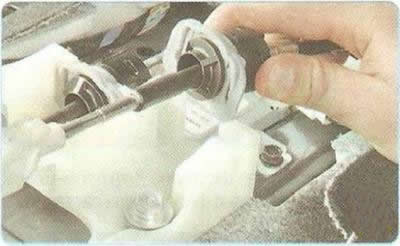
14. Remove the gear shift cable sheath tip from the groove in the bracket housing.
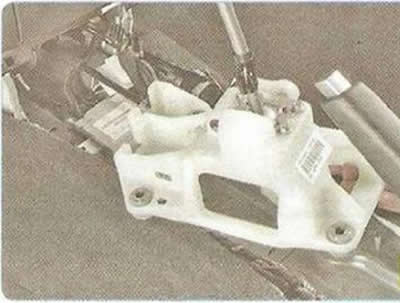
14. Remove the gear shift cable sheath tip from the groove in the bracket housing.


15. Remove the mechanism.

16. Install the gearshift lever mechanism and all removed parts in the reverse order of removal.

The article was checked: Vladimir Romannikov
This article is available at russian, bulgarian, belarusian, ukrainian, serbian, croatian, romanian, polish, slovak, hungarian

Share information:

Previous articles
Cruze 1: Car gearbox
Next articles

Replacing manual transmission control cables
Gearbox differential repair
Gearbox synchronizer repair
Primary shaft repair
Secondary shaft repair


See similar articles on the topic of Chevrolet cars:
Gearbox control Chevrolet Aveo T300 (2012-2018)
Shift Control Lever Assembly Chevrolet Captiva 1 (2006-2018)
Adjusting the gearbox control drive Chevrolet Lacetti 1 (2002-2009)
Adjusting the gearbox control drive Chevrolet Lanos T150 (2002-2009)
Control lamp block Chevrolet Niva 1 (2002-2016)
Transfer case with manual control Chevrolet Tahoe 1 (1992-2000)
Troubleshooting the Cooling Fan Control Circuit Chevrolet Lumina 1 (1989-1994)
Link in different formats to this page


Visitor comments

No comments yet


How much will 29 + 16 =


Cruze 1 (2008-2016) 
  • General information
  • User manual
  • Troubleshooting
  • Maintenance
  • Power unit
  • Engine repair
  • Lubrication system
  • Cooling system
  • Exhaust system
  • Supply system
  • Control system
  • Transmission
  • Clutch
  • Car gearbox
  • Front wheel drives
  • Chassis
  • Front suspension
  • Rear suspension
  • Steering
  • Brake system
  • Body
  • Exterior (external elements)
  • Interior (internal elements)
  • Doors, covers and windows
  • Heating and air conditioning
  • Security systems
  • Electrical equipment
  • Equipment and devices
  • Power devices
  • Lighting and signaling
  • Electrical circuits


ChevyMan.ru © 2017-2026 · Mobile version · Feedback · Site search · Interesting to read · Sitemap: EN BG BY UA RS HR RO PL SK HU

Aveo 2003-2008 · Aveo 2006-2011 · Aveo 2012-2018 · Captiva 2006-2018 · Cruze 2008-2016 · Lacetti 2002-2009 · Lanos 2002-2009 · Niva 2002-2016 · Tahoe 1992-2000 · Tahoe 2000-2014 · Lumina 1 1989-1994 · Trailblazer 1 2001-2008 · Orlando 1 2010-2018 ·
🛡️ For your security and to improve our service, this site uses cookies. You can disable them in your browser.