
ChevyMan.ru
Mazda Mitsubishi Toyota Land Rover Honda Kia Nissan
English Русский
Български
Беларускі
Український
Српски
Hrvatski
Română
Polski
Slovenský
Magyar
|
Articles | Sitemap | Contacts |


Home   Aveo   Captiva   Cruze   Lacetti   Lanos   Niva   Tahoe   Others  
Lanos T150 (2002-2009)
  • Home
  • Lanos
  • T150 (2002-2009)
  • Chassis
  • Brake system
  • Removal the master brake cylinder

Removal the master brake cylinder (Chevrolet Lanos T150)

            0

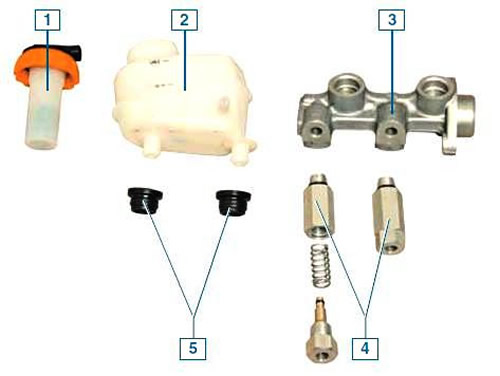
Components of the master brake cylinder: 1 - tank cap with a sensor for low fluid level in the…
Components of the master brake cylinder: 1 - tank cap with a sensor for low fluid level in the tank; 2 — brake and clutch hydraulic fluid reservoir; 3 - master brake cylinder; 4 - pressure regulator; 5 - sealing bushings


We carry out the work when replacing the main brake cylinder and removing the brake booster.

Having pressed two clamps..
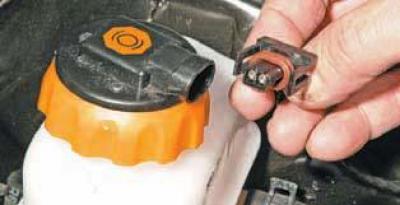
…disconnect the wiring harness from the working fluid level sensor.


…disconnect the wiring harness from the working fluid level sensor.

After unscrewing the tank cap, remove it together with the liquid level sensor.

Using a rubber bulb, we remove the liquid from the tank and screw on the lid.

Putting a rag underneath..
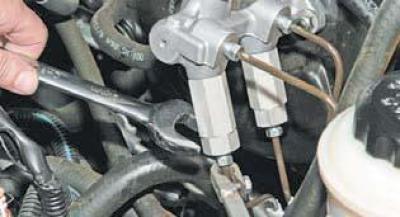
...holding the pressure regulator nipple with a 21 mm wrench, and using a special 10 mm wrench for…


...holding the pressure regulator nipple with a 21 mm wrench, and using a special 10 mm wrench for the brake pipe nipples, unscrew the nipples of the rear brake pipes.
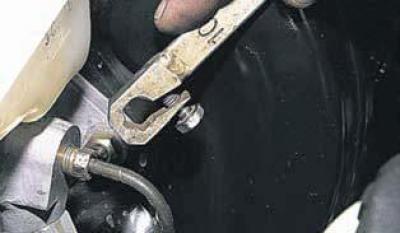


Using a special 10 mm wrench for brake pipe fittings, unscrew the fittings of the front brake…


Using a special 10 mm wrench for brake pipe fittings, unscrew the fittings of the front brake mechanism pipes.
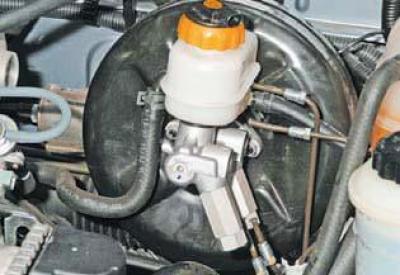
We move the pipes away from the main brake cylinder.

We move the pipes away from the main brake cylinder.

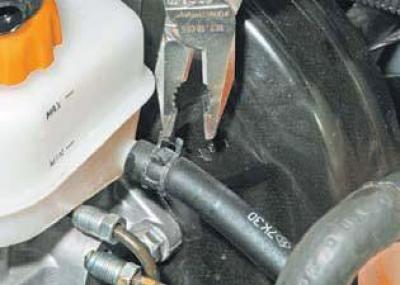
Using pliers, loosen the clamp securing the hose that supplies the working fluid to the clutch…


Using pliers, loosen the clamp securing the hose that supplies the working fluid to the clutch master cylinder..
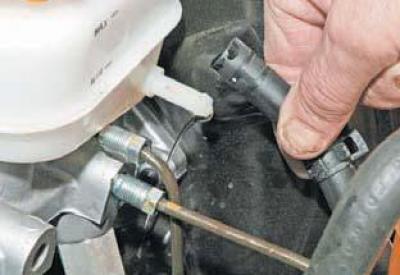
…and remove it from the tank pipe.

…and remove it from the tank pipe.


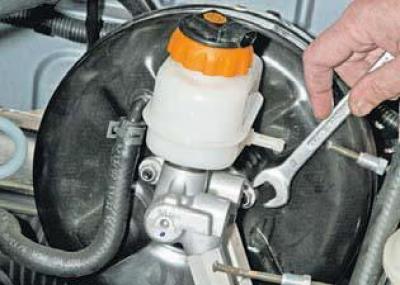
Using a 13 mm spanner, unscrew the two nuts securing the cylinder to the brake booster…
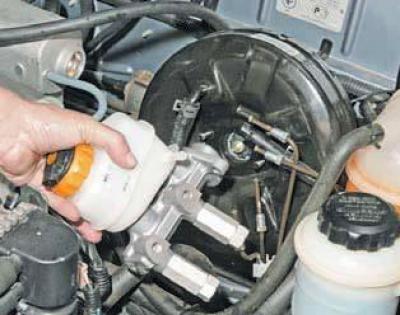

Using a 13 mm spanner, unscrew the two nuts securing the cylinder to the brake booster…

…and remove the main brake cylinder together with the hydraulic drive reservoir.


…and remove the main brake cylinder together with the hydraulic drive reservoir.

The connection between the master brake cylinder and the brake booster is sealed with a rubber gasket.

To check its condition and possible replacement…
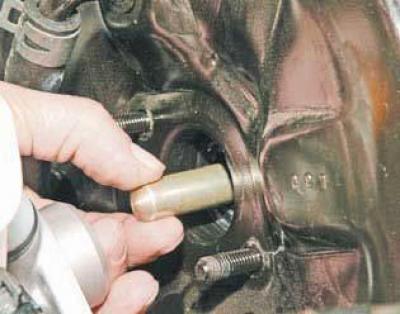
…we remove the pusher from the vacuum booster hole…
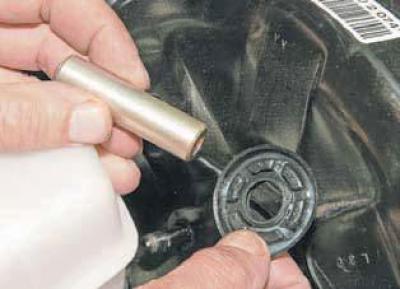

…we remove the pusher from the vacuum booster hole…


…and a rubber gasket.


…and a rubber gasket.

We install the master brake cylinder in the reverse order.

We bleed the hydraulic drive of the brake system (see Bleeding the hydraulic brake system).

To replace the tank, unscrew the cap and remove it together with the liquid level sensor.

Using a rubber bulb, we collect liquid from the tank.

Disconnect the hose supplying the working fluid to the clutch master cylinder from the reservoir (see above).
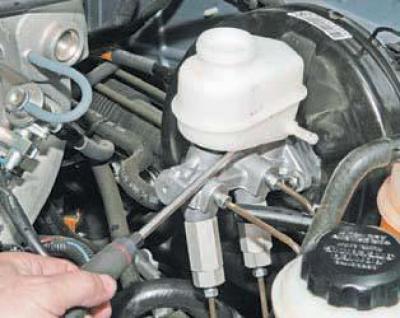
We pry it up with a screwdriver and, overcoming the resistance of the rubber connecting bushings..
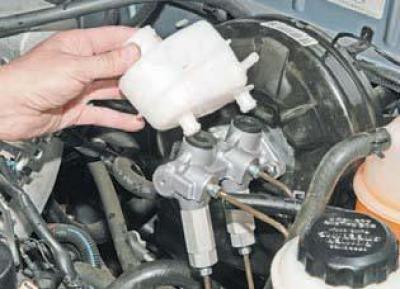

We pry it up with a screwdriver and, overcoming the resistance of the rubber connecting bushings..

…we remove the tank.


…we remove the tank.


To replace the connecting sleeve, squeeze the upper edge of the sleeve with your fingers..
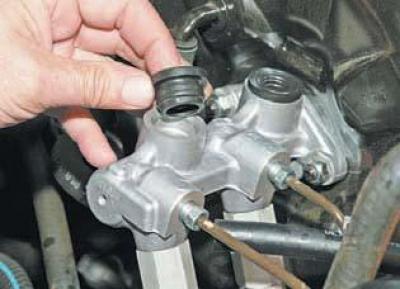
…and we take it out of the hole of the main brake cylinder.


…and we take it out of the hole of the main brake cylinder.

We remove the other connecting sleeve in the same way.

We install the tank in the reverse order.

After installation, bleed the hydraulic drive of the brake system (see Bleeding the hydraulic brake system).

The article was checked: Vladimir Romannikov
This article is available at russian, bulgarian, belarusian, ukrainian, serbian, croatian, romanian, polish, slovak, hungarian

Share information:

Previous articles
Lanos T150: Brake system
Next articles

Replacing the brake pads of the rear wheels
Replacing the protective cover and sealing ring of the front wheel brake piston
Replacing the brake pads of the front wheels
The structure of the braking system
Removal the brake booster
Replacing the front brake hose
Replacing the front wheel brake disc
Replacing the rear wheel brake cylinder
Replacing the rear wheel brake hose


See similar articles on the topic of Chevrolet cars:
Replacing the brake master cylinder reservoir Chevrolet Aveo T300 (2012-2018)
General description and operation of the brake master cylinder Chevrolet Captiva 1 (2006-2018)
Checking the level and adding fluid to the brake master cylinder reservoir Chevrolet Cruze 1 (2008-2016)
Removal the master brake cylinder Chevrolet Lacetti 1 (2002-2009)
Brake master cylinder Chevrolet Niva 1 (2002-2016)
Filling the master brake cylinder reservoir Chevrolet Tahoe 2 and 3 (2000-2014)
Removal, overhaul and installation of the master brake cylinder Chevrolet Lumina 1 (1989-1994)
Link in different formats to this page


Visitor comments

No comments yet


How much will 36 + 21 =


Lanos T150 (2002-2009) 
  • General information
  • User manual
  • Maintenance
  • Troubleshooting
  • Power unit
  • Engine repair
  • Control system
  • Supply system
  • Cooling system
  • Exhaust system
  • Transmission
  • Clutch
  • Car gearbox
  • Front wheel drives
  • Chassis
  • Front suspension
  • Rear suspension
  • Steering
  • Brake system
  • Body
  • Repair of body elements
  • Heating and air conditioning
  • Electrical equipment
  • Engine electrics
  • Lighting and lamps
  • Equipment and devices
  • Electrical circuits


ChevyMan.ru © 2017-2026 · Mobile version · Feedback · Site search · Interesting to read · Sitemap: EN BG BY UA RS HR RO PL SK HU

Aveo 2003-2008 · Aveo 2006-2011 · Aveo 2012-2018 · Captiva 2006-2018 · Cruze 2008-2016 · Lacetti 2002-2009 · Lanos 2002-2009 · Niva 2002-2016 · Tahoe 1992-2000 · Tahoe 2000-2014 · Lumina 1 1989-1994 · Trailblazer 1 2001-2008 · Orlando 1 2010-2018 ·
🛡️ For your security and to improve our service, this site uses cookies. You can disable them in your browser.