
ChevyMan.ru
Mazda Mitsubishi Toyota Land Rover Honda Kia Nissan
English Русский
Български
Беларускі
Український
Српски
Hrvatski
Română
Polski
Slovenský
Magyar
|
Articles | Sitemap | Contacts |


Home   Aveo   Captiva   Cruze   Lacetti   Lanos   Niva   Tahoe   Others  
Lanos T150 (2002-2009)
  • Home
  • Lanos
  • T150 (2002-2009)
  • Chassis
  • Brake system
  • Replacing the brake pads of the rear wheels

Replacing the brake pads of the rear wheels (Chevrolet Lanos T150)

            0

We replace the brake pads in the event of the maximum permissible wear of their linings or the drum of the rear wheel brake mechanism.

The pads also need to be replaced if the linings are oily, have deep grooves and chips on them, or if the linings have separated from the base of the pads.

The minimum permissible thickness of the pads is 0.5 mm.

The maximum permissible internal diameter of the drum is 201 mm.

The rear wheel brake pads must only be replaced as a set - all four pads.


Replacing the pads of only one brake mechanism may cause the vehicle to pull to the side when braking.

We show the replacement of pads on the left rear wheel.

The brake pads of the right rear wheel are replaced in the same way.

We remove the wheel.
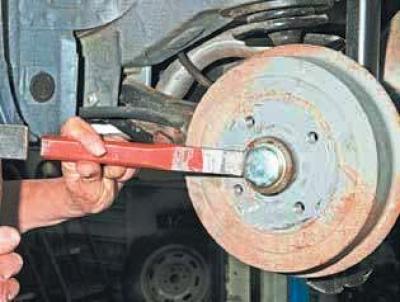
Using a chisel and a hammer…
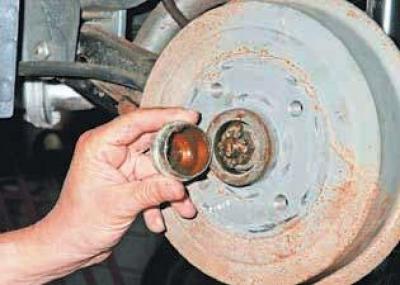

Using a chisel and a hammer…

…we press out the protective cap of the hub bearing.

…we press out the protective cap of the hub bearing.


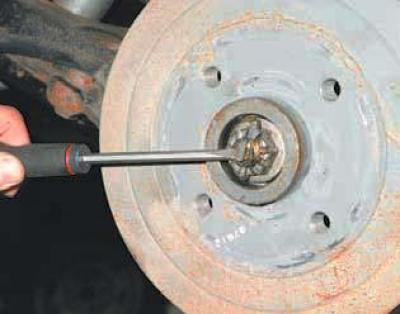
We straighten the cotter pin with a screwdriver..

We straighten the cotter pin with a screwdriver..

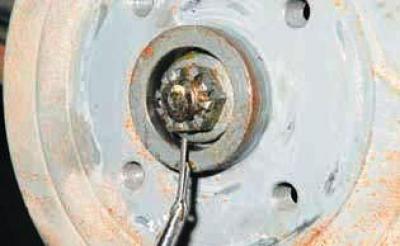
…and using pliers we remove it from the journal hole.

…and using pliers we remove it from the journal hole.

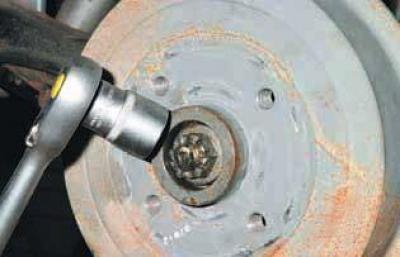
Using a 24 mm socket, unscrew the crown nut of the hub bearing.

Using a 24 mm socket, unscrew the crown nut of the hub bearing.

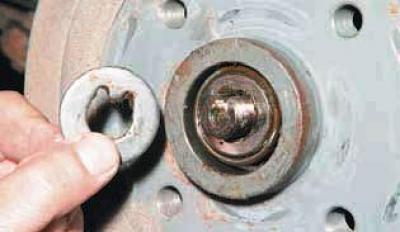
Remove the lock washer.


Remove the lock washer.


Before removing the brake drum, lower the parking brake lever all the way - the car must be released.
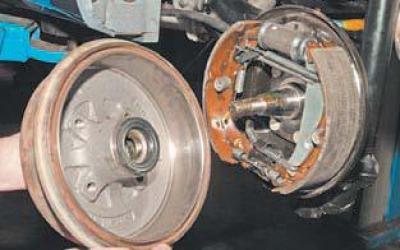
We remove the brake drum assembly with the bearing.


We remove the brake drum assembly with the bearing.

Do not press the brake pedal after removing the brake drum, as the pistons may come out of the wheel cylinder completely.


We clean the brake mechanism parts from dirt.

It is prohibited to use gasoline and diesel fuel to clean brake mechanism parts.
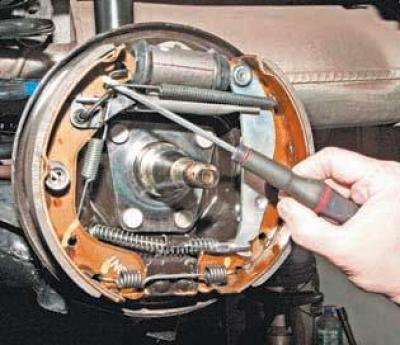

Using a screwdriver, disconnect the front end of the upper tension spring from the gap adjuster…


Using a screwdriver, disconnect the front end of the upper tension spring from the gap adjuster lever earring and remove the spring.

We move the upper stops of the brake pads away from the pistons of the wheel cylinder.
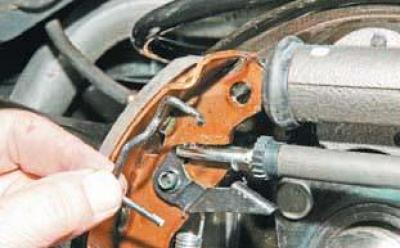
We remove the gap adjuster lever earring.
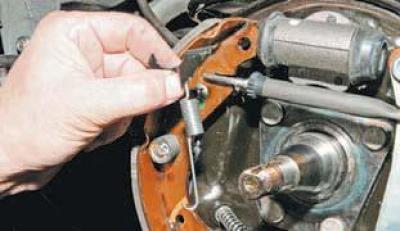

We remove the gap adjuster lever earring.


We remove the clearance adjuster lever together with the spring.
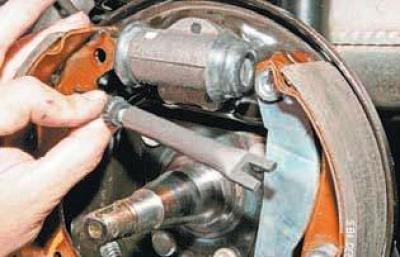

We remove the clearance adjuster lever together with the spring.

We remove the spacer bar assembly.
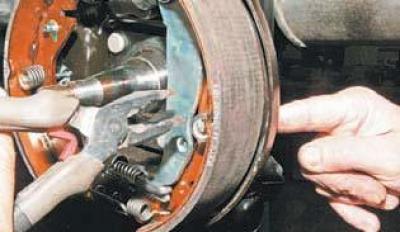

We remove the spacer bar assembly.

Using pliers, turn the cup of the brake shoe support spring until the groove in the cup aligns with…


Using pliers, turn the cup of the brake shoe support spring until the groove in the cup aligns with the tail of the support.
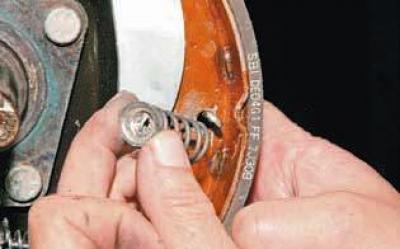
We remove the cup with the spring and take out the support stand from the hole in the brake…


We remove the cup with the spring and take out the support stand from the hole in the brake mechanism shield.
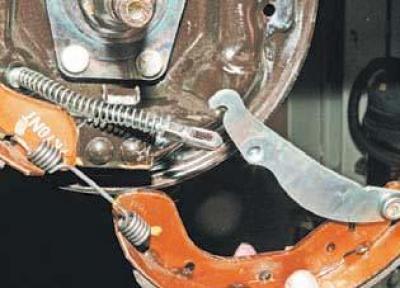


We disconnect the end of the parking brake cable from the drive lever and, having disconnected the…


We disconnect the end of the parking brake cable from the drive lever and, having disconnected the end of the lower tension spring from the shoe, we remove the rear shoe with the lever assembly.

We remove the lower tension spring.

We remove the cup with the spring of the front brake shoe support in the same way as the rear one..
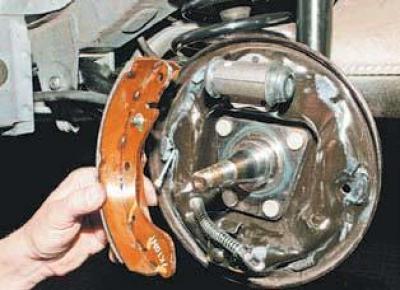
…and remove the front shoe.


…and remove the front shoe.

We check the technical condition of the parts and clean them.
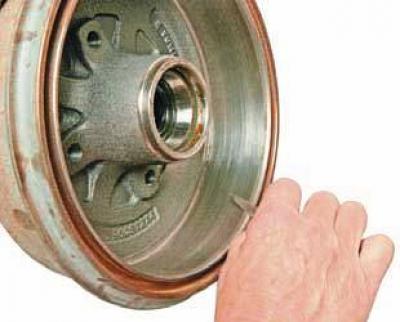
If a ridge has formed on the inner diameter of the brake drum… …we remove it with a scraper.
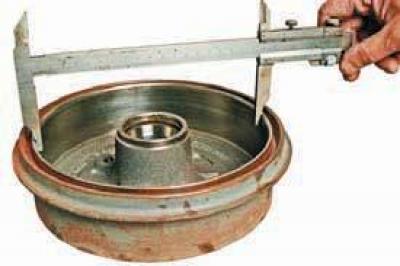

If a ridge has formed on the inner diameter of the brake drum… …we remove it with a scraper.


Using a caliper, measure the inner diameter of the brake drum, the value of which should not be…


Using a caliper, measure the inner diameter of the brake drum, the value of which should not be more than 201 mm.

Before installing new pads, clean the threads of the spacer bar tip and ratchet nut and apply a thin layer of plastic grease to the threads.

We install new brake pads on the rear wheel in the reverse order.

Please note…
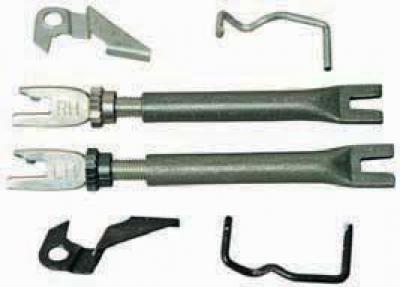
...that the ratchet nut of the spacer bar, the shackle and the adjuster lever of the right brake…


...that the ratchet nut of the spacer bar, the shackle and the adjuster lever of the right brake mechanism are silver, and the left mechanism is black.

The threaded end of the spacer bar is marked: RH - for the right mechanism; LH — for left-hand mechanism.

Before installing new pads, it is necessary to reduce the length of the spacer bar by tightening the ratchet nut all the way onto the threaded tip.

This must be done in order to install the brake drum.

After installing the brake drum, tighten the rear wheel bearing nut and adjust the bearings (see Adjusting the rear wheel bearings).

We adjust the position of the brake pads.

To do this, press the brake pedal 10–15 times.

In this case, clicks will be heard in the brake mechanisms of the rear wheels from the operation of the mechanism for automatic adjustment of the gaps between the pads and brake drums.

When the clicking stops, the adjustment is complete.

Adjust the parking brake (see Adjusting the parking brake).

We check the ease of rotation of the suspended wheels with the parking brake lever fully lowered.

We check the fluid level in the tank and, if necessary, bring it up to normal.

The article was checked: Vladimir Romannikov
This article is available at russian, bulgarian, belarusian, ukrainian, serbian, croatian, romanian, polish, slovak, hungarian

Share information:

Previous articles
Lanos T150: Brake system
Next articles

Replacing the protective cover and sealing ring of the front wheel brake piston
Replacing the brake pads of the front wheels
The structure of the braking system
Removal the master brake cylinder
Removal the brake booster
Replacing the front brake hose
Replacing the front wheel brake disc
Replacing the rear wheel brake cylinder


See similar articles on the topic of Chevrolet cars:
Replacing the brake pads of the rear wheel brake mechanism Chevrolet Aveo T300 (2012-2018)
Rear brake pads — removal and installation Chevrolet Captiva 1 (2006-2018)
Replacing the brake pads of the rear wheel brake mechanism Chevrolet Cruze 1 (2008-2016)
Replacing the brake pads of the rear wheels Chevrolet Lacetti 1 (2002-2009)
Replacing the front brake pads Chevrolet Niva 1 (2002-2016)
Brake fluid and pads Chevrolet Tahoe 1 (1992-2000)
Checking and replacing rear brake pads Chevrolet Lumina 1 (1989-1994)
Link in different formats to this page


Visitor comments

No comments yet


How much will 32 + 46 =


Lanos T150 (2002-2009) 
  • General information
  • User manual
  • Maintenance
  • Troubleshooting
  • Power unit
  • Engine repair
  • Control system
  • Supply system
  • Cooling system
  • Exhaust system
  • Transmission
  • Clutch
  • Car gearbox
  • Front wheel drives
  • Chassis
  • Front suspension
  • Rear suspension
  • Steering
  • Brake system
  • Body
  • Repair of body elements
  • Heating and air conditioning
  • Electrical equipment
  • Engine electrics
  • Lighting and lamps
  • Equipment and devices
  • Electrical circuits


ChevyMan.ru © 2017-2026 · Mobile version · Feedback · Site search · Interesting to read · Sitemap: EN BG BY UA RS HR RO PL SK HU

Aveo 2003-2008 · Aveo 2006-2011 · Aveo 2012-2018 · Captiva 2006-2018 · Cruze 2008-2016 · Lacetti 2002-2009 · Lanos 2002-2009 · Niva 2002-2016 · Tahoe 1992-2000 · Tahoe 2000-2014 · Lumina 1 1989-1994 · Trailblazer 1 2001-2008 · Orlando 1 2010-2018 ·
🛡️ For your security and to improve our service, this site uses cookies. You can disable them in your browser.