


The minimum permissible thickness of the friction linings of the brake pads is 1.4 mm.
Replace the pads in the following cases:
- the thickness of the friction linings is less than the permissible value;
- the surface of the linings is oily;
- the friction lining is not firmly connected to the base;
- the overlays have deep grooves and chips.
WARNINGS: Do not use gasoline, diesel fuel or any other mineral solvents to clean brakes.
Replace the brake pads on both rear wheels at the same time. Do not replace the front and rear pads between each other, or between the left and right wheels. This may result in uneven braking.
1. Engage 1st gear in a manual transmission or set the automatic transmission selector lever to the "P" (parking) position and place chocks under the front wheels.
2. Check that the parking brake lever is lowered all the way down (the car is released).
3. Raise the rear wheel and place the rear of the vehicle on the side where the brake pads are being replaced on a support. Remove the rear wheel.
4. If the brake fluid level in the master cylinder reservoir is at or approaching the "MAX" mark, pump out some of the fluid from the reservoir. Otherwise, it may spill out when replacing the pads.
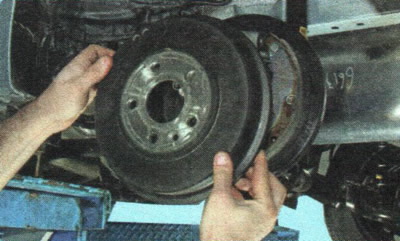
5. Remove the brake drum (see "Removal and installation the brake drum").
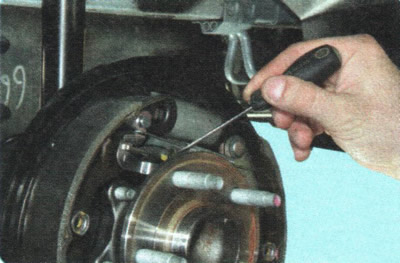
6. Screw the clearance adjuster nut all the way onto the threaded end of the spacer bar using a screwdriver, resting it on the edge of the hub, as shown in the photo.
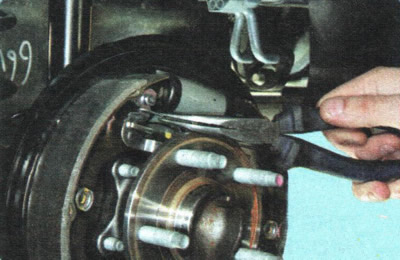
7. Use pliers to grasp the bent end of the upper tension spring...
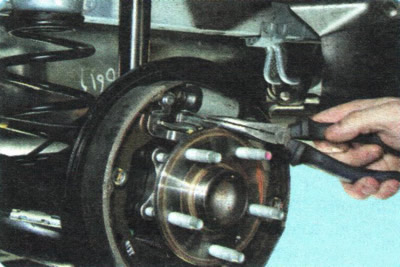
8. ... remove it from the groove of the gap adjustment mechanism earring...
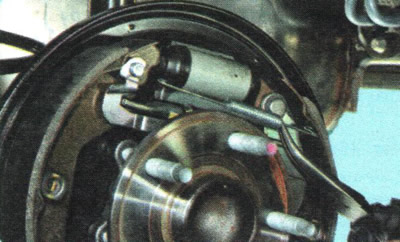
9. ...and remove the upper tension spring.
WARNING: Be careful when using pliers. We recommend using special pliers for removing tension springs.
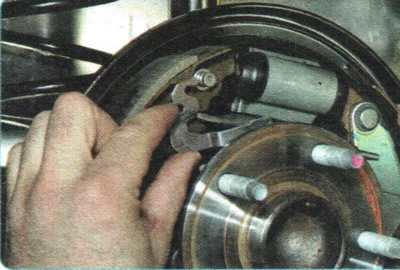
10. Remove the gap adjustment mechanism earring...
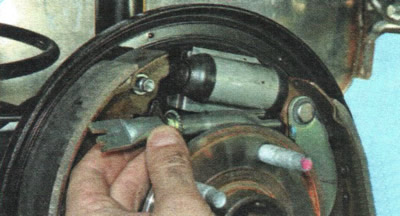
11. ...and a spacer bar.
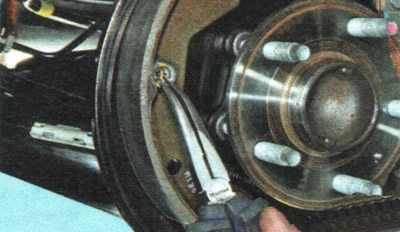
12. Holding the shank of the support post with pliers, press on the washer, turn it 90°...
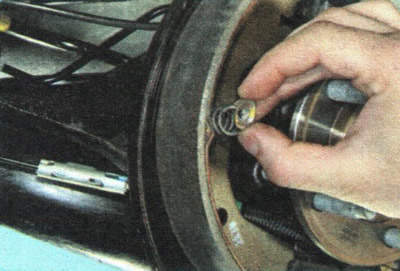
13. ...and remove the washer...
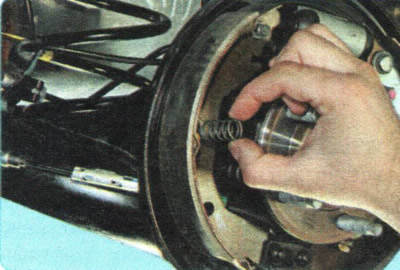
14. ...spring...
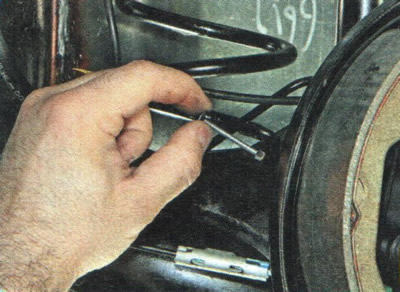
15. ...and the front brake shoe support.
16. Similarly, remove the washer, spring and support post of the rear shoe.
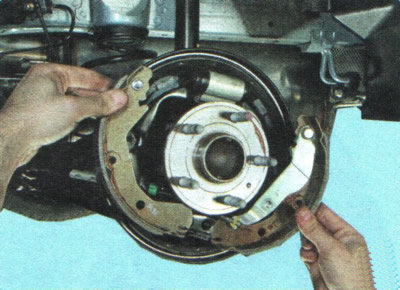
17. Overcoming the resistance of the lower tension spring, move the toes of the brake shoes beyond the lower stop limiter to relieve the spring tension.
WARNING: Immediately after removing the brake pads from the brake shield, secure the slave cylinder pistons in any way possible (for example, tie it with a rubber band or tie it with wire), otherwise, the pistons may be pushed out of the cylinder by the expansion spring and brake fluid will leak out of the hydraulic system.
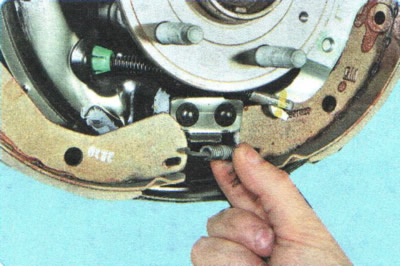
18. Having disconnected the bent end of the lower tension spring from the front shoe, remove the shoe...
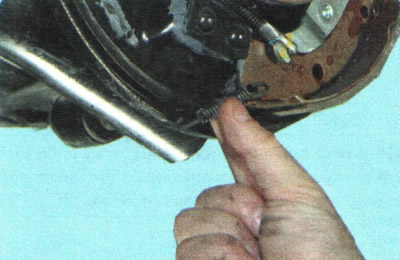
19. ...and a spring.
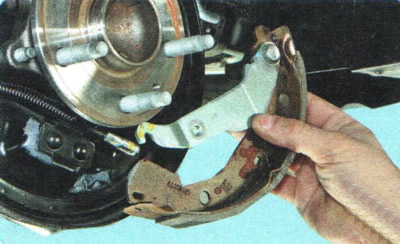
20. Remove the parking brake cable end from the slot in the release lever and remove the rear brake shoe.
21. Clean and inspect the brake mechanism parts (figure 9.5). Replace deformed or heavily corroded parts. Replace heavily stretched, loose or bent springs.
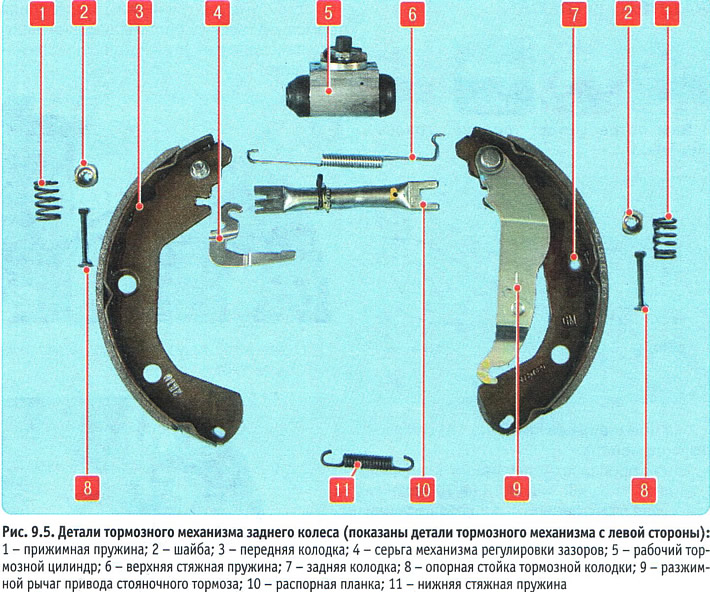
HELPFUL TIP: Whenever the brake mechanism is disassembled, replace the pressure springs, washers and support legs with new ones.
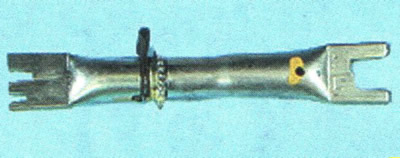
NOTE: The left brake mechanism spacer bar and clearance adjuster parts are not interchangeable with the corresponding parts of the right brake mechanism. The left clearance adjuster has a left-hand thread, the right one has a right-hand thread.
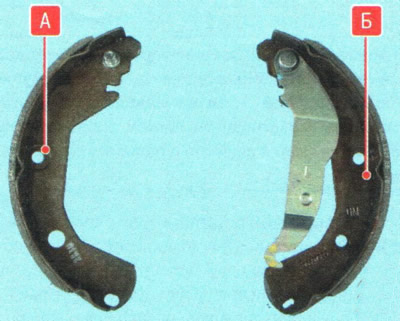
Front A and rear B rear brake pads are different in design (the front shoe has a gap adjustment mechanism shaft installed instead of the pin for attaching the expansion lever). In addition, the rear brake pads assembled with the release levers are distinguished as left and right.
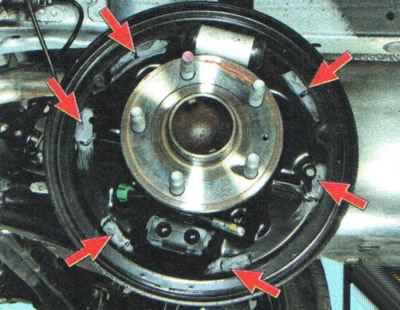
22. Apply high-melting brake grease to the friction areas of the front and rear brake pads on the brake shield.
USEFUL TIP: When replacing brake pads, we recommend replacing the spacer bars together with the clearance adjusters if they have begun to corrode, as corrosion may cause the clearance adjuster to fail during further use.
23. Release the pistons of the working cylinder from the locking device, squeeze the pistons of the working cylinder with sliding pliers and install the brake pads in the reverse order of removal.
WARNING: Be aware that retracting the pistons into the cylinder will increase the brake fluid level in the master cylinder reservoir. If necessary, pump out the fluid.
24. Install the brake drum (see "Removal and installation the brake drum").
25. Adjust the clearance between the brake shoes and the drum by pressing the brake pedal 10-15 times. Each time you press it, you should hear the adjuster click. If the clicking stops, the clearance is set.
26. Replace the wheel. Check that it rotates easily.
27. Replace the brake pads of the brake mechanism of the other wheel in the same way.
28. After installing the brake pads, adjust the parking brake system (see "Adjusting the parking brake drive").