
ChevyMan.ru
Mazda Mitsubishi Toyota Land Rover Honda Kia Nissan
English Русский
Български
Беларускі
Український
Српски
Hrvatski
Română
Polski
Slovenský
Magyar
|
Articles | Sitemap | Contacts |


Home   Aveo   Captiva   Cruze   Lacetti   Lanos   Niva   Tahoe   Others  
Cruze 1 (2008-2016)
  • Home
  • Cruze
  • J300 (2008-2016)
  • Chassis
  • Brake system
  • Replacing the brake pads of the rear wheel brake mechanism

Replacing the brake pads of the rear wheel brake mechanism (Chevrolet Cruze J300)

            0

You will need: a 14 mm wrench, sliding pliers.

Brake pads must be replaced when the linings are worn out (minimum permissible thickness of friction linings 2 mm), poor connection of the pads to the base, oily work surfaces, presence of deep grooves or chips.

Warning: Replace rear brake pads only as a set - 4 pcs. (two on each side).


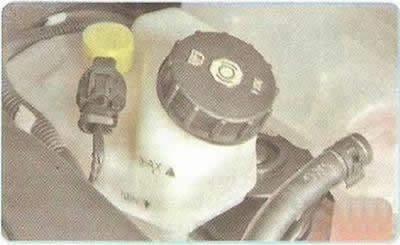
Before replacing the brake pads, check the brake fluid level in the master cylinder reservoir. If the level is close to the upper mark, you need to pump out some of the fluid: after replacing the worn pads with new ones, the level will rise.


1. Remove the rear wheel from the side where the pads are being replaced.
1. Remove the rear wheel from the side where the pads are being replaced.


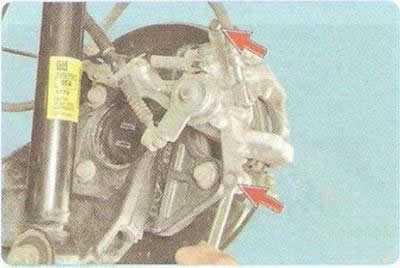
2. Remove the upper and lower bolts securing the caliper guide pins.
2. Remove the upper and lower bolts securing the caliper guide pins.


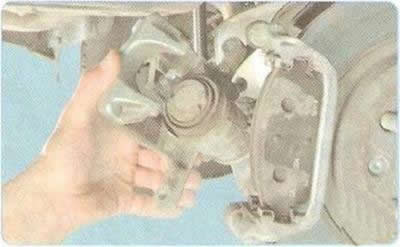
3. Remove the caliper from the disc without disconnecting the brake hose from the caliper and secure it with wire to the suspension elements...


3. Remove the caliper from the disc without disconnecting the brake hose from the caliper and…


4. ...the brake pads will remain in the guide.

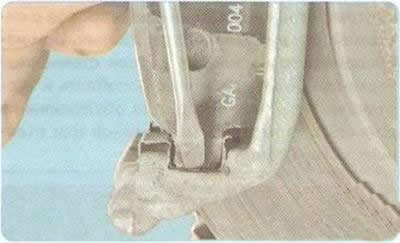
5. Use a flat-blade screwdriver to pry up the top...
5. Use a flat-blade screwdriver to pry up the top...


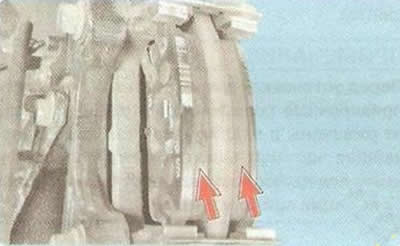
6. ...and the lower retaining spring clamps.
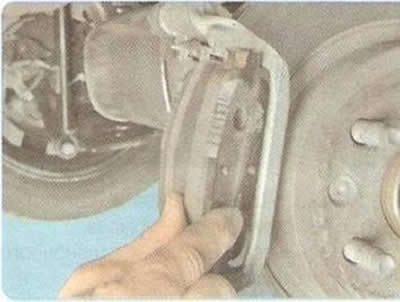
6. ...and the lower retaining spring clamps.


7. Remove the outer... from the shoe guide.
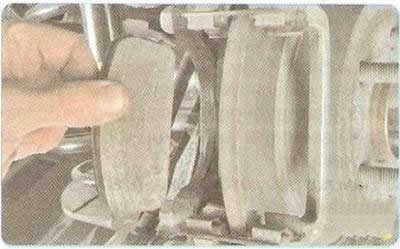
7. Remove the outer... from the shoe guide.


8. ...and internal brake pads.


9. Remove the lower and upper retaining plates from the shoe guide.

Note: To reduce the vibration of the brake pads when the wheels rotate, retaining plates are installed in the grooves of the pad guide. When installing the pads, replace them with new ones.


10. Press down the piston of the working cylinder (see "Checking the degree of wear of brake pads and discs").

11. Install the retaining plates, brake pads into the guides and other parts in the reverse order of removal. To prevent the caliper guide pin mounting bolts from loosening, lubricate their threads with anaerobic thread locker before installation.

Note: The outer brake pads are symmetrical and fit both rear wheels. The inner brake pads are asymmetrical (the outer side of the pad is marked "INBOARD" and has an arrow indicating the direction of rotation of the brake disc). Install the inner brake pads with the arrow pointing upwards.


12. Press the brake pedal all the way down several times. This is necessary to eliminate the gaps in the brake mechanism that appeared after the pistons were pressed into the cylinders.

13. Install the wheel.

14. Similarly, replace the brake pads of the brake mechanism of the other rear wheel.
14. Similarly, replace the brake pads of the brake mechanism of the other rear wheel.


15. Check and, if necessary, restore the brake fluid level in the master cylinder reservoir.


Helpful tips: After replacing worn brake pads with new ones, do not rush to drive on busy highways. It is possible that at the first intensive braking you will be unpleasantly surprised by the low efficiency of the brakes, although the pads were installed branded. Brake discs also wear out, and new pads touch them only with the edges, practically without braking. Choose a quiet street or a passage without cars and brake smoothly several times so that the pads rub in and begin to fit over the entire surface. At the same time, evaluate the efficiency of the brakes.


Try not to brake sharply for at least the first 100 km. If the brake pads are too hot, the top layer of their linings will burn and the brakes will not be as effective as possible for a long time.


[The original article is on the website chevyman.ru]

The article was checked: Vladimir Romannikov
This article is available at russian, bulgarian, belarusian, ukrainian, serbian, croatian, romanian, polish, slovak, hungarian

Share information:

Previous articles
Cruze 1: Brake system
Next articles

Replacing the brake disc of the front wheel brake mechanism
Replacing the front wheel brake caliper assembly
Replacing the brake pads of the front wheel brake mechanism
Removal and installation the brake pedal
Replacing brake lines
Replacing the rear wheel brake caliper assembly
Replacing the brake disc of the rear wheel brake mechanism
Adjusting the parking brake
Replacing the parking brake cables
Removal and installation the parking brake lever


See similar articles on the topic of Chevrolet cars:
Replacing the brake pads of the rear wheel brake mechanism Chevrolet Aveo T300 (2012-2018)
Rear wheel brake hose Chevrolet Captiva 1 (2006-2018)
Replacing the brake pads of the rear wheels Chevrolet Lacetti 1 (2002-2009)
Replacing the brake pads of the rear wheels Chevrolet Lanos T150 (2002-2009)
Replacing the front brake pads Chevrolet Niva 1 (2002-2016)
Rear Brake Wheel Cylinder — Removal, Disassembly and Installation Chevrolet Tahoe 1 (1992-2000)
Checking and replacing rear brake pads Chevrolet Lumina 1 (1989-1994)
Link in different formats to this page


Visitor comments

No comments yet


How much will 28 + 38 =


Cruze 1 (2008-2016) 
  • General information
  • User manual
  • Troubleshooting
  • Maintenance
  • Power unit
  • Engine repair
  • Lubrication system
  • Cooling system
  • Exhaust system
  • Supply system
  • Control system
  • Transmission
  • Clutch
  • Car gearbox
  • Front wheel drives
  • Chassis
  • Front suspension
  • Rear suspension
  • Steering
  • Brake system
  • Body
  • Exterior (external elements)
  • Interior (internal elements)
  • Doors, covers and windows
  • Heating and air conditioning
  • Security systems
  • Electrical equipment
  • Equipment and devices
  • Power devices
  • Lighting and signaling
  • Electrical circuits


ChevyMan.ru © 2017-2026 · Mobile version · Feedback · Site search · Interesting to read · Sitemap: EN BG BY UA RS HR RO PL SK HU

Aveo 2003-2008 · Aveo 2006-2011 · Aveo 2012-2018 · Captiva 2006-2018 · Cruze 2008-2016 · Lacetti 2002-2009 · Lanos 2002-2009 · Niva 2002-2016 · Tahoe 1992-2000 · Tahoe 2000-2014 · Lumina 1 1989-1994 · Trailblazer 1 2001-2008 · Orlando 1 2010-2018 ·
🛡️ For your security and to improve our service, this site uses cookies. You can disable them in your browser.