


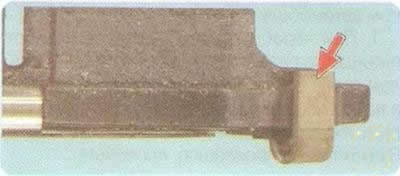
They are metal plates fixed in a certain way to the inner brake pads. As the friction lining wears down, the plate gradually approaches the surface of the brake disc. When the minimum permissible thickness of the lining is reached, the edges of the plate and the disc touch. When braking, a characteristic creaking sound appears. This is a signal that the pads need to be replaced. After the sound appears, the car can be used, but it is necessary to avoid intensive braking and replace the brake pads as soon as possible.
To avoid being caught off guard by the need to replace the brake pads, do not wait for the wear indicator to go off. Before a long trip or when changing wheels, visually check the degree of wear on the brake pads and discs.
You will need: calipers or micrometer, ruler.
1. To check the front brakes, raise the front of the car with a jack. To prevent accidental starting of the engine, remove the key from the ignition.
Warning: Depending on what part of the vehicle you are raising, place wheel chocks ("shoes") under the opposite wheels.
2. Remove the front wheel.
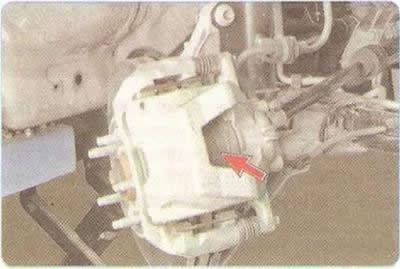
3. Check the condition of the brake pads through the hole in the brake caliper housing. If the thickness of the friction linings together with the base is less than the permissible (see table 9.1), replace the brake pads (see "Replacing the brake pads of the front wheel brake mechanism").
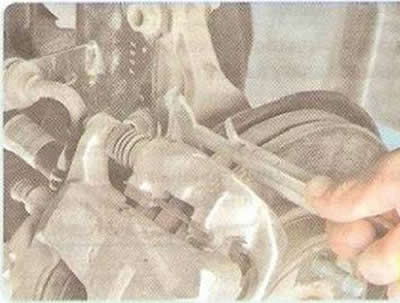
4. Measure the thickness of the brake disc in the working surface area. If its thickness is less than the permissible (see table 9.1), replace the brake disc (see "Replacing the brake disc of the front wheel brake mechanism").
Table 9.1. Dimensions of brake pads and discs
| Parameter | Meaning |
| Front wheel brakes | |
| Brake disc diameter, mm | 276 |
| Brake disc thickness, mm | 26 |
| Minimum permissible thickness of brake disc, mm | 24 |
| Thickness of the brake shoe friction lining, including the base, mm | 19,8 |
| Minimum permissible thickness of the brake shoe friction lining, mm | 2 |
| Rear wheel brakes | |
| Brake disc diameter, mm | 268 |
| Brake disc thickness, mm | 12 |
| Minimum permissible thickness of brake disc, mm | 10 |
| Thickness of the brake shoe friction lining, including the base, mm | 17 |
| Minimum permissible thickness of the brake shoe friction lining, mm | 2 |
5. The surface of the disc wears unevenly. A rim remains on the outer circumference of the disc, so it is more correct to measure the thickness of the disc with a micrometer.
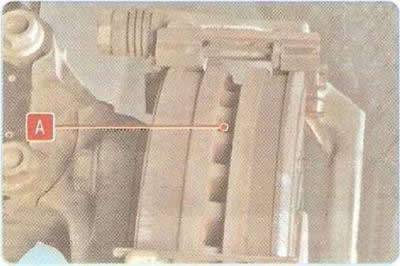
6. Inspect the jumpers A of the disk cooling air channels. If cracks are found in the jumpers, the disk must be replaced.
7. Check the brake mechanisms of the second front wheel in the same way.
8. To check the rear disc brake mechanism, remove the rear wheel and check the mobility of the pistons and guide pins of the brake mechanism. Rotate the piston, press it into the caliper cylinder (use a special device). If the piston cannot be moved, it means that it is jammed in the brake cylinder.
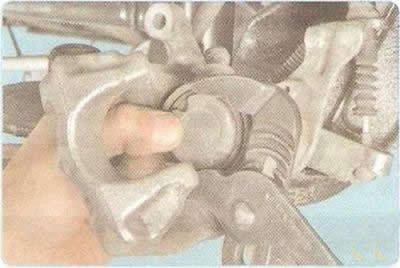
If you don't have a special tool, use sliding pliers. Press the piston down by rotating it and pressing it with your finger at the same time. Be careful not to damage the side surface of the piston.
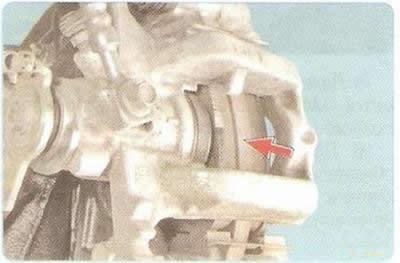
9. Check the condition of the brake pads through the hole in the brake caliper housing. If the thickness of the friction linings is less than the permissible (see table 9.1), replace the brake pads (see "Replacing the rear wheel brake mechanism").
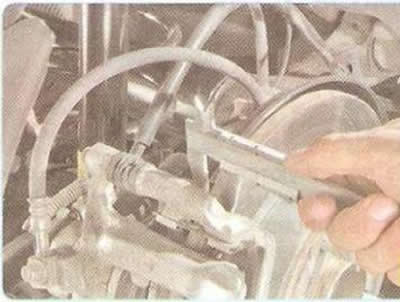
10. Measure the thickness of the brake disc. If its thickness is less than the permissible (see table 9.1), replace the brake disc (see "Replacing the brake disc of the rear wheel brake mechanism").
11. The surface of the disc wears unevenly. A rim remains on the outer circumference of the disc, so it is more correct to measure the thickness of the disc with a micrometer (see item 5).
12. Check the brake mechanisms of the other rear wheel in the same way.
Note: Replace the pads in the following cases:
- the warning light in the instrument cluster came on due to the brake pad wear sensor being triggered;
- the surface of the linings is oily;
- the pads are not firmly connected to the base.