


This is due to the fact that brake fluid is very hygroscopic. It absorbs moisture from the air, which, in addition to causing corrosion of brake system parts, lowers the boiling point of the fluid itself, which can lead to brake failure during frequent, intensive braking. Do not reuse drained fluid: it is contaminated, saturated with air and moisture. Always add only new fluid of the same brand to the system as the fluid that was previously poured.
Before replacing the brake fluid, check the hydraulic drive for leaks (see "Checking the tightness of the hydraulic brake drive") and troubleshoot.
The brake fluid must be replaced with an assistant. It is convenient to work by installing the car on an inspection ditch or overpass (there will be no need to remove the wheels).
You will need: a 11 mm wrench for the pipes, brake fluid, a rubber or transparent hose, a transparent container, and a syringe.
1. Brake the car with the parking brake and install the anti-rollback stops ("shoes") under the wheels,
2. If the work is not being carried out on a ditch or overpass, lift all four wheels one by one with a jack and place the car on supports. You can also do the work by raising and removing each wheel one by one.
The order of replacing the fluid in the brake mechanisms:
- right rear;
- left front;
- left rear;
- right front.
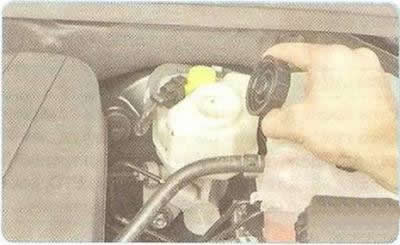
3. Unscrew the cap of the master brake cylinder reservoir.
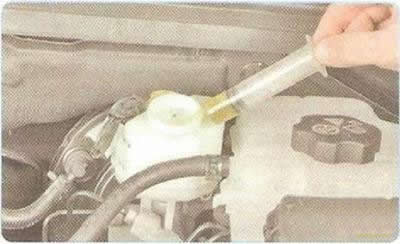
4. Pump out the old brake fluid from the master cylinder reservoir using a medical syringe or rubber bulb.
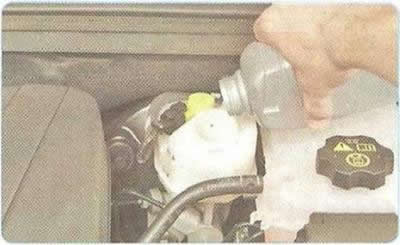
5. Add new brake fluid to the lower edge of the filler neck.
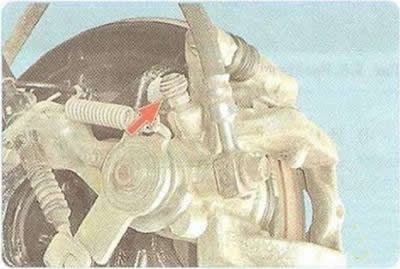
6. Clean the protective caps of the air release valves of the front and rear brake mechanisms from dirt...
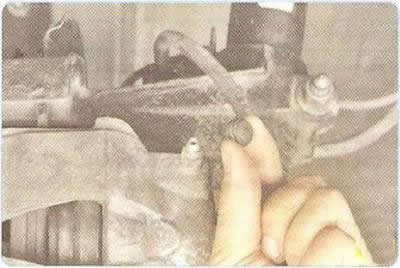
7. ...and remove the caps.
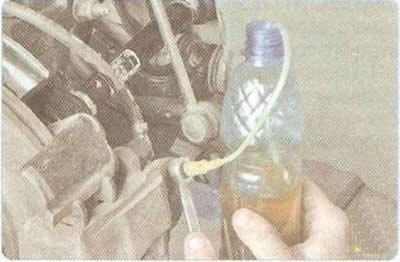
Note: Attach the hose to the right rear brake master cylinder bleeder valve and place the end of the hose in a clean, clear container.
8. The assistant should press the brake pedal sharply four to five times (with an interval between presses of 1-2 s), then keep the pedal pressed.
9. Loosen the air release valve by 1/2-3/4 of a turn. Old (dirty) brake fluid will start to flow out of the hose. At this time, the brake pedal should smoothly reach the stop. As soon as the fluid stops flowing, close the air release valve.
Note: Always monitor the fluid level in the reservoir, not allowing it to drop to the "MIN" mark on the reservoir wall. If necessary, add new brake fluid to prevent air from entering the hydraulic drive. This ensures that the old fluid is gradually replaced by the new one without draining the hydraulic system.
10. In the same way, replace the brake fluid in the working cylinder of the left front wheel brake mechanism by unscrewing the air release valve.
11. Repeat steps 6-9 until the fluid in the drive is completely replaced (clean liquid without air bubbles should flow out of the hose).
12. Then replace the brake fluid in the second circuit (first in the working cylinder of the brake mechanism of the left rear wheel, then the right front).
13. After replacing the brake fluid, be sure to put the protective caps on the air release valves. Replace any damaged caps.
14. Check the quality of the work performed: press the brake pedal several times - the pedal travel and force on it should be the same with each press. If this is not the case, return to operations 6-10.
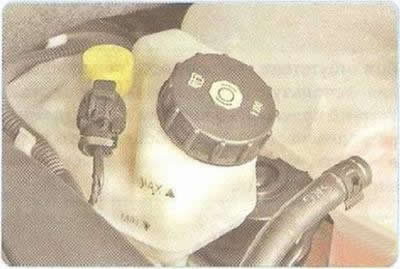
15. Add brake fluid to the level of the "MAX" mark on the wall of the master brake cylinder reservoir. Close the reservoir with the lid.
16. After replacing the brake fluid, be sure to put the protective caps on the air release valves to prevent corrosion.