
ChevyMan.ru
Mazda Mitsubishi Toyota Land Rover Honda Kia Nissan
English Русский
Български
Беларускі
Український
Српски
Hrvatski
Română
Polski
Slovenský
Magyar
|
Articles | Sitemap | Contacts |


Home   Aveo   Captiva   Cruze   Lacetti   Lanos   Niva   Tahoe   Others  
Cruze 1 (2008-2016)
  • Home
  • Cruze
  • J300 (2008-2016)
  • Chassis
  • Brake system
  • Replacing the brake disc of the rear wheel brake mechanism

Replacing the brake disc of the rear wheel brake mechanism (Chevrolet Cruze J300)

            0

If there are burrs, deep scratches and other defects on the working surface of the disc that increase pad wear and reduce braking efficiency, as well as in the case of increased lateral runout of the disc that causes vibrations during braking, replace the disc. In specialized workshops, such a disc can be turned and ground on both sides to the same depth, but after processing, the thickness of the disc must not be less than the minimum permissible.

The minimum permissible thickness of the brake disc of the rear wheel brake mechanism is 10 mm. If the thickness of one of the discs is less than the specified one, replace both discs. When replacing the brake discs, be sure to replace the brake pads with a new set.

You will need: TORX key, wheel nut key.

I. Remove the wheel from the side of the caliper being replaced.
I. Remove the wheel from the side of the caliper being replaced.


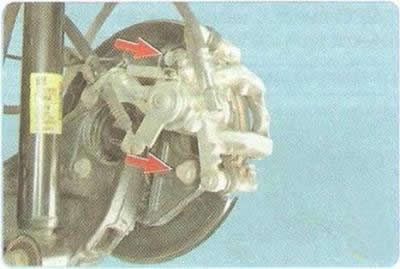
2. Unscrew the bolts securing the brake shoe guide to the bracket
2. Unscrew the bolts securing the brake shoe guide to the bracket


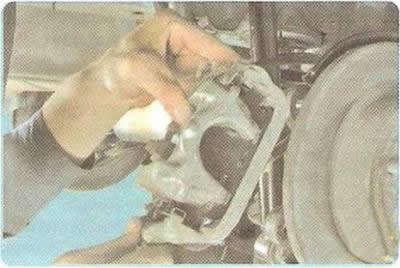
3. Remove the caliper assembly without disconnecting the brake hose.


3. Remove the caliper assembly without disconnecting the brake hose.


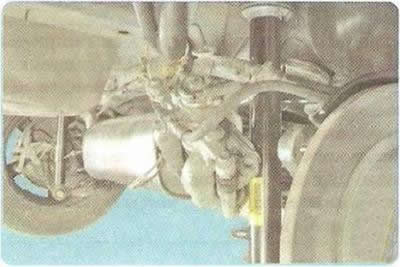
4. ...and secure the support with wire, preventing the hose from twisting or being pulled.
4. ...and secure the support with wire, preventing the hose from twisting or being pulled.


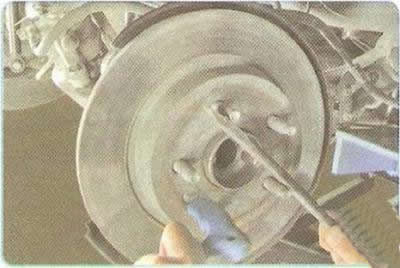
5. While holding the hub from turning with a tire iron, adjust the screw that secures the brake disc to the rear hub...
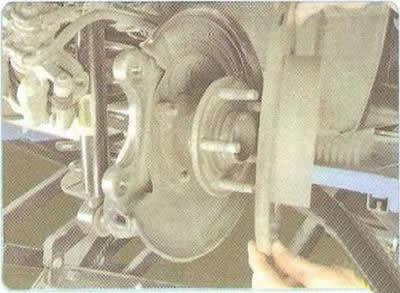
5. While holding the hub from turning with a tire iron, adjust the screw that secures the brake…


6. ...and remove the disc from the wheel hub.

7. Install the parts in the reverse order of removal.


Note: Before installing the disc, thoroughly clean the mating surfaces of the hub and disc from rust and scale, since even the smallest particle clamped between the mating surfaces will cause disc beating and vibration during braking.


8. Press the brake pedal all the way down several times. This is necessary to eliminate the gaps in the brake mechanism that appeared after the pistons were pressed into the cylinders.

9. Install the wheel.

10. Remove the brake disc of the other wheel in the same way.

The article was checked: Vladimir Romannikov
This article is available at russian, bulgarian, belarusian, ukrainian, serbian, croatian, romanian, polish, slovak, hungarian

Share information:

Previous articles
Cruze 1: Brake system
Next articles

Replacing the rear wheel brake caliper assembly
Replacing the brake pads of the rear wheel brake mechanism
Replacing the brake disc of the front wheel brake mechanism
Replacing the front wheel brake caliper assembly
Replacing the brake pads of the front wheel brake mechanism
Adjusting the parking brake
Replacing the parking brake cables
Removal and installation the parking brake lever


See similar articles on the topic of Chevrolet cars:
Replacing the brake pads of the rear wheel brake mechanism Chevrolet Aveo T300 (2012-2018)
Rear wheel brake hose Chevrolet Captiva 1 (2006-2018)
Removal the rear wheel brake disc Chevrolet Lacetti 1 (2002-2009)
Replacing the front wheel brake disc Chevrolet Lanos T150 (2002-2009)
Checking the rear brake wheel cylinders on the stand Chevrolet Niva 1 (2002-2016)
Rear Brake Wheel Cylinder — Removal, Disassembly and Installation Chevrolet Tahoe 1 (1992-2000)
Checking and replacing rear brake pads Chevrolet Lumina 1 (1989-1994)
Link in different formats to this page


Visitor comments

No comments yet


How much will 49 + 24 =


Cruze 1 (2008-2016) 
  • General information
  • User manual
  • Troubleshooting
  • Maintenance
  • Power unit
  • Engine repair
  • Lubrication system
  • Cooling system
  • Exhaust system
  • Supply system
  • Control system
  • Transmission
  • Clutch
  • Car gearbox
  • Front wheel drives
  • Chassis
  • Front suspension
  • Rear suspension
  • Steering
  • Brake system
  • Body
  • Exterior (external elements)
  • Interior (internal elements)
  • Doors, covers and windows
  • Heating and air conditioning
  • Security systems
  • Electrical equipment
  • Equipment and devices
  • Power devices
  • Lighting and signaling
  • Electrical circuits


ChevyMan.ru © 2017-2026 · Mobile version · Feedback · Site search · Interesting to read · Sitemap: EN BG BY UA RS HR RO PL SK HU

Aveo 2003-2008 · Aveo 2006-2011 · Aveo 2012-2018 · Captiva 2006-2018 · Cruze 2008-2016 · Lacetti 2002-2009 · Lanos 2002-2009 · Niva 2002-2016 · Tahoe 1992-2000 · Tahoe 2000-2014 · Lumina 1 1989-1994 · Trailblazer 1 2001-2008 · Orlando 1 2010-2018 ·
🛡️ For your security and to improve our service, this site uses cookies. You can disable them in your browser.