ChevyMan.ru
Mazda Mitsubishi Toyota Land Rover Honda Kia Nissan
English Русский
Български
Беларускі
Український
Српски
Hrvatski
Română
Polski
Slovenský
Magyar
|
Articles | Sitemap | Contacts |


Home   Aveo   Captiva   Cruze   Lacetti   Lanos   Niva   Tahoe   Others  
Aveo T300 (2012-2018) Aveo T250 (2006-2011) Aveo T200 (2003-2008)
  • Home
  • Aveo
  • T300 (2012-2018)
  • Chassis
  • Brake system
  • Replacing the front brake pads

Replacing the front brake pads (Chevrolet Aveo T300)

            0

You will need: 10 mm, 18 mm wrenches, a lug wrench, and sliding pliers.

Check the condition of the brake pads at every maintenance.

Brake pads require replacement when the linings are worn out (minimum permissible thickness of friction linings 2 mm), poor connection of the pads to the base, oily work surfaces, presence of deep grooves or chips.

WARNINGS: Replace the front brake pads only with a set of four pieces (two on each side). Before replacing the brake pads, check the brake fluid level in the master cylinder reservoir. If the level is close to the "MAX" mark, it is necessary to pump out some of the fluid (for example, with a medical syringe or a rubber bulb), because after replacing worn pads with new ones the level will rise.


1. Loosen the nuts of the left front wheel, put the anti-rollback stops ("shoes") under the rear wheels, Use the jack to lift the front part of the car, install it on reliable supports, remove the left front wheel.
1. Loosen the nuts of the left front wheel, put the anti-rollback stops («shoes») under the rear…


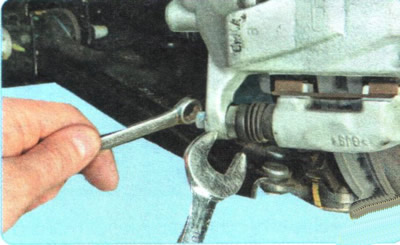
2. Loosen the tightening of the lower caliper guide pin mounting bolt, holding the pin from turning with a second wrench...
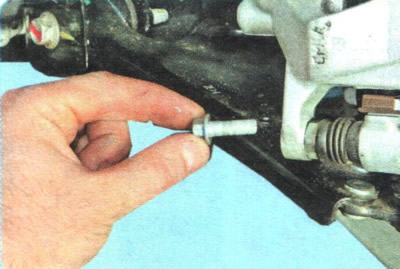
2. Loosen the tightening of the lower caliper guide pin mounting bolt, holding the pin from turning…


3. ...and unscrew the bolt.


3. ...and unscrew the bolt.


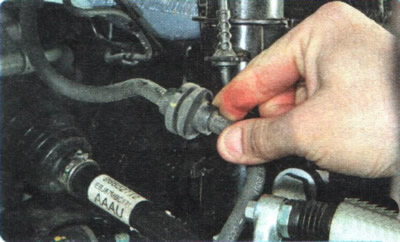
4. Remove the brake hose retainer from the slot in the bracket on the shock absorber strut.
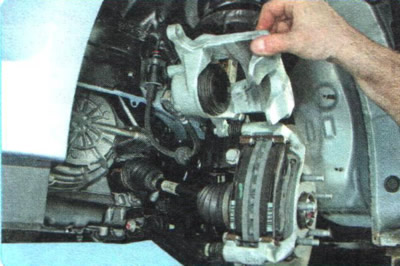
4. Remove the brake hose retainer from the slot in the bracket on the shock absorber strut.


5. Lift the caliper up...
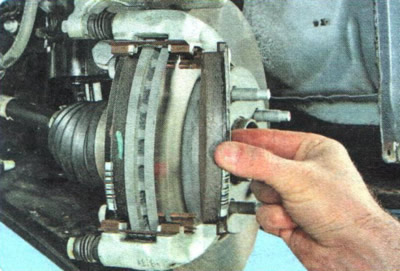
5. Lift the caliper up...


6. ...remove the outer...
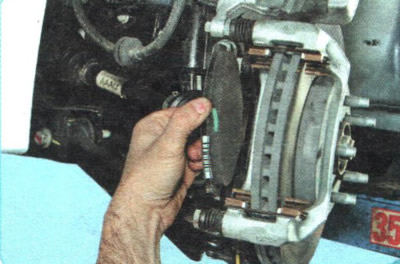
6. ...remove the outer...


7. ...and internal brake pads.
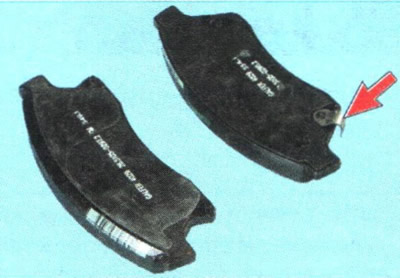


7. ...and internal brake pads.


NOTE: This is what the front brake pads look like. They vary in shape and design (the inner shoe has a sound indicator of the wear limit, shown in the photo by the arrow), as well as catalog numbers.

NOTE: This is what the front brake pads look like. They vary in shape and design (the inner shoe…


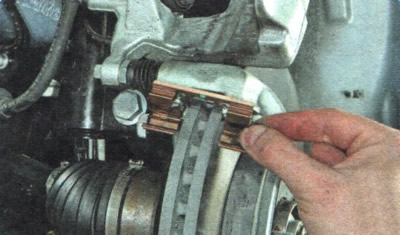
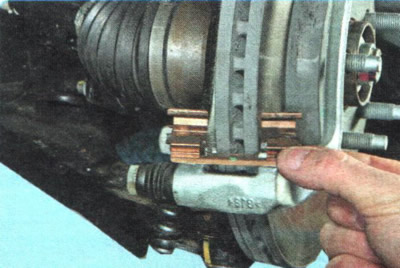
8. Remove the bottom...

8. Remove the bottom...


9. ...and the upper brake shoe pressure springs and inspect them.
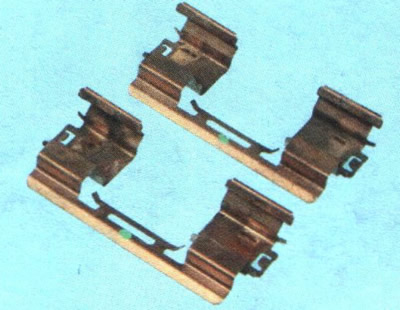
9. ...and the upper brake shoe pressure springs and inspect them.


NOTE: Replace springs if they are deformed or badly corroded.


NOTE: Replace springs if they are deformed or badly corroded.


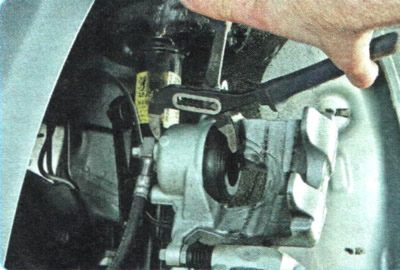
10. Press down the piston of the working cylinder using adjustable pliers.

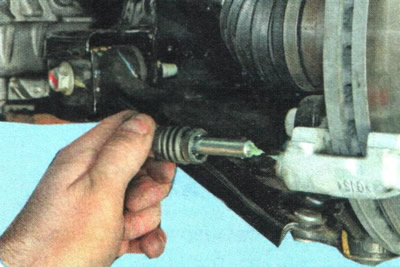
USEFUL TIPS: Whenever you replace the brake pads, be sure to check the condition of the protective rubber boots of the guide pin and the movement of the caliper relative to the brake pad guide. If movement is difficult, lubricate the caliper guide pins with grease.

USEFUL TIPS: Whenever you replace the brake pads, be sure to check the condition of the protective…


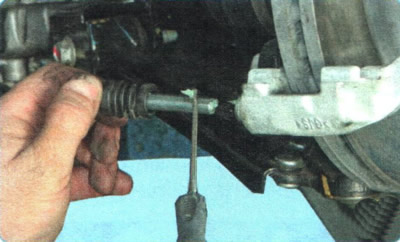
To do this, remove the guide pin...


To do this, remove the guide pin...


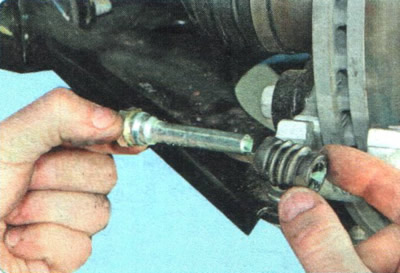
...lubricate it with grease, and then lubricate the protective boot of the finger. Lubricate the second guide finger and its boot in the same way.


Install the guide pins in the reverse order of removal.

Install the guide pins in the reverse order of removal.


Replace the guide pin boots if they are hardened, deformed or torn.


11. Similarly, replace the brake pads of the right front wheel brake mechanism.

12. Check and, if necessary, restore the brake fluid level in the master cylinder reservoir.

USEFUL TIPS: After replacing worn brake pads with new ones, do not rush to drive on busy highways. It is possible that at the first intensive braking you will be unpleasantly surprised by the low efficiency of the brakes, although the pads are original. Brake discs also wear out, and new pads touch them only with their edges, practically without braking. Choose a quiet street or a passage without cars and brake smoothly several times so that the pads rub in and begin to fit over the entire surface. At the same time, evaluate the efficiency of the brakes.


Try not to brake sharply for at least the first 100 km. If the brake pads are too hot, the top layer of their linings will burn and the brakes will not be as effective as possible for a long time.


The article was reprinted from the website: CHEVYMAN.RU

The article was checked: Vladimir Romannikov
This article is available at russian, bulgarian, belarusian, ukrainian, serbian, croatian, romanian, polish, slovak, hungarian

Share information:

Previous articles
Aveo T300: Brake system
Next articles

Removal and installation the brake pedal
Replacing brake pipes
Replacing brake hoses
Replacing the vacuum pump
Replacing the brake booster
Replacing the front wheel brake caliper
Replacing the brake disc
Removal and installation the rear wheel brake drum
Replacing the brake pads of the rear wheel brake mechanism
Replacing the rear wheel brake slave cylinder


See similar articles on the topic of Chevrolet cars:
Front brake pads — removal and installation Chevrolet Captiva 1 (2006-2018)
Replacing the brake pads of the front wheel brake mechanism Chevrolet Cruze 1 (2008-2016)
Replacing the front brake pads Chevrolet Lacetti 1 (2002-2009)
Replacing the brake pads of the front wheels Chevrolet Lanos T150 (2002-2009)
Replacing the front brake pads Chevrolet Niva 1 (2002-2016)
Brake fluid and pads Chevrolet Tahoe 1 (1992-2000)
Replacing the front brake pads Chevrolet Orlando 1 (2010-2018)
Link in different formats to this page


Visitor comments

No comments yet


How much will 46 + 50 =


Aveo T300 (2012-2018) 
  • General information
  • Vehicle device
  • User manual
  • Main malfunctions
  • Maintenance
  • Power unit
  • Engine
  • Lubrication system
  • Cooling system
  • Supply system
  • Exhaust system
  • Transmission
  • Clutch
  • Manual gearbox
  • Automatic gearbox
  • Front wheel drives
  • Chassis
  • Front suspension
  • Rear suspension
  • Steering
  • Brake system
  • Body
  • Exterior
  • Interior
  • Doors and trunk
  • Security systems
  • Electrical equipment
  • Engine electrics
  • Equipment and devices
  • Heating and air conditioning
  • Electrical circuits


Aveo T250 (2006-2011) 
  • Manual
  • Driver's workplace
  • Salon equipment
  • Vehicle characteristics
  • Maintenance
  • Engine 1.5 SOHC
  • Engine repair
  • Fuel supply system
  • Control system
  • Cooling system
  • Engine 1.6 DOHC
  • Engine repair
  • Control system
  • Transmission
  • Clutch
  • Manual gearbox
  • Automatic gearbox
  • Wheel drive
  • Chassis
  • Wheel suspension
  • Steering
  • Brake system
  • Body
  • Exterior
  • Interior


Aveo T200 (2003-2008) 
  • General information
  • User manual
  • Power unit
  • Engine repair 1.5L SOHC
  • Fuel system
  • Control system
  • Cooling system
  • Transmission
  • Clutch
  • Manual gearbox
  • Automatic gearbox
  • Drive shafts
  • Chassis
  • Front suspension
  • Rear suspension
  • Steering
  • Brake system
  • Body
  • Exterior (external elements)
  • Interior (internal elements)
  • Electrical equipment
  • Equipment and devices
  • Electrical circuits


ChevyMan.ru © 2017-2026 · Mobile version · Feedback · Site search · Interesting to read · Sitemap: EN BG BY UA RS HR RO PL SK HU

Aveo 2003-2008 · Aveo 2006-2011 · Aveo 2012-2018 · Captiva 2006-2018 · Cruze 2008-2016 · Lacetti 2002-2009 · Lanos 2002-2009 · Niva 2002-2016 · Tahoe 1992-2000 · Tahoe 2000-2014 · Lumina 1 1989-1994 · Trailblazer 1 2001-2008 · Orlando 1 2010-2018 ·
🛡️ For your security and to improve our service, this site uses cookies. You can disable them in your browser.