


The brake pads must be replaced as a set on the brake mechanisms of the right and left wheels.
Warning: Never replace brake pads on only one side of the vehicle. This can lead to uneven braking of the wheels, causing the car to pull to the side and even skidding during emergency braking.
The original front brake pad kit number according to GM catalog is 13 301 234. The kit includes four pads and four retaining springs.
Recommendation. When replacing brake pads, be sure to check the thickness and condition of the brake disc.
To perform the work, you will need a rubber bulb and brake lubricant, sliding pliers or a special device for pressing the piston into the caliper cylinder. We replace the front brake pads in the following order:
1. We prepare the car for maintenance and repair.
Warning! When the pistons are pressed into the brake caliper cylinders, the brake fluid level in the reservoir will increase, so pump out some of the brake fluid from the reservoir. After replacing the brake pads, check and, if necessary, top up the brake fluid level. Top up with new brake fluid only.
2. Remove the cover of the main brake cylinder reservoir and use a rubber bulb to pump out some of the brake fluid.
3. Install wheel chocks under the rear wheels.
4. Remove the front wheel. We clean the caliper mounting bolts with a wire brush.
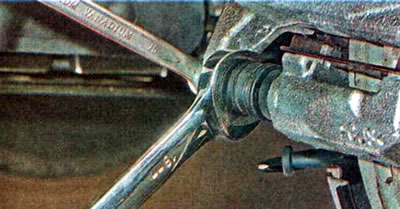
5. Using a screwdriver as a lever, press the piston into the brake cylinder (see above). Holding the lower guide pin from turning with an 18 mm open-end wrench, use a 10 mm wrench to unscrew the lower caliper mounting bolt.
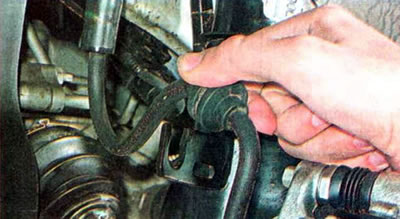
6. Remove the brake hose from the bracket.
7. Raise the caliper by turning it on the upper guide pin.
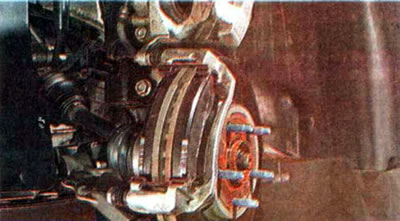
Warning: Do not press the brake pedal with the caliper removed.
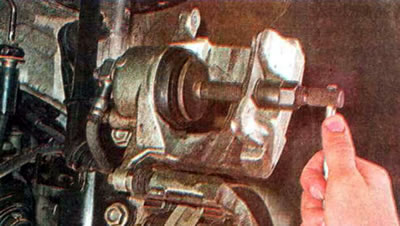
8. Using sliding pliers or a special device, press the piston into the caliper cylinder.
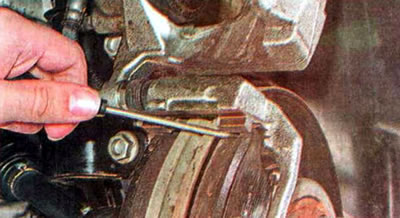
9. Using a screwdriver, remove the outer shoe.
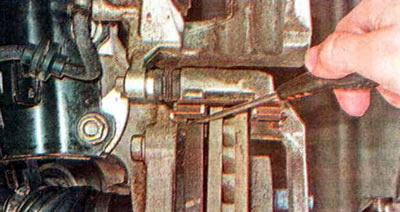
10. Similarly, remove the inner shoe from the guide.
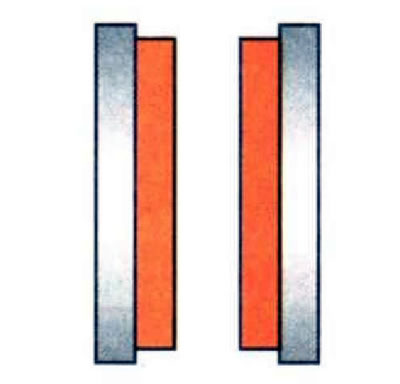
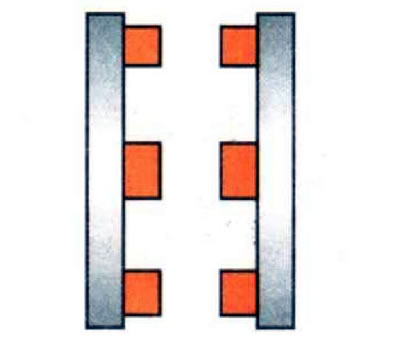
11. Inspect both removed brake pads. The condition and performance of the brake mechanism can be determined by the nature of the wear of the friction linings:
- uniform wear of the friction linings of both pads - the brake mechanism is in good working order, the surface of the brake disc is smooth, without damage;
- the friction linings are completely worn out; depending on the design of the pads, the rivet heads may protrude - the pads have been used beyond the permissible limit.
It is necessary to check the condition of the brake disc. During further operation of the vehicle, conduct regular checks of the technical condition of the brake system and do not allow the friction linings of the brake pads to wear out completely in order to avoid damage to the brake mechanism;
- the friction lining of one of the pads is worn out more - the piston or guide pins of the caliper have jammed, or the pad has jammed in the guide bracket.
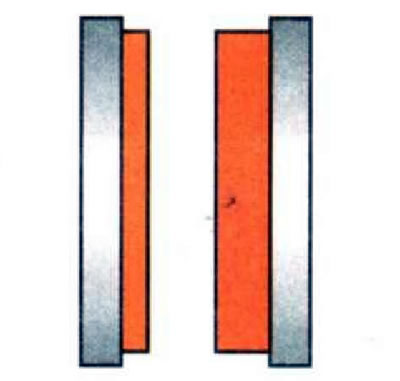
It is necessary to clean the pad guides from dirt and rust with a metal brush, wash the caliper parts with brake cleaner, check the mobility of the brake cylinder piston and the condition of the guide pins (see below);
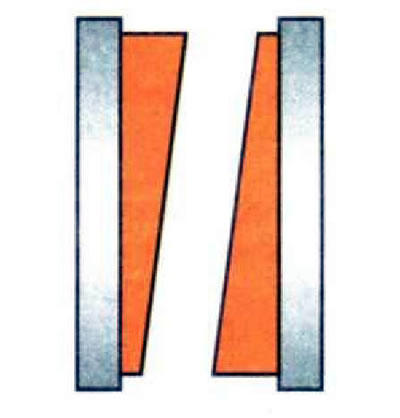
- uneven wear of the friction linings of both pads - jamming of one of the caliper guide pins.
In this case, it is necessary to check the condition of the guide pins of the front brake caliper - the pins should move freely along the guide bushings of the caliper;
- grooves across the entire surface of the friction lining - the brake disc is worn out.
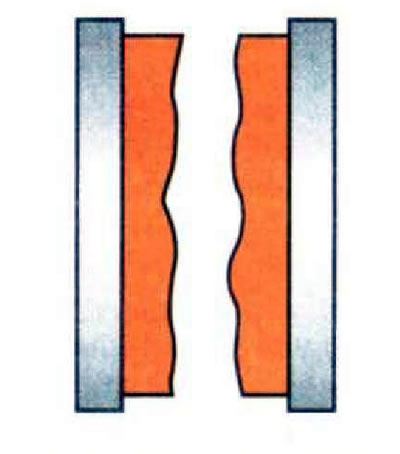
The condition of the brake disc should be checked and replaced if necessary;
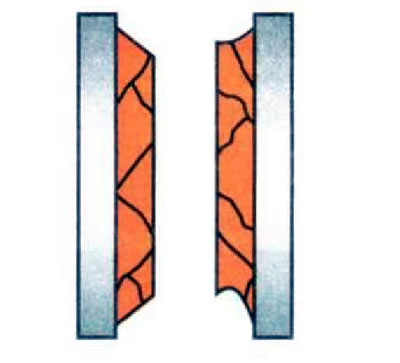
- cracks in the friction linings, rolled edges - the malfunction could have occurred due to overheating of the brake mechanisms or jamming of the caliper cylinder piston.
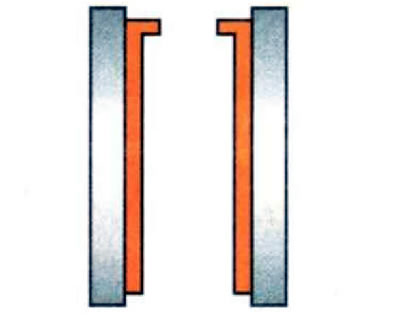
It is necessary to check the mobility of the brake cylinder pistons; if the piston sticks, we repair or replace the front brake caliper;
- uneven wear of the friction linings of both pads (step) - incorrect installation of the brake pads.
12. Remove the top...
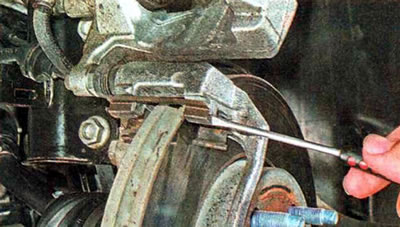
...and the lower retaining springs of the pads with a guide.
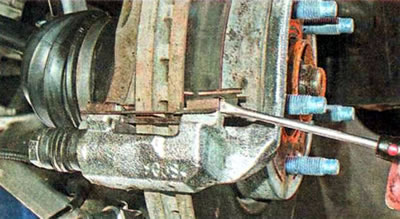
Warning! Avoid inhaling friction lining wear products, it is harmful to health.
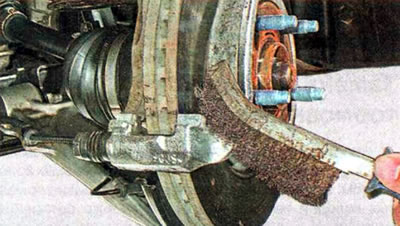
13. After wetting the brake cleaner, clean the brake shoe guide with a metal brush.
14. Remove the lower guide pin of the brake caliper.
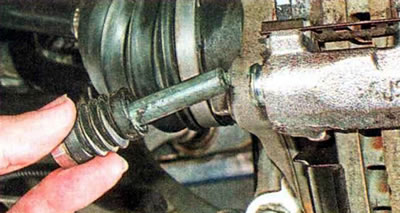
15. Use a rag to clean it from old grease. If the protective cover is damaged, remove it from the finger and replace it.
16. Apply a special lubricant for brake mechanisms to the guide pin and install it into the caliper hole.
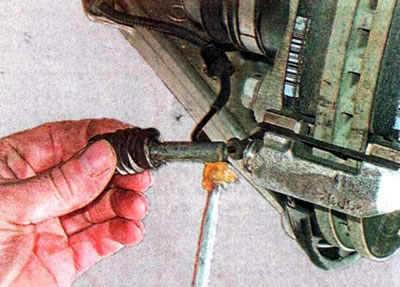
17. Remove the second guide pin together with the brake caliper, use a rag to clean the pin from old grease and apply new grease to it. We replace the damaged protective cover of the finger.
18. Insert the brake caliper pin into the guide and leave the caliper in the upper position.
19. Install new brake shoe retaining springs on the guide from above...
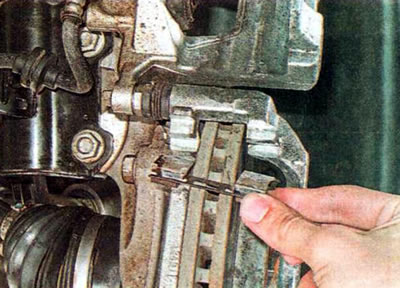
...and from below.
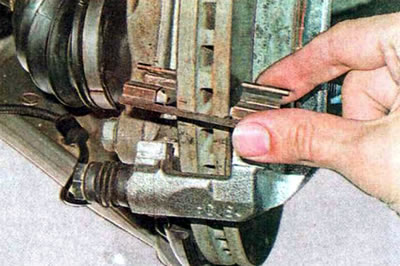
20. Apply a special lubricant for brake mechanisms to the retaining springs at the points of contact with the pads.
Warning! Do not allow grease to come into contact with the friction linings of the brake pads or the working surfaces of the brake discs. If necessary, treat the working surface of the brake discs on both sides with a special brake cleaner.
Note: The front brake pads are not interchangeable. The inner brake pads have a special bracket (audible wear indicator). When installing the shoe into the guide, the indicator should be positioned on top.
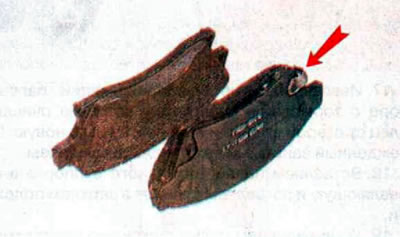
21. Install the inner brake shoe into the guide with the sound indicator facing up.
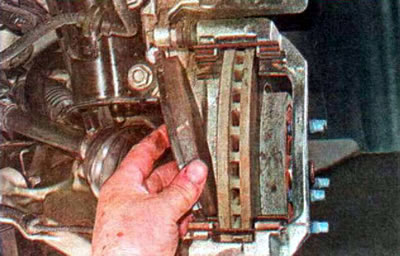
22. Insert the outer block into the guide.
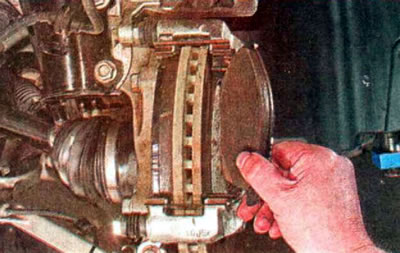
22. Press the pads firmly against the brake disc. We turn the caliper to the lower position and move it onto the brake pads.
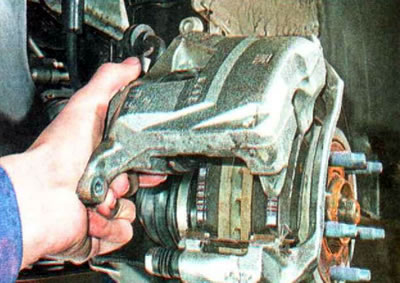
23. Apply anaerobic thread locker to the bolt that secures the caliper to the guide pin. Tighten the lower caliper mounting bolt to a torque of 28 Nm.
24. Insert the brake hose into the bracket groove.
25. Similarly, we replace the front brake pads on the other side of the car.
26. Press the brake pedal several times to automatically adjust the gaps between the brake pads and discs.
27. Check the brake fluid level in the master cylinder reservoir and top it up to normal if necessary.
Warning! The first 100-200 km of the road, the braking efficiency may be reduced until the brake pads are worn to the discs. During this period, try to avoid situations that require sudden braking.