ChevyMan.ru
Mazda Mitsubishi Toyota Land Rover Honda Kia Nissan
English Русский
Български
Беларускі
Український
Српски
Hrvatski
Română
Polski
Slovenský
Magyar
|
Articles | Sitemap | Contacts |


Home   Aveo   Captiva   Cruze   Lacetti   Lanos   Niva   Tahoe   Others  
Orlando 1 (2010-2018) Trailblazer 1 (2001-2008, petrol) Lumina 1 (1989-1994)
  • Home
  • Chevrolet
  • Orlando 1
  • Chassis
  • Brake system
  • Replacing rear brake pads

Replacing rear brake pads (Chevrolet Orlando 1)

            0

The necessity of performing this work should be determined during the inspection of the brake pads (see above). If the friction linings of the brake shoes are worn to the limit, a squealing sound will be heard when braking. For this purpose, an audible indicator is made on the inner shoe - a special bracket that will rub against the brake disc when the thickness of the friction lining is less than 2 mm.

Brake pads must be replaced as a set. The original brake pad set number according to GM catalog is 13 319 294.

Warning: Never change brake pads on only one side of the vehicle. This can lead to uneven braking of the wheels, causing the car to pull to the side and even skidding during emergency braking.


Recommendation. When replacing brake pads, be sure to check the thickness and condition of the brake disc.


To perform the work you will need a rubber bulb, special grease for brake mechanisms and a device for screwing pistons into the calipers of the rear brake mechanisms.
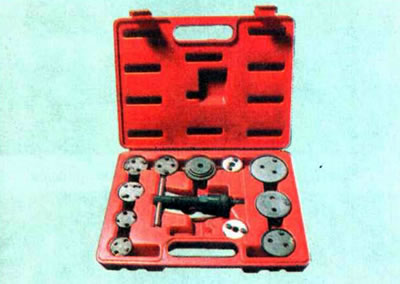
To perform the work you will need a rubber bulb, special grease for brake mechanisms and a device…


We replace the rear brake pads in the following order:

1. We prepare the car for maintenance and repair.

Warning! When the pistons are pressed into the brake caliper cylinders, the brake fluid level in the reservoir will increase, so pump out some of the brake fluid from the reservoir. After replacing the brake pads, check and, if necessary, top up the brake fluid level. Top up with new brake fluid only.


2. Remove the cover of the main brake cylinder reservoir and use a rubber bulb to pump out some of the brake fluid.

3. Install wheel chocks under the front wheels.

4. Remove the rear wheel.

5. Using a 13 mm open-end wrench, unscrew the lower caliper mounting bolt.
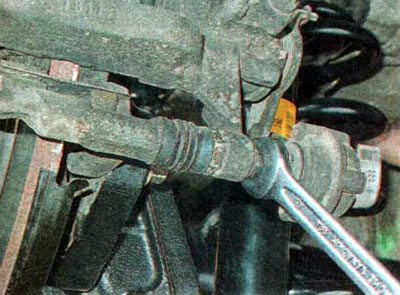
5. Using a 13 mm open-end wrench, unscrew the lower caliper mounting bolt.


6. Remove the stud bolt together with the damper.
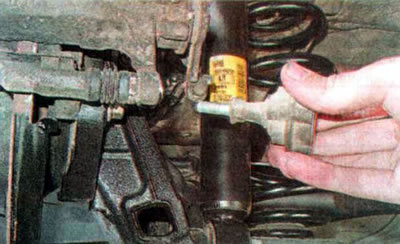
6. Remove the stud bolt together with the damper.


7. Using a 10 mm wrench, unscrew the upper caliper mounting bolt.
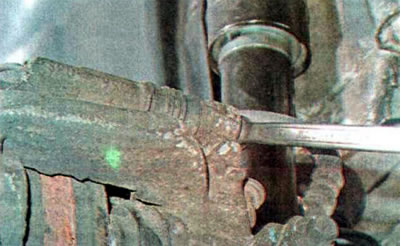
7. Using a 10 mm wrench, unscrew the upper caliper mounting bolt.


8. Using a 10 mm socket wrench, loosen the parking brake cable mounting bolt.
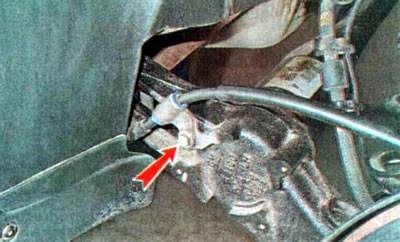


8. Using a 10 mm socket wrench, loosen the parking brake cable mounting bolt.


9. Remove the caliper from the brake pads and, using a special tool, screw the piston into the cylinder.
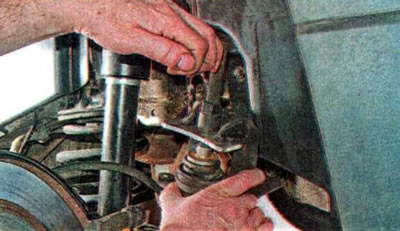
9. Remove the caliper from the brake pads and, using a special tool, screw the piston into the…


Warning! Do not press the piston into the caliper (as on the front brake mechanism) this is unacceptable! This will inevitably lead to damage to the caliper and will require its replacement. On rear brakes, the piston must be recessed while rotating.


10. Hang the support on a cord or wire.
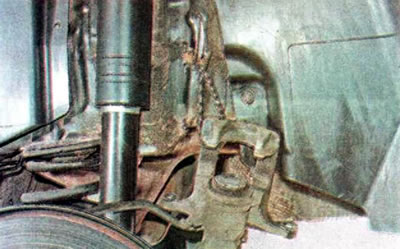
10. Hang the support on a cord or wire.


Warning: Do not press the brake pedal with the caliper removed.


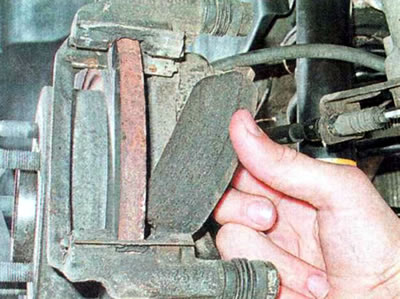
11. Using a screwdriver, remove the outer shoe.
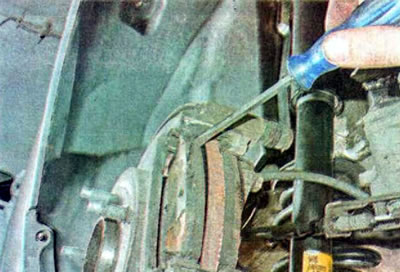
11. Using a screwdriver, remove the outer shoe.


12. Similarly, remove the inner brake shoe from the guides.
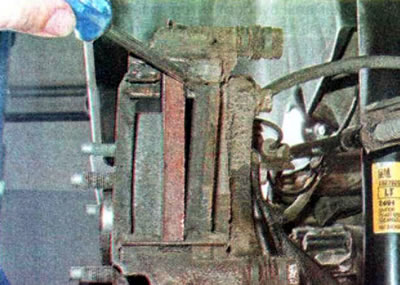
12. Similarly, remove the inner brake shoe from the guides.


13. Inspect both removed brake pads. Based on the nature of wear, we determine the condition of the rear brake mechanism (see above).

14. Using a slotted screwdriver, remove the upper... from the guide.
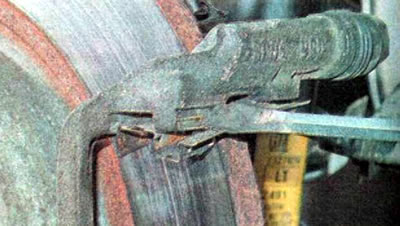
14. Using a slotted screwdriver, remove the upper... from the guide.


...and the lower retaining springs of the pads.
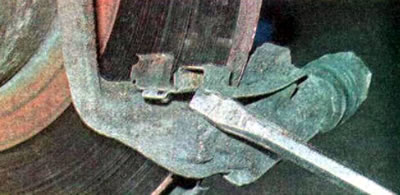


...and the lower retaining springs of the pads.


Warning! Avoid inhaling friction lining wear products, it is harmful to health.


15. After wetting the brake cleaner, clean the brake shoe guide with a metal brush.
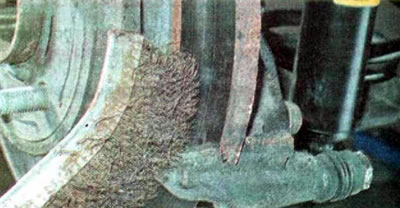
15. After wetting the brake cleaner, clean the brake shoe guide with a metal brush.


16. Remove the lower guide pin of the brake caliper.
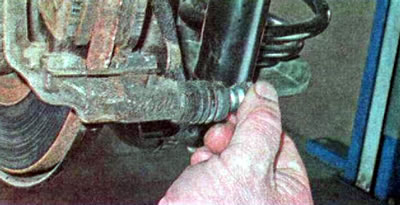
16. Remove the lower guide pin of the brake caliper.


15. Using a clean cloth, clean the finger from old grease.

16. Remove the protective cover. If it is damaged, we replace it.


17. Place some special grease for brake parts into the cover and install it into the caliper hole.

18. Apply a special high-temperature grease for brake mechanisms to the guide pin and install it into the caliper hole.
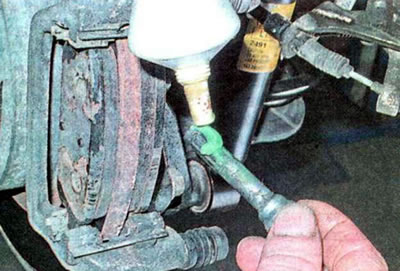
18. Apply a special high-temperature grease for brake mechanisms to the guide pin and install it…


19. Remove the second guide pin, use a rag to clean the pin from old grease and apply new grease to it. We replace the damaged protective cover of the finger.

20. Apply grease to the caliper and piston in the areas of contact with the brake pads.

21. Install new upper guides onto the guide...
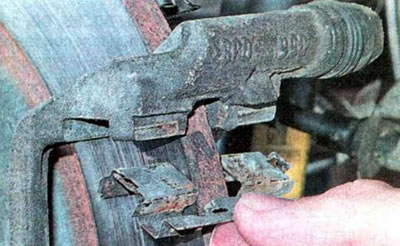
21. Install new upper guides onto the guide...


...and the lower retaining springs of the pads.
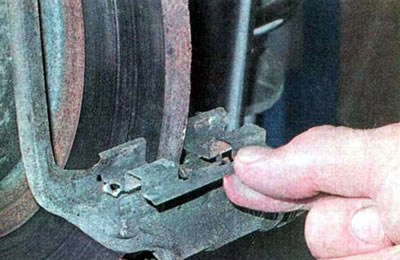
...and the lower retaining springs of the pads.


Warning! Do not allow grease to come into contact with the friction linings of the brake pads or the working surfaces of the brake discs. If necessary, treat the working surface of the brake discs on both sides with a special brake cleaner.


Note: The brake pads of the brake mechanism are not interchangeable. The inner brake pads have a special bracket (audible wear indicator). When installing the shoe into the guide, the indicator should be positioned on top.
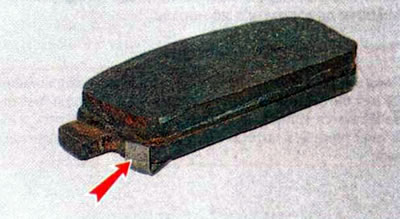

Note: The brake pads of the brake mechanism are not interchangeable. The inner brake pads have a…


22. Install the inner guide...

22. Install the inner guide...


...and the outer brake pads and press them tightly against the brake disc.
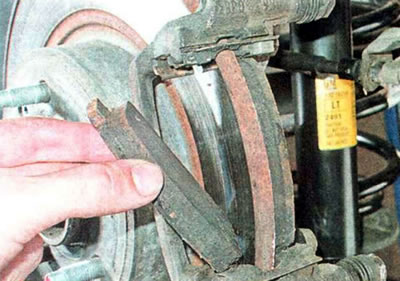
...and the outer brake pads and press them tightly against the brake disc.


23. Move the caliper onto the brake pads.

24. Apply anaerobic thread lock to the caliper mounting bolt.

25. Tighten the lower caliper mounting bolt to a torque of 28 Nm.

26. Secure the parking brake cable with a bolt.

27. Similarly, we replace the rear brake pads on the other side of the car.

28. Press the brake pedal several times to automatically adjust the gaps between the brake pads and discs.

29. Check the brake fluid level in the master cylinder reservoir and top it up to normal if necessary.

Warning! The first 100-200 km of the road, the braking efficiency may be reduced until the brake pads are worn to the discs. During this period, try to avoid situations that require sudden braking.


[The article is based on data from the website: ChevyMan.ru]

The article was checked: Vladimir Romannikov
This article is available at russian, bulgarian, belarusian, ukrainian, serbian, croatian, romanian, polish, slovak, hungarian

Share information:

Previous articles
Orlando 1: Brake system
Next articles

Replacing the front brake pads
Checking brake pads
Replacing rear brake discs
Replacing the front brake discs
Brake discs


See similar articles on the topic of Chevrolet cars:
Replacing the brake pads of the rear wheel brake mechanism Chevrolet Aveo T300 (2012-2018)
Rear brake pads — removal and installation Chevrolet Captiva 1 (2006-2018)
Replacing the brake pads of the rear wheel brake mechanism Chevrolet Cruze 1 (2008-2016)
Replacing the brake pads of the rear wheels Chevrolet Lacetti 1 (2002-2009)
Replacing the brake pads of the rear wheels Chevrolet Lanos T150 (2002-2009)
Replacing the front brake pads Chevrolet Niva 1 (2002-2016)
Brake fluid and pads Chevrolet Tahoe 1 (1992-2000)
Link in different formats to this page


Visitor comments

No comments yet


How much will 27 + 48 =


Orlando 1 (2010-2018) 
  • General information
  • Introduction to manual
  • User manual
  • Maintenance
  • Troubleshooting
  • Power unit
  • Engine repair
  • Fuel and control system
  • Cooling and lubrication system
  • Ignition system
  • Transmission
  • Clutch
  • Gearbox
  • Drive shafts
  • Chassis
  • Car suspension
  • Steering
  • Brake system
  • Body
  • Exterior (external elements)
  • Doors, locks and windows
  • Electrical equipment
  • Equipment and devices
  • Windscreen wipers
  • Power devices
  • Electrical diagrams


Trailblazer 1 (2001-2008) 
  • General information
  • User manual
  • Troubleshooting
  • Maintenance
  • Power unit
  • Engine in a car
  • Engine overhaul
  • Cooling and heating
  • Fuel and exhaust system
  • Engine electrical equipment
  • Engine control
  • Transmission
  • Automatic gearbox
  • Transfer case
  • Drive shafts and cardan
  • Chassis
  • Brake system
  • Car suspension
  • Steering
  • Body
  • Exterior (external elements)
  • Interior (internal elements)
  • Doors, locks and windows
  • Electrical equipment
  • Equipment and devices
  • Electrical circuits


Lumina 1 (1989-1994) 
  • General information
  • Maintenance
  • Power unit
  • Engine 3.1L V6
  • Engine 3.8L V6
  • Engine overhaul
  • Cooling system
  • Power and exhaust system
  • Fuel injection
  • Engine electrical equipment
  • Reduced exhaust gas toxicity
  • Transmission
  • Automatic gearbox
  • Drive shafts
  • Chassis
  • Brake system
  • Car suspension
  • Steering
  • Body
  • Heating and air conditioning
  • Repair of body elements
  • Doors, covers and windows
  • Interior (internal elements)
  • Electrical equipment
  • Equipment and devices
  • Electrical circuits


ChevyMan.ru © 2017-2026 · Mobile version · Feedback · Site search · Interesting to read · Sitemap: EN BG BY UA RS HR RO PL SK HU

Aveo 2003-2008 · Aveo 2006-2011 · Aveo 2012-2018 · Captiva 2006-2018 · Cruze 2008-2016 · Lacetti 2002-2009 · Lanos 2002-2009 · Niva 2002-2016 · Tahoe 1992-2000 · Tahoe 2000-2014 · Lumina 1 1989-1994 · Trailblazer 1 2001-2008 · Orlando 1 2010-2018 ·
🛡️ For your security and to improve our service, this site uses cookies. You can disable them in your browser.