


Warning!
- Brake discs should only be replaced as a pair and with a new set of brake pads installed at the same time. Never change the brake disc and pads on only one side of the vehicle. This can lead to uneven braking of the wheels, causing the car to pull to the side and even skidding during emergency braking.
- The first few hundred kilometers after installing new discs and brake pads, braking efficiency (due to grinding of parts) will be reduced, be careful!
To complete the job, you will need new brake shoe guide mounting bolts. We replace the rear brake discs in the following order:
1. We prepare the car for maintenance and repair.
2. Lower the parking brake lever to the lower position.
3. Remove the rear brake pads. We hang the rear brake caliper on a cord or wire without disconnecting the brake hose from it.
4. Using a wire brush, clean the brake shoe guide mounting bolts.
5. Using a 15 mm socket wrench, unscrew the brake shoe guide mounting bolts.
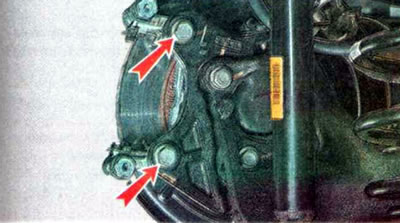
6. Remove the brake shoe guide.
7. Using a TORX T30 key, unscrew the brake disc mounting screw.
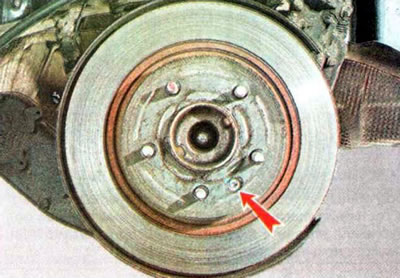
8. Treat the seat of the disk on the hub with penetrating lubricant. If necessary, tap the disk to loosen its fit and knock the disk off the hub with a hammer through a wooden block (also as shown when removing the front disc).
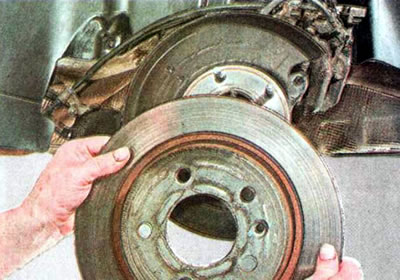
9. Remove the brake disc from the hub.
10. Using a metal brush, clean the seat on the hub.
11. Install the brake disc in reverse order. We fasten the brake shoe guide with new bolts. We tighten the bolts in three stages: first with a torque of 100 Nm, then turn them at an angle of 60° and then another 15°.
12. Install new brake pads and brake caliper.
13. Install the rear wheel.
14. Similarly, replace the rear brake disc on the other side of the car.
15. After finishing the work, press the brake pedal several times to bring the pads to the brake disc.
16. Check and, if necessary, adjust the parking brake system drive.
[The source of the article is available on the website: CHEVYMAN]